Posts mit dem Label Clearly Besotted werden angezeigt. Alle Posts anzeigen

Samstag, 15. Juni 2024

Have a dino-mite birthday

Hello everyone!
I'd like to share with you my newest creation. It was made for the new theme "For the Boys" over at Papercraft Challenges:


Our kind sponsor Dr Digi provided us with sum fun images and I chose the dino, because there are some birthdays for little boys coming up and for this the cute image is perfect I think. I created a background fpr the dino using a leaves-stencil and also coloured a piece of scrap paper with the same colours I used for the dino to cut the word "birthday" from.


Next step was to assemble everything on an orange-yellowish cardbase to fit with the beak and the bone plates. As a finishing touch I added Nuvo drops in two different colours. If you looks closely you'll see that each drop has a lighter dot in the middle which turned out really great in real life but gets lost a little in the pictures. Next time I want to try creating a rainbow dot that way...


I hope you are going to join us with a creation "For the Boys" and I keep my fingers crossed for you to win the 2 digis by our sponsor Dr. Digi!

Until next time have a fantastic months and happy crafting to you ;o))


Supplies:
Digi stamp: "Stacey the Stegosaurus" by Dr. Digi 
Stamps: "You rock" by Clearly Besotted (discontinued)
Stencil: "Leafy" by Create a Smile
Die: "Birthday" by Create a Smile

Freitag, 14. August 2020

Precious Baby


Hello my friends,
I have been super busy with the first few days at school this week - everything is different and strange and there is a lot of need for reflecting on how things went and adjusting to it for the next day. So I hope you will forgive that I am very, very late publishing the newest PINspirational Challenge inspiration card... This is the super cute inspiration picture:


I obviously went with the theme, but also thought I would like to use a grey card base and, as the baby clothes are kind of in the focus, I used a onesie as my focus element as well. But as you can see I felt that a baby card needed a bit more colour, so I decided to go with greens and blues as well. 


I hope you are going to join us any am looking forward to seeing your lovely projects. Happy crafting and take care, yours Maike


Supplies: tba

Mittwoch, 27. Februar 2019

Welcome in Plaid


Heya everyone!
This is the inspiration picture for the newest challenge at PINspirational and you can see the card I made for it above ;o) I tried making a black and white card but try as I might I never liked the result, so I went back to playing with my lovely bright colours ;o)


For my card I used a piece of patterned paper by Lawn Fawn with lovely orange and pink stripes. I die cut the frame and coloured the inside piece with Oxide Inks in Squeezed Lemonade and Worn Lipstick and really loved the effect. Even more so after flicking some droplets of water on the surfice and taking it off again quickly afterwards with a towel. The cute stuffed elephant is an older image by Clearly Besotted, but any cute image iin a sitting position should work for this layout I think. 


The sentiment was stamped and then I went over it with a glaze pen to give it more dimension. And simply because I feel that stuffed toys should never be alone I stamped to more on the inside of the card. I hope you are going to join us with one of your wonderful projects! Have a great week and happy crafting!


Material / supplies:
Stempel / stamps: "Cute & Cuddly" von Clearly Besotted
Stanze / die: "Wonky Squares Frames" von Avery Elle


Samstag, 5. Januar 2019

Sending Hugs (Purple Onion)

Halli Hallo ihr Lieben!
Ich hoffe, ihr hattet einen guten Start ins neue Jahr und ich wünsche euch allen für 2019 Zufriedenheit, Freude, Gesundheit, Zeit und anhaltende Kreativität ;o)
Nun zu meiner Karte: Für das Thema "Alles Neu" bei Challenge Up Your Life habe ich einen meiner neuen Stempel von Purple Onion Designs benutzt:

Heya my dear crafty friends!
I hope you had a good start to the New Year and I wish you all happiness, happiness, health, time and continued creativity in 2019 ;o)
Now for my card: For the theme "All New" at Challenge Up Your Life I used one of my new stamps from Purple Onion Designs:


Den Hintergrund habe ich mit Distress Oxide Inks in den Farben "Peacock Feathers", "Blueprint Sketch" und "Seedless Preserves" gewischt. Anschließend habe ich den Hintergrund erst mit Wasser und dann noch mal mit Copic Opaque White bespritzt. Der Spruch ist aus dem Set "Arctic Animals", das gerade sogar mit 50% Rabatt zu bekommen ist ;o)

I created the background with Distress Oxide Inks in the colors "Peacock Feathers", "Blueprint Sketch" and "Seedless Preserves". Then I sprayed the background first with water and then again with some Copic Opaque White. The sentiment is from the "Arctic Animals" set, which is on sale right now and you could get it with a 50% discount ;o)


Ich hoffe, ihr habt Lust bekommen bei unserer neusten Challenge mitzumachen! Habt ein tolles Wochenende und happy crafting ;o)))

I hope you are going to join us in our first challenge of the year! Have a wonderful weekend and happy crafting ;o)))


Material / supplies:
Stempel / stamps: "Curly - Winter Pig" von Purple Onion Designs
                              "Arctic Animals" von Clearly Besotted
Stanzen / dies: "Wonky Stitches Elle-Ments" von Avery Elle

Dienstag, 5. Juni 2018

Good luck (Little goal-keeper)


Halli Hallo ihr Lieben!
Heute ist wieder Doppel-Dienstag, das heißt, ich teile jetzt eine Karte mit euch und später am Nachmittag habe ich dann noch einmal eine. Die Karte, die ihr hier schon seht, ist mein Inspirationsbeitrag für die aktuelle PINspirational Challenge und da dreht sich ab heute alles ums Thema "Fußball":

Heya my dear crafty friends!
Today is two-cards-tuesday which means that I am going to share one card with you now and the neyt one later tonight :o) The card you are seeing here already is my inspiration for the current PINspirational Challenge. From today on we would like to see your projects about football or maybe you would much rather be inspired by the beautiful colours of the picture? That's awesome, too ;o)

http://pinspirationalchallenges.blogspot.com/2018/06/pinspirational-challenge-217.html


Meine Inspiration habe ich natürlich vom Thema Fußball genommen, aber auch die vielen Farben und die Kreisform wollte ich aufgreifen. Als ersten Schritt habe ich ein Papier für den  Hintergrund ausgestanzt, aus dem ich zusätzlich noch einen Kreis gestanzt habe und welches ich außerdem mit einem Muster geprägt habe, dass mich an das Netz im Tor erinnert hat. Danach habe ich einen runden Rahmen ausgestanzt, der etwas kleiner als die Öffnung ist und einen noch etwas kleineren Kreis, auf den ich ein Tor gestempelt habe und mit nicht nachge"ladenen" Blendingtools in den passenden Farben das Gras und den Himmel aufgewischt habe.

My inspiration came from the theme obviously but also from the circle form and the many different colours. My first step was to die cut a card panel, which I also die cut a circle from and dry embossed with a pattern that reminded me of the net in the goal. Next I die cut a circle frame that was slightly smaller than the opening, so that it would be able to move and another circle again smaller than the frame. On the latter I stamped a goal and added some grass and sky by simply going over it a few times with a (not re-inked) blending tool.


Auf den Kreisrahmen habe ich die acht verschieden farbigen Fußbälle aufgeklebt. Beim Zusammenbau der Karte habe ich bei der Hälfte der Bälle jeweils einen Kreis von hinten dagegengeklebt, so dass eine Art Führung entstand und die Bälle nicht nach vorne rausfallen konnten. Unter die anderen Bälle habe ich Abstandshalter von MFT geklebt, die für die richtige Höhe sorgen sollten. Bevor ich die Elemente aufkleben konnte, musste ich erst einmal einen Moment überlegen, damit sich die Bälle später auch drehen konnten und das Fußballtor auch am richtigen Platz war. Zum Schluss habe ich dann nur noch den niedlichen Torwart und den Spruch dazu geklebt und meine Karte war fertig ;o) Ich hoffe, sie gefällt euch. Ich würde mich freuen auch euer Werk in der PINspirational Gallerie zu entdecken. Habt eine schöne Woche und happy crafting, eure Maike

I adhered the eight footballs directly to the circle frame and then I started building my card. I had to think twice to make sure that the circle would be able to move, but it worked out just fine with the help of four circles glued behind the balls to stabilize them and also four Spin & Slide discs by MFT. After I had assembled everything I could add the cute little goal keeper and the sentiment as well. I hope you like the card and that I will get to see your creation in our gallery ;o) Have a wonderful week and happy crafting, yours Maike


Material / supplies:
Stempel / stamps: "Game On" von Clearly Besotted (retired?)
                              "Fußball" von Betty's Creations
Stanzen / dies: "All Prettied Up" von Mama Elephant


Dienstag, 13. März 2018

Happy Birthday Wild Thing


Halli Hallo ihr Lieben!
Ab heute gibt es eine neue Challenge bei Pinspirational und dies hier ist unser niedliches Inspirationsbild für euch:

Heya my dear crafty friends!
Today is the start of a new PINspirational challenge and this is the cute inspiration picture we have for you this time:

http://pinspirationalchallenges.blogspot.de/2018/03/pinspirational-challenge-211.html

Ihr habt sicherlich keine Schwierigkeiten zu erkennen, wo ich die Inspiration für meine Karte her habe, oder? Dieses schwingende Äffchen hat mich sofort an einen Stempel erinnert, den ich von Clearly Besotted habe und der schon lange einmal auf eine Karte wollte ;o) Ich habe ihn auf Copic-freundliches Papier gestempelt und mit den E70er und E50er Stiften coloriert, bevor ich ihn maskiert und den blauen Himmel mit Salty Ocean Distress Oxide Ink gewischt habe. Für den Löwenkörper habe ich die YR20er-Serie benutzt und finde, das gibt ein richtig schön passenden Farbton. Seine Mähne ist ebenfalls wie der freche Affe mit der E70er-Serie coloriert.

I am sure you don't have any difficulties in seeing where I got my inspiration from, right? This  monkey swinging from the branch reminded me very much of a stamp by Clearly Besotted which I haven't used very often before and I felt it would be perfect for this card. I stamped the cheeky monkey on some Copic friendly paper and coloured it with the E70th- and the E50th- series. Next I put a mask over him and coloured the area around him blue using Salty Ocean Distress Oxide Ink. For the lion I used the YR20th-series and think it looks very good on a lion. What do you think? And because I didn't want to have too many difdferent shades of brown on my card I used the same colours I had used on the monkey for the lion's mane as well.


Ich hatte mir vorgestellt, dass der Affe durch eine Öffnung schaut, also habe ich ein zuvor mit grünen Pünktchen bestempeltes Papier mit einer Rechteckstanze und anschließend das Fenster ausgestanzt, um es direkt über das sportliche Äffchen zu kleben. Da ich dieses Mal zur Abwechslung eine gründe Kartenbasis gewählt habe, diese mir aber zu dunkel war, habe ich noch eine orange Lage dazwischen geklebt und finde es so viel besser. Auch, weil dadurch die Farbe des Löwen betont wird ;o) Den ersten Teil des Spruchs habe ich auf schwarzes Papier embosst und auseinander geschnitten, um dem Affen das "happy" in die Hand zu geben und das zweite Wort darunter kleben zu können. Den Rest des Spruchs habe ich dann nur noch in schwarz neben den Löwen gestempelt, den ich auf einem "Drop Shadow" sitzend auf die Karte geklebt habe.

I wanted the monkey to look through an opening, so I die cut a rectangle from some white paper I had stamped green dots on and die cut an aperture from that and glued that piece directly over the piece of paper with the monkey. Because I used a green card base for a change, but didn't like that it was so dark, I layered my white piece on some orange to bring out the colour of the lion a little more and that worked much better. ;o) I heat embossed the first part of the sentiment on black cardstock and cut it apart, so I could place the first piece in the monkey's hand and put the second one beneath it. I stamped the rest of my sentiment next to the lion's head in black ink and adhered the cute lion sitting on a drop shadow to the card as well.


Um das Thema auch im Inneren der Karte fortzusetzen habe ich ein weißes Rechteck ausgestanzt und an den unteren, rechten Rand die Giraffe aus dem Set gestempelt. Sie habe ich ganz leicht / hell coloriert, um sie ein wenig mehr von der weißen Umgebung abzusetzen und ihr durch Schattierungen etwas Tiefe zu geben. Ich hoffe, ihr habt Lust bekommen bei uns mitzuspielen. Dieses Mal könnt ihr einen 1ß$-Gutschein zum Online Shop unseres freundlichen Sponsors "Little Blue Button" zu gewinnen. Habt eine wundervolle Woche und ich wünsche euch allen happy crafting ;o) Eure Maike

In order to continue the outside to the inside as well I placed a white stitched rectangle there and stamped the image of the giraffe to the bottom right. I only coloured it very lightly just to give it a tiny bit of interest.  I hope you are going to play along with us. This time you could be the lucky winner of a $10-voucher to the online store of our kind sponsow "Little Blue Button". Have a great week and happy crafting, everyone ;o) Yours Maike

Material / supplies:
Stempel / stamps: "Wild Thing" von Clearly Besotted
                             (On sale right now- going to retire, so be quick :o)
                         von My Favorite Things

Samstag, 20. Januar 2018

Warmest Wishes from Flurry and Chilly (POD)

Halli Hallo ihr Lieben!
Ich bin ein bisschen spät dran mit meiner Inspirationskarte für die "Schneemann" Challenge bei Challenge Up Your Life, aber hier ist sie nun:

Heya my dear crafty friends!
I am a bit late to the party for the new challenge at Challenge Up Your Life, but at least I made it now. The theme is "Snowman" and this is my inspiration card:


 Zuerst habe ich das Quadrat ausgestanzt und den unteren Rand mit einem Post-It maskiert. Anschließend habe ich den Schneemann mit dem Geschenk in den Händen gestempelt, ebenfalls maskiert und noch den zweiten kleineren Kerl hinzugestempelt. Coloriert habe ich sowohl die beiden, als auch den Hintergund mit Copics.

First I die cut the square, masked the bottom part below the stitched line and then stamped the bigger one of the snowmen. After I masked him as well I stamped the second, smaller snowman as well. The whole scene was coloured with Copic markers.


Die Kartenbasis habe ich mit Schneeflocken im Hintergrund embossed. Als nächstes habe ich das Quadrat mit den eisigen Gesellen mit Abstandsklebern aufgeklebt und in eine Lücke zwischen all den  Schneeflocken habe ich einen passenden Spruch gestempelt. (Wie üblich habe ich an den Spruch mal wieder als Letztes gedacht... *typisch_ich *grins) So, wie sie zu dem Zeitpunkt war, fand ich die Karte aber zu langweilig, also habe ich mit meinen Nuvo Drops noch passende Akzente um das Panel und den Spruch herum verteilt. Ganz zum Schluss habe ich noch Wink of Stella auf sämtliche Schneeflächen verteilt, damit die Schneemänner das typisch eisige Glänzen bekommen. Falls ihr eure Schneemänner noch nicht wieder ganz nach hinten ins Regal geräumt habt (und falls doch, holt sie einfach wieder hervor...), würde ich mich freuen, wenn ihr bei unserer Challenge mitmachen würdet. Habt noch ein schönes, kreatives Wochenende! Happy crafting wünscht euch, Maike :o)

My next step was to emboss some snowflakes on the card base and to glue the square on using foam tape. As usual I had forgotten to plan ahead as dar as the placing of the sentiment goes ;o) Typical for me... Ah well, luckily I found a spot between some embossed snowflakes that was big enough for my chosen sentiment. Because I felt that the card was too plain I got out some colours of Nuvo Drops and added some drops around the panel and the sentiment to give it more interest. Lastly I added Wink of Stella to all of the snow areas to give the snowmen that frosty shimmer. I case you haven't put all of your snowmen stamps away (and even if you did...) we would love to see your creations in our gallery at Challenge Up Your Life. Have a wonderful and creative weekend! Happy crafting from your Maike


Material / supplies:
Stempel / stamps: "Flurry" & "Chilly" von Purple Onion Designs
                            "Warm Wishes Too" von Clearly Besotted (Sentiment)
Embossing Folder: "Snowfall" von Taylored Expressions

Mittwoch, 17. Januar 2018

What?! Trifold-Card

Hallo ihr Lieben
und willkommen zum zweiten Post des heutigen Tages ;o) Das neue Thema der Papercraft-Challenge lautet "Trifold" und ich würde euch gerne meine Inspirationskarte zeigen. Unser freundlicher Sponsor "Sparkle N Sprinkle" hat diesen wunderbar lustigen Vogel im Programm, der unbedingt auf die Karte musste und zwar mehrmals. Aber seht selbst:

Heya my dear crafty friends
and welcome to the second post for today ;o) The new theme at Papercraft Challenges is "Trifold" and I would like to share my inspiration card with you. Our kind sponsor "Sprinkle N Sparkle" has got this image of a funny crazy bird and it just had to be part of my card and several time at that. But have a look yourself:


Die Front habe ich bewusst schlicht gehalten. Das Fenster habe ich durch den weißen Rahmen betont und mit den Buchstaben - die den ersten Teil des Spruchs bilden - habe ich das Gelb vom Schnabel aufgenommen. 

I kept the front of the card deliberately simple. The white frame around the window draws more attention to it and the image you see and the yellow letters are the first part of the sentiment.


Wenn man die Karte dann aber öffnet, hoffe ich, dass schlicht nicht das Wort ist, dass jemandem spontan einfällt ;o) I finde diese verrückten Vögel in Regenbogenfarben einfach genial; wie schockiert sie dann noch über das Alter des Empfängers aus den Federn gucken *herrlich... Ich habe sie mir als Chor vorgestellt, also auch, dass sie nachdem sie bis drei gezählt haben...

When you open the card, however, I hope that simple is not the word that comes to mind ;o) I love those birds in rainbow colours; how shocked they look about the recipients age *grin... I pictured them to be a choire, so after counting to three....


auch anfangen "Happy Birthday" zu singen ;o) Den Boden habe ich mit Simon Says Stamp "Fog Ink"und der "Modern Triangles" Schablone von Neat and Tangled gestaltet. Die Wände wurden mit einem der wunderbaren Clarity Stamp Pinseln und "Fossilized Amber Distress Oxide Ink" aufgetragen. Die Pinsel liebe ich übrigens sehr - vor allem in Verbindung mit Schablonen, weil man einen ganz soften Farbauftrag hinbekommt. Ich hoffe, ihr habt auch Lust bekommen eine "Trifold" Kreation zu basteln und mit uns zu teilen ;o) Habt einen tollen Tag und happy crafting, eure Maike

they start singing "Happy Birthday" ;o) I created the floor using Simon Says Stamp "Fog Ink" and the "Modern Triangles" stencil by Neat and Tangled. For the walls I chose to add "Fossilized Amber Distress Oxide Ink" using one of the fabulous Clarity Stamp brushes which I really, really love! I hope you like my card and that you are going to join us with your "Trifold" creation ;o) Have a great day and happy crafting, yours Maike


Material / supplies:
Stempel / stamps: "Cool Chicks" von Sparkle N Sprinkle
                             "You Rock" von Clearly Besotted -> sentiment (retired)
                             "Birthday Greetings" von Altenew
Stanzen / dies: "Stitched Mini Scallop Circle Stax" von My Favorite Things
Stencil: "Modern Triangles" von Neat and Tangled

Challenges:


Samstag, 16. Dezember 2017

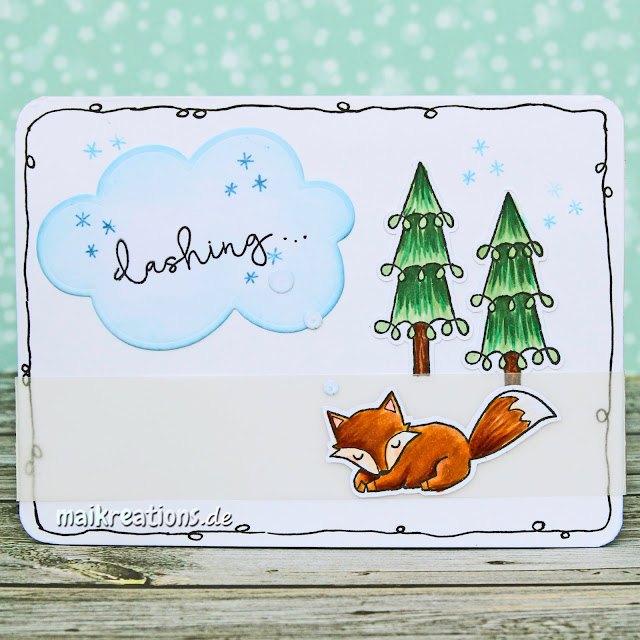
Christmas Series #22 / Weihnachtsserie #22 (Dashing Foxes Pop-up Card)

Halli Hallo ihr Lieben!
Hier hat das Winter-Weihnachtschaos voll zugeschlagen, dehalb muss ich leider meine Karte heute auf die Schnelle mit euch teilen:

Heya my dear crafty friends!
The usual winter and Christmas chaos has hit me this past week, so unfortunately I'll have to share todays card with you in a quick way:


Die Vorderseite ist, wie ihr sehen könnt, recht schlicht gehalten. Der kleine Fuchs schläft auf einem Streifen Vellumpapier, das dabei hilft die Karte geschlossen zu halten. Der Empfänger soll die Überraschung ja nicht zu früh bemerken:

This is the rather plain outside of the card. The fox sleeps on a strip of vellum paper, that helps to hold the card down, so that the recipient only finds out about the surprise when they open the card:


Insgesamt sind es drei Ebenen, die man entdeckt, wenn man die Karte öffnet: Der Hintergrund, der Wald plus Schneehügel und den Fuchs kann man auch noch einmal "ausklappen", um noch mehr Tiefe zu erhalten. Den Spruch, der außen beginnt, wird im Inneren zu Ende geführt. Ich hoffe, euch gefällt meine Winter-Weihnachtskarte passend zum Winter-Weihnachtschaos ;o))? Habt ein wundervolles Adventswochenende und happy crafting, eure Maike ;o)

All in all the inside has three different levels: the sky, the forrest with the snow hills and the fox can be moved up and out as well, for even more dimension. The sentiment starts on the outside and it finished on the inside. I hope you like my Winter-Christmas-Card ;o) It is quite fitting for this winter-Christmas-chaos over here, so I am quite fond of it ;o) Have a wonderful weekend and happy crafting, yours Maike ;o)


Material / supplies:
Stempel / stamps: "Foxy Holidays" von Memory Box (retired?)
                              "Scene It Again" von Clearly Besotted
Stanzen / dies: "Stitched Scallop Basic Edges" von My Favorite Things
                         "TBA" von Simon Says Stamp

Samstag, 20. August 2016

Baby Giraffe

Halli Hallo ihr Lieben!
Manchmal wird man ja sogar noch von der Geburt eines Babys überrascht, entweder, weil es doch ein bisschen früher wurde als geplant oder weil Dein Partner vergessen hat Dir frühzeitig zu sagen, dass er oder sie bald eine braucht. Egal was war, hier habe ich - inspiriert durch die neue Aufgabe auf dem Challenge Up Your Life Blog - eine fixe, aber wirklich niedliche Babykarte für euch:

Heya my dear crafty friends!
Sometimes even the birth of a baby can come as a surprise, either because it decides to come a bit too earlier into our world or maybe because your spouse forgot to tell you in advance that a baby card is soon needed. No matter what is is, I have a card for you that is cute and quick to make. I was inspired by the newest task at the Challenge Up Your Life blog, where we would like to see your take on the theme "Baby" for the next two weeks.


Als erstes habe ich die "Watercolor Stripes" auf die Kartenbasis gestempelt und sie trocknen lassen. Währenddessen habe ich die Giraffe mit "Archival Ink" auf Aquarellpapier gestempelt und mit Zigs coloriert.

First I stamped the "Watercolor Stripes" on the card base and let it dry. Next I stamped the giraffe on some watercolor paper with Archival Ink and coloured it in using Zig markers. 


Die Giraffe habe ich mit der Schere ausgeschnitten und dann das kleine Rechteck aus Transparentpapier ausgestanzt, damit die Giraffe einen Platz zum gemütlichen Sitzen hat ;o) So hatte ich genug Fläche, um die beiden Elemente auf meine Karte zu kleben, ohne, dass man den Kleber durchschimmern sieht. Zuletzt habe ich den Spruch "Welcome Baby" unter die Giraffe gestempelt und meine Karte war fertig.

I fussy cut the giraffe and also die cut a small rectangle from vellum and glued the giraffe on top. That way I had a large enough area to glue it to the card with some foam tape without the adhesive showing through. Lastly I stamped the sentiment right beneath the vellum piece.


Material / supplies:
Stempel / stamps: "Petite Plushies" von Clearly Besotted
                             "Critters Down Under" von Lawn Fawn (sentiment)

Mittwoch, 13. Juli 2016

Picnic Penguin

Hallo ihr Lieben!
Meine Picknick-Pinguin Karte möchte ich jetzt noch - auf den letzten Drücker - bei der monatlichen Challenge von Gerda Steiner einreichen. Ich hoffe, der Korb vom Pinguin ist nicht zu schwer und wir watscheln noch pünktlich ins Ziel...

Heya my dear crafty friends!
I would like to enter my Picnic Penguin card - at the very last minute - in Gerda Steiner's Monthly Challenge. Hopefully the basket of this cute penguin isn't too heavy and we will get there in time...


Leider nicht mehr geschafft, die drei süßen Tierchen waren wohl ein wenig zu verschnuppt! ;o) Trotzdem gibt es jetzt noch eine kurze Anleitung dazu wie ich die Karte gemacht habe: Zuerst habe ich die letzten 3 Digistamps von der Challenge kombiniert, weil sie im weitesten alle etwas mit dem Thema Essen und Picnic zu tun haben und ich dachte, dass das prima zusammen passt. Die süßen Viehcherchen und den Hintergrund habe ich mit Copics coloriert.

Unfortunately we were too late. Don't tell anyone, but I think our cuties here have been a little too greedy and so they were slowed down quite a bit. ;o) Oh well, on to a short description on how I made this card: First I combined the last three digistamps from the challenge, because they all had something to do with food or drink and I thought they would go well together. I coloured the cute critters and the background with Copic markers.


Die colorierte Szene habe ich mit einer Rechteckstanze ausgestanzt und dann den unteren Rand noch mit einer "Scallop Edge" Stanze bearbeitet ;o) Das habe ich dann mit Abstandshaltern auf die Kartenbasis geklebt, die ich zuvor noch mit dem hübschen gelb gestreiften Papier etwas sonniger gestaltet hatte. Zum Schluss hab ich den Kartenspruch gestempelt und fertig war meine Karte! Hattet ihr dieses Jahr denn schon Gelegenheit zum picknicken oder seid ihr - wie wir hier im Ruhrgebiet - draußen auch eher nass geworden? 

I die cut a rectangle from the coloured scene and also put a "Scallop Die" to good use at the bottom edge ;o) Next I glued the panel to the card base, that I had covered with some lovely yellow striped patterned paper. After I had stamped the sentiment "Lass uns feiern!" ("Let's party!") my card was done. Hope you all had time for a lovely picnic already this summer and that you get to enjoy more sun than rain unlike us here in the Ruhr region. 


Material / supplies:
Stempel / stamps: "Carrot Bunny", "Picnic Penguin" & "Mouse with Drink" von Gerda Steiner Designs
                              "Mini Geburtstag" von Create a Smile
Stanzen / dies: "Decorative Border" von Clearly Besotted

Challenges:

Samstag, 30. April 2016

You are so tweet! (Toucan)

Halli Hallo und einen wunderschönen guten Morgen ;o)
Es ist Samstag und damit nicht nur Wochenende, sondern auch der Start einer neuen Herausforderung auf dem "Challenge Up Your Life" Blog! Dieses Mal wollen wir eure Werke mit allen Arten von Tieren bewundern. Ganz egal, ob Hund, Katze, Maus oder.... Tukan:

Hello everyone and goodl morning ;o)
Today is Saturday and this does not only mean, that the weekend is finally here, but also that we have a new challenge for you ate the "Challenge Up Your Life" blog. This time we would like to see projects with all kinds of critters. It doesn't matter wether you use the image of a cat, a dog, a mouse or.... a toucan:


Vielleicht hat die ein oder andere unter euch meine Muttertagskarte von vor ein paar Tagen gesehen? Ich hatte da nämlich seit langer Zeit mal wieder meine Zigs herausgekramt. Die leuchtenden Farben finde ich wirklich wunderschön, aber ich hab mich nie so wirklich an die Stifte dran getraut. Was mir geholfen hat? Das könnt ihr hier nachlesen. ;o) Meinem Tukan wollte ich auch gerne ein so leuchtendes Federkleid malen, also habe ich mich wieder für die Zigs entschieden und dieses Mal für einen No-Line Look. Die Ränder sind leider nicht ganz so klar geworden, wie ich das gern gehabt hätte, weil die starke Struktur vom Papier gegen mich gearbeitet hat. Aber... ich finde den No-Line-Wasserfarbeffekt wirklich super schön und werde weiter üben und auch mal andere Papiere mit den Zigs ausprobieren, um herauszufinden, was am besten funktioniert.

Maybe some of you have seen the Mother's Day card with the crocuses, that I have posted a couple of days ago? (click) I had used my Zig markers again, after having forgotten about them for the longest time and I loved the vibrant look they gave me. I wanted my toucan to have the same vibrant colours, so I used them again, but this time I went for a no-line look. Quite frankly: it took ages and in the close up picture you can see that the edges aren't nearly as clean, as I would like them to be. But... I think no-line watercolour look is absolutely amazing and I will definately try out different papers with the Zigs, to find out which one works best.


Den Hintergrund für die Karte habe ich direkt auf der Kartenbasis gestaltet. Dazu habe ich mit dem Mini Round Ink Blending Tool "Peacock Feathers" Distress Ink aufgetragen und anschließend die Federn mit der gleichen Farbe gestempelt. Normalerweise kann man mit den Distress Inks ja nicht so gut stempeln (finde ich), aber hier haben sie mich wirklich überrascht. Meistens probiere ich das an einer Stelle aus, die man später nicht mehr sehen kann und dieses Mal hatte ich schon gedacht, dass ich mein MISTI rausholen müsste, aber es hat ganz wunderbar geklappt. 

I created the background directly on the card base itself, using a Mini Round Ink Blending Tool and Peacock Feathers Distress Ink. Next I used the same ink again to stamp the feathers, because I love the tone on tone look it gives. Usually Distress Inks aren't all that great for stamping, but I was really surprised this time. When I remember to do so, I test the stamping on a spot that will be covered later on and I have already seen myself getting out the MISTI to get a crisp image, but the ink worked really well with those feathers from WPlus9.


Ich hoffe, dass ihr bei uns mitspielt und ich eure Werke auf dem CUYL Blog zu sehen bekomme! Happy crafting und euch allen ein tolles Wochenende ;o)

I hope you are going to play along with us and to see you over at the CUYL blog! Happy crafting and a great weekend, everyone ;o)


Material / supplies:
Stempel / stamps: "Some Birdie Loves You" von Clearly Besotted
                              "Fanciful Feathers" von WPlus9
Stanzen / dies: "Stitched Rounded Rectangles" & "Hi There" von My Favorite Things

Challenge:
Animal Friends Challenge "Birds"
Simon Says Stamp "Anything goes"
Aud Sentiment Challenge "Animal + A Sentiment"

Donnerstag, 28. April 2016

Grüner Drache / Green Dragon

Hallöchen ihr Lieben!
Wie geht es euch? Ist bei euch das Wetter auch so furchtbar chaotisch oder habt ihr zumindest ein bisschen Sonnenschein abbekommen dieses Frühjahr?
Nun zu meiner heutigen Karte: Ich wollte unbedingt noch bei der April Challenge des Copic Marker Deutschland Blogs mitmachen und habe es nun nach etwa 2 Wochen geschafft. Das Thema lautet "Grün" und ich kann scheinbar keine grünen Karten *grins. Ich hab ein bisschen geschummelt, aber ich hoffe, dass das trotzdem zählt. 

Heya my dear crafty friends!
How are you doing? Is the weather as chaotic as it is over here where I live or do you get some spring-appropriate hours of sunshine? I hope you need sun glasses rather than umbrellas wherever you are ;o)
But now on to today's card: I wanted to participate in the current Copic Marker Deutschland challenge, but it took me the longest time to come up with a concept that would (mostly) fit the theme, which is "green". For some reasons I cannot make entirely green cards, I had to cheat a teensy tiny bit. Hope it still counts.


Es gibt nicht viel, was ich euch über die Karte erzählen könnte, also werde ich auch nicht mit zu vielen Details langweilen. Aber ich wollte euch mitteilen, wie sehr ich diese Stanze für das Faux-Stitching im Hintergrund liebe und außerdem, dass ich die Sterne aus einer Farb-Musterkarte aus dem Baumarkt ausgestanzt habe, die ich bei mir noch rumfliegen hatte. Das Grün passte toll zu dem Drachen und die beiden anderen Farben sind einfach perfekt als Akzente.

There is not a whole lot to tell about how I made this card, so I won't bore you with too many details. However I would like to tell you that I love the die for the background stitching detail and also that I die cut the stars from a colour sample card from a hardware store that I had laying around. The green matched my dragon so well and the other two colours were just perfect as accent colours.


Habt noch einen schönen Abend und viel Spaß beim Basteln ;o) Bis übermorgen!

Happy crafting and a wonderful evening everyone ;o) See you the day after tomorrow for a new card ;o)


Material / supplies:
Stempel / stamps: "Hot Stuff" von Clearly Besotted (dragon)
                              "Birthday Greetings" von Altenew (retired)
                              "Lots of Stars" von Simon Says Stamp

Stanzen / dies: "Stitched Strip" & "Peek-a-Boo Wonky Windows" von My Favorite Things

Challenges:

Dienstag, 26. April 2016

Focus on Die Cuts (Elephant)

Hallöchen ihr Lieben!
Ich hoffe, ihr hattet einen guten Start in die Woche ;o) Vor einer Weile habe ich ja schon angedeutet, dass mein Leben wieder etwas "hektischer" sein wird. Einerseits wurde letzte Woche meine zweite Nichte geboren - sie ist gesund und wunderschön und alle sind zum Glück wohl auf. Andererseits fordert mich mein Job nun wieder etwas mehr und ich muss die Zeit am Basteltisch wieder etwas mehr einschränken. Was aber nicht heißen soll, dass ich weniger Karten basteln werde. Allerdings werde ich versuchen die Posts ein wenig kürzer zu halten. Sollte ich also einmal etwas auslassen, oder ihr habt eine Frage dazu, wie ich etwas gemacht habe, dann schreibt mir einfach einen Kommentar und ich werde mich bemühen so schnell es geht zu antworten. Ich freu mich eh immer darüber ;o)
Für die Cards und More Challenge geht es dieses Mal um Projekte, bei denen der Fokus auf Stanzteilen liegt. Ich hab mich an die Süße Elefantenstanze von Rayher erinnert und diese Karte gewerkelt:


Heya my crafty friends out there!
I hope your week got off to a great start ;o) A while back I wrote, that life got a little more hectic over here and that I would tell you more about it later. Now that it is later, I wanted to share with you that my second niece was born last week and I am happy to say that both the baby and my sister in law are doing great. Also I increased my working hours again, so I will have to use my desk more for other tasks besides crafting again. That doesn't mean, however, that I will be sharing less cards and other projects with you, but that I will try to keep my posts shorter in the future. Writing the posts is the most time consuming part, when it comes to my blog, so I hope you won't mind shorter posts. If I should leave something out that interests you or you have a question, just leave me a comment and I will get back to you as quickly as I can. I love reading your comments by the way and am grateful for each and every one ;o)
For the new Cards und More Challenge I made this birthday card, because we are asking fo projects that focus on die cuts. I remembered this cute elephant die from Rayher I own and knew I wanted to make instantly:


Zuerst habe ich alle Elemente für die Karte ausgestanzt und anschließend die Wörter "Happy" und "Birthday" auf die entsprechenden Teile gestempelt. Um dem Ballon und den Elefanten Farbe zu verleihen habe ich mit einem Ink Blending Toll Farbe aufgetragen und mit passenden Copic Farben die Schattierungen dazu gemalt.

I die cut and then stamped stamped the words "Happy Birthday" and also die cut the other elements for my card. To colour the balloon and the elephant I used my ink blending tool first and afterwards used matching Copic markers for shading.


Ich hatte das Gefühl, dass das Wort "Geburtstag" auf dem weißen Kartenhintergrund nicht genug auffiel, also habe ich die Form des Wortes noch einmal aus grauem Cardstock ausgestanzt und als Schatten dahinergeklebt. So war es direkt viel besser und ich mag, dass das Grau von dem Elefanten so auf der Karte noch einmal auftaucht.

I felt that the word "Birthday" got a little lost, so I die cut the shape of the word again from a dark grey cardstock and used it as a back drop to make it stand out more against the white card base.I liked it a lot better and really like that the colour of the elephant repeats itself.


Material / supplies:
Stempel / stamps: "Happy Birthday" von Clearly Besotted
Stanzen / dies: "Baby Elephant" von Rayher
                         "Happy Birthday Die Collection" von Clearly Besotted
                         "Stitched Squares" von Simon Says Stamp

Challenges:
Related Posts Plugin for WordPress, Blogger...