Posts mit dem Label Maritime werden angezeigt. Alle Posts anzeigen

Donnerstag, 15. September 2022

Waving hello - one layer card

Heya everyone,
the newest theme over at Papercraft Challenges was a real challenge for me. The theme is "One Layer Wonder" and I always have problems with one layer cards. For some reason, no matter which masking tape I use (and believe me I have tried at least ten different ones), it never really works. Often times I rip the paper and have to start all over again. The one thing that does sort of work is post-it-notes, but with them I only have a small area that is sticky. Ah well, I managed a card in the end and I am rather proud of it, so here it is:

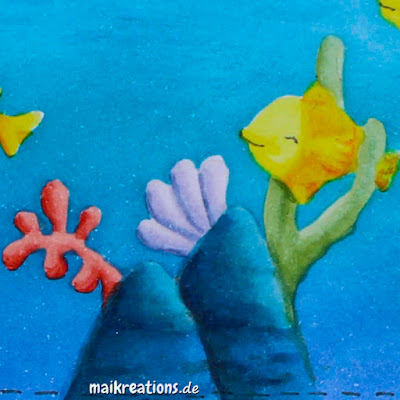
I used some sweet images of Purple Onion Designs and stamped them with "Ink on 3" vanishing ink on my piece of Copic friendly paper and then... I had to hurry ;o) I masked all my images and created the sea and the sky with Distress Inks. Next, while I could still see the lines I coloured all the critters and the other elements with Copic markers. Towards the end I needed a reference sheet with all the images I needed and it was more guessing than actually seeing the lines, but I love the soft look of the no-line-coloring in this summer one-layer card. And I hope you do too ;o))
Have a wonderful day and please consider joining our challenge, especially when you do not like creating one-layer cards that much - in the end it is always very rewarding and a lot of fun, when one accepts a real challenge I find ;o) Happy crafting and I hope to see you soon, yours Maike


Supplies:
Stamps - all by Purple Onion Designs:
"Ida - rabbit", "Peony - mouse", "rocks, seaweed and coral", "Neptune - fish"


Mittwoch, 1. Juli 2020

Urlaubsfeeling

Hello everyone!
Wow, this time it worked out so that I got to post three days in a row to inspire you for different challenges ;o) Today I would like to inspire you to play along with our newest theme "Vacation Mood" at Challenge Up Your Life. It made me so happy to create this vacation inspired card, because we won't be going on holiday anytime soon it seems. Anyhow, this is the card I made:


This really takes me to the beach and I hope you'll join me there, if only for a brief moment ;o) For this card I used a background stamp from Purple Onion Designs and also the cute, cute penguins by My Favorite Things ;o) First Istamped a palm tree, masked it and stamped it again. Next I stamped over it with the background stamp and coloured everything with Copics. Once I was happy with how it looked I die cut the scene using a stitched rectangle (nothing too crazy, because there was a lot going on already) and added the fussy cut and also Copic coloured penguins. 


Lastly I added the sentiment and also stamped another penhuin on the inside of the card just to make that look extra special as well ;o) I hope you are going to join us at Challenge Up Your Life with a vacation themed project. Have a great day and happy crafting! Thank you for stopping by, yours Maike


Supplies:
Stamps: "Penguins in Paradise" by My Favorite Things
              "Sand Dunes" by Purple Onion Designs
Die: "Wonky Stitches Elle-Ments" von Avery Elle

Freitag, 1. Mai 2020

Lifesaver


Heya everyone,
this is my card for the latest PINspirational Challenge! I am a bit late - well very late really, but life is getting in the way all the time recently... So I hope you'll forgive me. This is our challenge inspiration picture, though it is an "Anything Goes" theme at the moment to give everyone the "room" to create whatever is good for them or needed at the moment ;o)


I created the card using a background die by HEllo Bluebird and an older stamp set by Simon Says Stamp. 


I hope you are all well and that maybe if you feel like crafting you will share your project with us at PINspirational Challenge! Take care and happy crafting, everyone ;o)))


Supplies:
Stamps:
Die: "Ocean Scene Die" by Hello Bluebird

Donnerstag, 11. Juli 2019

Mehr Meer oder I sea it's your birthday!


Heya guys!
I am so sorry, but I completely forgot to post this card! It is for Challenge Up Your Life and you can still play until the 27th of July ;o) Here is my inspiration card:


I used the super cute stamps from Purple Onion Designs and created a background for my scene with Distress Inks. The clouds in the sky are barely visible in this picture, but believe me there are some and they look really nice in real life! ;o)


I hope you are having a great day and that you'd like to join us in our "Vitamin Sea" challenge at Challenge Up Your Life! Happy crafting, Maike


Supplies:
Stamps: "Sammy" & "Sandy" & "Shelly" & "Beach Toy Set" & "Beach Umbrella"
               by Purple Onion Designs


Montag, 17. Juni 2019

Taufkerze für Felix

Hello dear crafters!
As you might know I truly enjoy making cards. As I myself found out recently I detest working with wax, but I love how the candle turned out. But first things first: The Crafty Cardmakers dare you to make "Anything But A Card" this time around. I thought I'd give myself a real challenge and created the candle for my nephew's christening:


It isn't perfect, but it is handmade ;o) So I am almost certain Felix will like it when he is older. Is there something you would like to create apart from a card? Yes? Perfect! ;o) Then I hope you will share it with us at the Crafty Cardmakers. I may not feel tempted to play with wax again anytime soon, but I am absolutely glad I tried it. Have a wonderful and crafty week ;o)


Supplies:
Dies: "Finley's ABCs" by Lawn Fawn

Samstag, 4. Mai 2019

I'm not Squidding

Heya my dear crafty friends!
If you have been looking for the new Challenge Up Your Life task last Saturday you might have noticed that there was no new task. This was due to our decision to make CUYL a monthly challenge so more of you get the chance to participate ;o) We hope you are as excited about the change as we are and dive right into our newest challenge themed "Vellum". This is the card I made as an inspiration:


I created a background using Copic refills in various shades of blue on some Yupo paper and I love the look of it. You can achieve such neat looks with alcohol inks that I can promise this won't be the last you'll get to see ;o) I ripped a piece of vellum to get the white looking edge, embossed the sentiment on it and glued it to the back of the Yupo paper so I wouldn't have to use any adhesives at the front. That way I didn't have to worry about the placement of the elements and could just go ahead and put them where I wanted them.


I have combined images from different companies on this card, because I thought they would nonetheless work perfectly together. What do you think? Well, I hope you will join us for this month' challenge and create something awesome with vellum ;o) Have a lovely weekend and happy crafting everybody!!!

Supplies:
Stamps: "Totally Narly" by Your Next Stamp
              "Under The Sea" by C.C.Designs
              "Critters In The Sea" & "Gleeful Gardens" by Lawn Fawn

Challenges:

Montag, 7. Mai 2018

Waving Hello Shaker Card

Halli Hallo ihr Lieben!
Für die Crafty Cardmakers und das Thema "Kein Designpapier" habe ich folgende Karte gewerkelt: 

Heya my dear crafty friends!
I created this card for the Crafty Cardmakers and the new challenge theme "No Patterned Paper":


Zuerst habe ich die Hillside Cover Die ausgestanzt und diese mit Distress Oxide Inks und der Hilfe meiner wundervollen Stencil Brushes eingefärbt. Für den Grund habe ich Vintage Photo und für das Wasser Salty Ocean und Peacock Feathers benutzt. Als nächstes habe ich dann alle Unterwasserlebewesen mit Memento auf Copic freundliches Papier gestempelt und mit eben solchen dann coloriert. Die meisten von ihnen habe ich um das ebenfalls gestempelte Sentiment herum direkt aufgeklebt, nur eine Qualle und ein Büschel Seegras habe ich für später zur Seite gelegt.

I had started by die cutting the Hillside Cover die and did some ink blending with Distress Oxide Inks using Stencil Brushes to get a lighter result than if I had used the foam blending tool. For the ground I used Vintage Photo and for the water Salty Ocean and Peacock Feathers. Next I stamped all images with Memento Ink and coloured them using Copic markers. I glued most the elements directly to the hill piece around the stamped sentiment, except for one jelly fish and a bit of sea grass.


Die beiden wollte ich nämlcih auf die Folie des Shakers kleben um noch etwas mehr Tiefe zu erzeugen. Dank des rechteckigen Rahmens war der Shakerteil leicht herzustellen. Zuerst habe ich eine zurechtgeschnittene Folie mit Scor Tape festgeklebt und dann doppelt gelegtes Foamtape komplett außen herum geklebt. In diese Vertiefung habe ich die Pailletten geschüttet und anschließend habe ich den Wasserhintergrund aufgeklebt - natürlich verkehrt herum, damit man ihn später durch die Folie sehen kann und nicht die etwas unansehnlichere Rückseite davon. Auf die habe ich ebenfalls großzügig Scor Tape geklebt und den Shaker so auf der Kartenbasis befestigt.

I wanted them to go on the front of my shaker to create even more dimension. The shaker was quick to make thanks to this rectangle frame to which I added a piece of acetate with very strong Score Tape and a double layer of foam adhesive. Next I added the shaker pieces, removed the protective foil from the adhesive and glued the water piece to it upside down. Using Score Tape again I then added that piece to my card front and also glued the two missing elements to the outside of the shaker.
 
Damit sollte meine Karte eigentlich fertig sein, aber das weiße Stück Papier, das ich innen heineingeklebt hatte, war mir irgendwie zu grell und zu langweilig gleichzeitig... Also habe ich den Tintenfisch noch einmal in lila gestempelt und für einen sanfteren Look mit Buntstiften coloriert. Mit dem Thema "Wasser" kann man echt viel anstellen finde ich und deshalb würde ich mich sehr freuen, wenn ihr nun auch Lust habt dazu etwas zu kreieren und mit uns zu teilen. Habt eine schöne Woche und happy crafting, wünscht euch eure Maike ;o)

My card could have been done at that point, but I felt, that the inside was too white against the purple so I decided to add another octopus to the inside. This one was coloured with coloured pencils to give it a softer look. There is so much you could create to follow our "Water" theme and I would love to see your creation in our gallery, so why not get crafty?! Have a great week and happy crafting, yours Maike ;o)

Material / supplies:
Stempel / stamps: "Octopi my Heart" & "So Jelly" von Lawn Fawn
                             "Little Mermaids" von The Greeting Farm
Stanzen / dies: "Hillside Cover" von Mama Elephant
                        "Build a Scene - Underwater" von Taylored Expressions

Dienstag, 10. April 2018

Congratulations Mermaid


Halli Hallo ihr Lieben!
Bei der Papercraft Challenge startet heute eine neue Aufgabe für euch. Dieses Mal haben wir ein Bingofeld für euch:

Heya my dear crafty friends!
Over at the Papercraft Challenge blog we have a whole new task for you. This time we have a bingo for you:
http://papercraft-challenges.blogspot.de/2018/04/challenge-009-bingo.html

Ich habe mich für die mittlere Zeile entschieden, wobei ich bei den vielen kleinen Fischmotiven sagen würde, dass auch die Diagonale von oben links nach unten rechts funktionieren würde, oder was meint ihr?

I decided to go with the middle row, but with all the tiny fish images on the card I'd daresay the diagonal going from the top left to the bottom right would have worked too. Would you agree?


Zuerst habe ich, um diese Karte zu machen, eine ganze Menge Elemente gestempelt und mit Copics coloriert.  Es sollte nämlich eine richtig schöne Szene werden und daher wusste ich, dass ich viele Fische neben der Meerjungfrau brauchen würde. Als nächstes habe ich den Hintergrund mit den Distress Oxide Inks in den Farben "Blueprint Sketch", "Salty Ocean" und "Peacock Feathers" direkt auf die Front meiner Kartenbasis aufgetragen und nach dem Trocknen geprägt. Damit der Bereich in der Mitte glatt bleibt habe ich einen Embossing Diffuser von Tim Holtz benutzt. Um den Bereich noch ein wenig mehr herauszustellen habe ich einen Ring aus weißem Papier ausgestanzt und darauf den Spruch gestempelt, bevor ich ihn mit Abstandspads aufgeklebt habe.

To create this card I first stamped and coloured a lot of underwater images, because I wanted to create a little scene. Next I used an ink blending tool and Distress Oxide Inks in "Blueprint Sketch", "Salty Ocean" and "Peacock Feathers" to create the background directly on the front of the card base. I used an Embossing Diffuser by Tim Holtz to leave the circle in the middle without texture. In order to highlight that section I die cut a huge circle frame from white paper and before adding it to the card using foam tape stamped the sentiment on it.


Alles, was nun noch zu tun war, war die vorher colorierten Elemente zu einer Szene zu arrangieren und sie festzukleben. Da auf der Karte schon ziemlich viel los ist, habe ich mit den "Clear Droplets" von Pretty Pink Posh nur dezente Embellishments hinzugefügt. Falls ihr übrigens auch kein Fan von glänzenden Kleberückständen seid, empfehle ich euch speziell für diese Tropfen das "Multi Matte Medium" von Ranger. Da es matt trocknet sieht man von kleinen Fehlerchen fast gar nichts. Ich hoffe, euch gefällt meine Karte und ihr macht mit bei unserer Bingo-Challenge! Habt eine großartige Woche und happy crafting ;o)
Now all that was left to so was to arrange all the previously coloured images and glue them on. Because there was quite a lot going on already I only used a few clear "Clear Droplets" by Pretty Pink Posh to embellish my card. If you want to avoid shiny glue marks on your card I highly recomment using "Multi Matte Medium" by Ranger. It dries matte so even if something spills out from under the droplets you can't see it once it is dry. I hope you like my card and that you will join us for our Bingo-Challenge! Have an amazing week and happy crafting ;o)

Material / supplies:
Stempel / stamps: "Little Mermaids" von The Greeting Farm
Stanzen / dies: "Blueprints Set" von My Favorite Things (discontinued?)
Embossing Folder: "Bubbles" von Taylored Expressions

Challenges:

Dienstag, 6. Juni 2017

That Bites!

Halli Hallo ihr Lieben!
Wie versprochen geht es zügig weiter mit den neuen Karten. Diese hier ist als DT-Karte für die aktuelle Cards und More Challenge zum Thema "Under the Sea" entstanden:

Heya my dear crafty friends!
Like I promised there will be a lot more going on here and so here is another new card as my DT creation for the current "Under the Sea" challenge at the Cards und More blog:


Ich habe die Fensterstanze ("Triple Peek-a-Boo Windows") von MFT benutzt, um meine bissigen Kerlchen in Szene zu setzen. Dazu habe ich sie einmal aus einem schönes Rechteck und einmal aus Schmierpapier ausgestanzt. Letzteres habe ich als Maske benutzt, um die Blautöne auf die Kartenbasis zu wischen. Ich wollte unbedingt, dass der Leuchtefisch in ganz dunkelblauem Wasser schwimmt und habe mich daher für einen Ombre-Look entschieden, bei dem es nach oben hin immer heller und karibischer wurde ;o)

I used the "Triple Peek-a-Boo Windows" from MFT to set my scene. I die cut them once out of a nice stitched rectangle and another time from some scratch paper I had on my desk. That way I could use the windows in the scratch paper as masks to add some colour to the card base. I went for an ombre look, because I wanted that fish with the "lamp" on its nose to swim through very dark water and the water to gradually get lighter towards the top. 


Bevor ich das Rechteck mit den Fenstern mit Abstandshaltern aufkleben konnte, musste ich noch schnell den Spruch und ein paar Wasserbläschen stempeln. Als nächstes habe ich die Fische auf Aquarelpapier gestempelt und mit Zigs ausgemalt. Nachdem sie alle auf dem Trockenen lagen ;o)  habe ich sie ebenfalls mit Foam Tape in die Öffnungen hineingeklebt. Dabei habe ich die unteren beiden Meeresbewohner ein wenig über den Rand der Fenster hinausragen lassen, um das Ganze Design etwas aufzulockern. Damit war meine Karte auch schon fertig ;o) Vielleicht habt ihr ja auch Lust bekommen ein "Unter Wasser"-Werk zu zaubern und es dann auf dem Cards und More Blog zu verlinken! Zu gewinnen gibt es übrigens eine Überraschung aus der Stempelküche. Ich wünsche euch viel Glück und happy crafting! Eure Maike ;o)

Before I adhered the window panel to the card base with some foam tape I stamped the sentiment and also added some water bubbles. Next I stamped and coloured the fish using Zig markers. After they had all dried completely I glued them into the windows using foam again and my card was done. I hope you are going to join us with a "Under the Sea" creation and with some luck you could win a surprise from our kind sponsor the "Stempelküche". Good luck and happy crafting, yours Maike ;o)


Material / supplies:
Stempel / stamps: "That Bites" von Avery Elle
Stanzen / dies: "Triple Peek-a-Boo Windows" von My Favorite Things

Mittwoch, 19. August 2015

Collaboration with Cards by Maaike

Hallo zusammen!
Die heutige Karte ist aus einer Zusammenarbeit mit der sehr talentierten Maaike von "Cards by Maaike" heraus entstanden. Vor einiger Zeit hatte sie selbstgemachte Karten von sich als Preis bei einem Giveaway auf Facebook zur Verfügung gestellt. Da ich ihre Karten durch verschiedene Challenges kannte - ihr Name taucht nicht selten bei den Gewinnern auf - habe ich mitgemacht und wollte soo gerne gewinnen. Und das habe ich. Juhuu ;o) Noch einmal ein herzliches Dankeschön an Maaike für die wundervollen Karten, die sie mir geschickt hat. Nachdem sie Kontakt zu mir aufgenommen hatte, habe ich mich einfach mal getraut zu fragen, ob sie Lust an einer Zusammenarbeit hätte. Und das hatte sie ;o) Also haben wir jeder fleißig Hintergünde gestaltet und verschiedene Pieces zusammengestellt und dem jeweils anderen zugesandt. Die Regel, die wir uns dabei gegeben haben war, dass wir jeder einen Hintergrund und noch ein weiteres Teil verwenden würden. Hier ist meine Karte:

Hello everybody!
Today's card is a collaboration with the very talented Maaike from "Cards by Maaike". A couple of weeks ago she had a giveaway on facebook and the prize was 5 handmade cards from her. I so wanted to win, because I knew her cards from many challenges - her name came up as a winner quite often! So I entered the giveaway and I actually won. Whohoo ;o) Thanks again to Maaike for the wonderful cards she sent me. After she got in contact with me I was brave and asked her if she was interested in a collaboration and she was ;o) We both created some backgrounds and a few other pieces for each other and send them off. The rule we have given ourselves for this collab was, that we would each use a background plus one other piece to create a card. And here is mine: 


Maaike hatte auf ihrem Blog ein Video, wie man aus Rasierschaum und Nachfülltinte wunderschöne Hintergründe gestalten kann. (Link zu ihrem Post findet ihr hier.) I hatte gehofft, dass sie einen davon mitschicken würde. Als ich den Umschlag öffnete und dieses blau marmorierte Papier sah, wusste ich sofort, dass ich daraus eine Karte machen wollte. Passend dazu hatte sie mir diese hübsche Meerjungfrau von Lili of the Valley mitgeschickt. Ich habe sie koloriert und mit einer meiner Tag-Stanzen ausgestanzt. Dann habe ich noch die Kartenbasis  und ein etwas größeres Tag mit den gleichen Farben eingefärbt, die sie für ihren Hintergrund benutzt hatte. (Blue Lagoon & Peacock Feathers Distress Ink von Ranger)

Maaike had made this fabulous backgrounds with shaving foam (of all things) and reinkers. (You can find her video about it here.) I had hoped she would send me one of these and when I opened the envelope and found this blue marbled piece I knew I wanted to turn it into a card. Maaike had send me this cute little mermaid from Lili of the Valley as well. I thought those two pieces would go together nicely and so I coloured the image with Copic markers and cut it out using a tag die. Afterwards I coloured my card base and a slightly bigger tag with the colours that Maaike had used to make this background. (Blue Lagoon & Peacock Feathers Distress Ink by Ranger).


Die einzelnen Lagen habe ich aufeinandergeklebt und oben Klammern angebracht, damit es so ausschaut, als hätte ich alles einfach zusammengetackert. Als Spruch habe ich mir "Just wavin' hello" herausgesucht, weil es so gut zum Thema passt. Die Karte war so gut wie fertig, aber mir fehlte noch der letzte Pfiff, als ich sie so sah. Mir fiel ein, dass ich diese süßen Stanzen für Muscheln, Seesterne und Sanddollars habe. Die habe ich aus einem Papier ausgestanzt, dass ich zuvor mit Versamarktinte bestempelt und mit einem Pulver namens "Bridal" von Embossing Tinsel embossed hatte. Leider kommt es im Bild nicht so rüber, aber die Stanzteile haben einen wundervollen Glanz und schimmern in verschiedenen Farben. 

I glued all the layers together and added some staples to the top, so that it would look like I had simply stapled everything together. I chose the "just wavin' hello" sentiment, because it fitted so nicely with the theme of the card. My card was almost ready, but I felt it was missing something. When I remembered that I had the "Seaside Treasures" die, I put some "Bridal"  Embossing Tinsel on a piece of paper, put my heatgun to it and and die cut the various pieces from it. Unfortunately I didn't manage to capture the shimmer those die cut pieces really have now. I love most about them that they kind of change colour when they are tilted in the light.


Maaike und ich werden bald wieder eine Collaboration machen, also schaut wieder rein ;o)
Und ich kann euch wirklich nur empfehlen auch  ihren Blog einmal zu besuchen! Es lohnt sich!!!


Maaike and I will be doing some more collaborations in the future, so stay tuned ;o)
And I can just recommend to you to visit her blog! It is certainly worth it!!!


Reminder: Giveaway is active until Friday!!! Have a look here! ;o) Good luck to everybody!

Material / supplies:
Stempel/ stamps: "Little Mermaid 1" von Lili of the Valley
                           "Critters in the sea" von Lawn Fawn
Stanzen:               "Pierced Traditional Tags STAX" von My Favorite Things
                            "Seaside Treasures" von Memory Box

Challenges:
Related Posts Plugin for WordPress, Blogger...