Posts mit dem Label Cards und More werden angezeigt. Alle Posts anzeigen

Dienstag, 19. Dezember 2017

Birthday Card using "Christmas Puppies" / Geburtstagskarte mit den "Christmas Puppies"

Halli Hallo ihr Lieben!
Schön, dass ihr hier vorbeischaut. Ganz außer der Reihe möchte ich mal wieder eine Nicht-Weihnachtskarte mit euch teilen ;o) Der Cards und More Blog feiert die 200. Challenge passend mit dem Thema "Geburtstag". Hier ist meine Karte:

Heya my dear friends!
Lovely to see you here ;o) And it is a non-Christmas card for a change, because the Cards und More blog is celebrating the 200th challenge with the new theme "birthday". This is my inspiration card:


Noch passender ist das Ganze, wenn man weiß, dass es einen neuen Start, also quasi einen Geburtstag für einen neuen Challengeblog geben wird. Da der Cards und More Challenge Blog schon seit Langem nichts mehr mit gleichnahmigem Shop zu tun hat, ist dies nun gleichzeitig die erste Herausforderung auf dem neuen Challengeblog namens Papercraft Challenge.

It is a very fitting theme as well, because this challenge will be the first of a new blog. The Cards und More blog was once one that was connected to the Cards und More shop, but not for the last three years. So this will be the first challenge of the new blog called "Papercraft Challenges"
https://papercraft-challenges.blogspot.de/
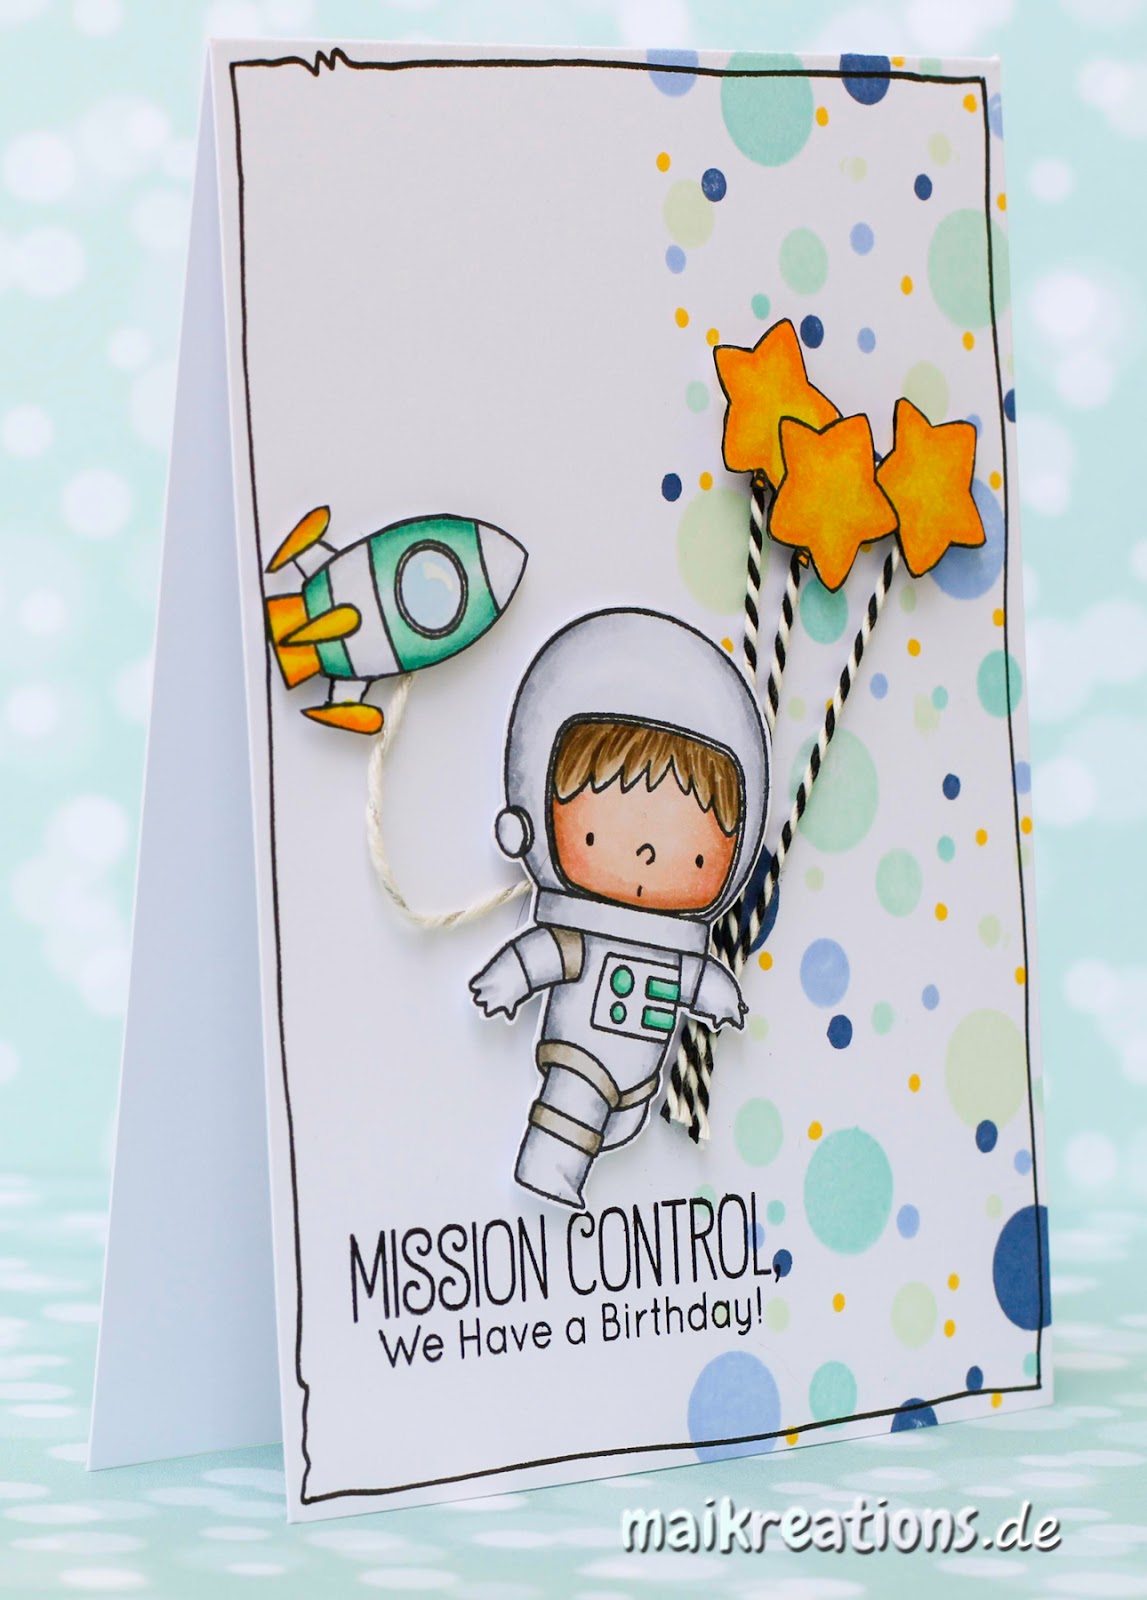
Und nun zu meiner Karte. Ich brauchte noch eine Männergeburtstagskarte, also kam die Challenge gerade recht. Der Hund aus dem Set "Christmas Puppies" von Gerda Steiner Designs eignet sich hervorragend auch für nicht weihnachtliche Karten. Passend zum Thema der Tüte, in der er sitzt habe ich auf meiner Karte ein paar Sterne verteilt und bin farblich im türkis-gelb Schema geblieben.

But not on to my card. I needed a male birthday card so this challenge theme was perfect. I used a dog from the "Christmas Puppies" set by Gerda Steiner Designs, but as you can see it is also perfect for non-Christmas cards as well. Because there are stars on the bag that the dog is sitting in I used stars as embellishments and mainly used the colours yellow and turquoise.


Schaut doch mal auf unserem neuen Blog vorbei - vielleicht habt ihr ja auch bald Wintergeburtstagskinder zu überraschen, dann ist unsere erste Challenge dort doch genau das richtige für euch, oder? Habt eine tolle Woche und happy crafting, eure Maike

Why don't you hop on over to our new blog. Maybe you know someone who's birthday is soon, then this first ever challenge of the Papercraft Challenge blog might be just the right inspiration to get crafty ;o) Have a wonderful week and happy crafting, yours Maike
 
 
Material / supplies:
Stempel / stamps: "Christmas Puppies" von Gerda Steiner Designs
Stanzen / dies: "Happy Birthday Circle Frame" von My Favorite Things
                         "Wonky Stitches Elle-Ments" von Avery Elle
                         "Mini Stars" von Simon Says Stamp

Challenges:

Dienstag, 21. November 2017

Christmas Series Card #10 / Weihnachtsserie Karte #10 (POD with alcohol background)

Halli Hallo zusammen!
Schön, dass ihr hier vorbeischneit und ich euch die zehnte Karte meiner Weihnachtsserie zeigen kann ;o) Sie ist für die aktuelle Cards und More Challenge "Things with Wings" entstanden und auch, wenn der gefiederte Kerl ziemlich klein ist, spielt er eine wichtige Rolle auf meiner Karte ;o) 

Hello everyone!
Thank you for coming by so that I can share the tenth card of my Christmas series with you ;o) It is my creation for the newest Cards und More "Things with Wings" challenge and even though this winged guy is rather tiny it plays an important rule on my card ;o)
 

Dieses süße Reh hat schon Ewigkeiten auf meinem Schreibtisch gelegen, coloriert und ready to go, aber irgendwie hat es nie auf eine Karte gepasst. Als ich dann aber ein paar Vögel für die Cards und More Challenge coloriert und damit dann herumkombiniert habe, ist mir diese Kombination sofort ins Auge gestochen und ich war sofort hin und weg. Was meint ihr? Ich finde, die beiden sehen zufrieden zusammen aus und entweder sind sie schon Freunde oder werden es noch... Nur das Reh sah bisher immer total verloren und irgendwie einsam aus auf einer Karte und das passte nicht mit meiner Vorstellung von Weihnachten zusammen.

I have had the deer ornament sitting on my desk for the longest time and it never made it on a card. For some reason it never worked. When I coloured a few birds for this challenge and played around with them and a few other images I found this combination and loved it instantly. What so you think? It looks like they are both happy to see each other and are or become friends... The deer alone always looked kind of forlorn to me which didn't fit with my idea of Christmas.


Den Hintergrund habe ich mit der momentan überall so präsenten Alkohol-Inks auf Vellum Technik. Dazu habe ich Copic Nachfüllerflüssigkeit in 4 Farben ganz wild durcheinander auf Vellum tropfen lassen und die Farben dann noch mit etwas Blender verteilt. Zuerst wollte ich es wegwerfen, aber wie das manchmal so ist, nach 2 Tagen gefiel es mir dann plötzlich total gut. Den Spruch habe ich in weiß embossed, alle Elemente aufgeklebt (das Vellum allerdings nur da, wo etwas die Klebestellen verdeckt) und meine Karte war fertig. Ich würde mich freuen, wenn ihr eure Werke mit Federvieh jeglicher Art mit uns bei Cards und More teilen würdet! Habt einen tollen Tag und happy crafting, eure Maike ;o)

The background was created using the rather popular alcohol ink on vellum technique. I gave a few drops in four different colours of copic refills on the vellum and spreaded them out using a few more drops of the blender solution. At first I thought it was a desaster, but then it grew on me and now I really love it and I will definately make more of these ;o) I added the sentiment to the bottom and white heat embossed it to make it stand out more. After glueing the vellum piece to the card base I added the ornament with foam tape and sat the bird halfway on it, too. I would be thrilled to see your winged things in our gallery at Cards and More! Have a wonderful and crafty day, yours Maike ;o)


Material / supplies:
Stempel / stamps: "Meadow (deer)" & "Silver (bird)" von Purple Onion Designs
                              "13 x Frohe Weihnachten" von Klartext Stempel
Stanzen / dies: "Small Stitched Rectangle" von Lawn Fawn

Challenges:

Dienstag, 24. Oktober 2017

Halloween Hello (Owl by Gerda Steiner Designs)

Halli Hallo ihr Lieben!
Bei Cards und More dreht sich alles um da bevorstehende Halloween-Fest! Da ich selber nicht so der Gruselfan bin, halte ich meine Halloweenkarten immer eher niedlich, so wie hier mit der niedlichen Eule von Gerda Steiner:

Heya my dear crafty friends!
Halloween is coming and so the Cards und More blog chose "Halloween" as the new challenge topic. I am not a big fan of scary and creepy things which is why I decided to use the cute owl by Gerda Steiner as my main image:


Das tolle an dem Motiv ist, wie ich finde, dass es super zu Halloween passt, man es aber auch einfach nur als Herbstmotiv nutzen kann ;o) Hier habe ich sie als süße Halloween-Schneeeule eingesetzt. Den Hintergrund habe ich mit einer Spinnennetz-Schablone gestaltet, und die Fäden mit Nuvo Glitter nachgezogen.

The awesome feature (I hope this is the right word) about this image is, that you can use it for Halloween but also as a normal Fall- image as well ;o)Here I made her a white snowy owl and made a Halloween background using a spider web stencil and Nuvo Glitter Drops to accentuate the threads.


Ich habe noch ein weißes Papier zurechtgestanzt (mit einem Fenster und einer Bordüre), damit die Eule einen Platz zum Sitzen und ich einen Platz für meinen Kartenspruch hatte. Ich hoffe, euch gefällt die Karte und ihr habt Lust, bei unserer Halloween Challenge mitzumachen. Habt eine tolle Woche und happy crafting, eure Maike

I added the white panel with the window cut out of it to give the owl a place to sit and also so that I would have a place for my sentiment. I hope you like the card and that you are going to join us at the Cards und More Blog. Have a great week and happy crafting, yours Maike

Material / supplies:
Stempel / stamps: "Where is the Candy" von Gerda Steiner Designs
                        "Rectangle Peek-A-Boo Window" von My Favorite Things
Background: Distress Inks in Seedless Preserves und Wilted Violet

Dienstag, 26. September 2017

I'm here - penguin


Halli Hallo ihr Lieben!
Mich auf wenige Farben zu beschränken fällt mir wirklich immer sehr schwer. Dieses Mal wusste ich aber zum Glück recht schnell, was ich für die aktuelle Challenge auf Cards und More machen wollte, als ich dieses Farbschema sah:

Heya my dear crafty friends!
I do have a hard time confining myself to only one or two colours on a card (or anything I create really...). This time however I knew quite quickly what I wanted to make, when I saw the colour scheme for the newest challenge at Cards und More:


Felix mit seinem Friesennerz hatte es mir auf dem Stempelmekka angetan und ich bin so froh, dass er bei mir eingezogen ist, denn ich finde, er ist die perfekte Besetzung für diese Karte. Was meint ihr?

Felix (the penguin) with his coat was one of the stamps I found at the Stempelmekka (a fair in Germany all about stamps). And I am so glad I did find him, because I think he is the perfect image for this card and colour scheme. What do you think?


Coloriert habe ich ihn mit Zig-Markern, bevor ich ihn dann ausgeschnitten und auf den gewischten Wolkenhintergrund geklebt habe. Den Herzregen hatte ich zuvor mit dem Nuvo Embellishment Mousse in Lemon Sorbet auf den Hintergrund aufgetragen.

I coloured the penguin with Zig markers before fussy cutting him out. I glued him on the background piece which I had created using Simon Says Fog Ink and the MFT cloud stencil. I also layered the shower of hearts on top using the Nuvo Embellishment Mousse in Lemon Sorbet.


I hope you are going to join us for this challenge and I am looking forward to seeing your creations - and as always we have a fun prize for the winner. This time it is a surprise sponsored by Elisa! Have a great week and happy crafting, yours Maike ;o)

Material / supplies:
Stempel / stamps: "Felix mit Kostüm" von Kulricke
                              "Get Well Gang" von WPlus9 (sentiment)
Stanzen / dies: "All Prettied Up" von Mama Elephant
                         "Blueprints 29" von My Favorite Things (tag)
Schablone / stencil: "Falling Hearts" von Simon Says Stamp

Challenges:
Simon Says Wednesday Challenge "Pop it up"

Dienstag, 29. August 2017

Birthday cake card

Halli Hallo ihr Lieben!
Da morgen die Schule wieder startet und ich noch einiges für das kommende Schuljahr vorbereiten musste / wollte, war es in den letzten Tagen etwas ruhiger auf meinem Blog. Aber jetzt bin ich ungefähr da, wo ich sein wollte mit meinen Vorbereitungen und kann daher meinem Hobby etwas mehr Zeit einräumen. Das passt sehr gut, denn heute startet bei Cards und More eine neue Challenge für euch. Das Thema ist dieses Mal ein ganz einfaches, nämlich "Anything Goes" und unser freundlicher Sponsor ist Dr. Digi. Da ich immer knapp mit Geburtstagskarten bin, habe ich mir diesen Geburtstagskuchen ausgesucht und zusammen mit den Kätzchen von Mama Elephant verbastelt:

Heya my dear crafty friends!
Because school starts again tomorrow after a lovely summer break it was a bit more quiet on my blog than usual. I had to prepare for the coming school year, but now I am almost content with what I have accomplished so far and can dedicate some time for my hobby again. Which is just perfect, seeing as there is a new challenge at Cards und More for you ;o) This time around the theme is "Anything goes" and as I am always short on birthday cards I chose this "birthday cake" image by our kind sponsor Dr. Digi and combined it with a few little cats by Mama Elephant:


Ich bin nicht ganz sicher, woher die Idee plötzlich angeflogen kam, das Quadrat auf die Spitze zu stellen, aber ich muss sagen, ich finds richtig gut zusammen mit dem Kuchen-Image ;o) Den Hintergrund habe ich mit verschiedenen Distress Inks gewischt und nach dem Trocknen direkt auf die Kartenbasis geklebt. Den Spruch habe ich unten in den hellsten Bereich gestempelt, damit er auch gut strahlen kann und zum Schluss kamen dann noch die partyverrückten Kätzchen dazu ;o) Ich hoffe, ihr habt Lust und Zeit bei der "Anything Goes" Challenge von Cards und More mitzumachen und freue mich darauf eure kreativen Ideen in der Gallerie zu sehen. Habt eine fantastische Woche und happy crafting, eure Maike

I am not quite sure where I got the idea from to tip the square to the side, but I really love how it turned out! The background was made with a few different Distress Inks and glued directly to the card base. I stamped the sentiment at the bottom of the coloured paper, so that it would be able to shine and as a last step added the party-loving cats ;o) I hope you are going to join us for our "Anything Goes" challenge at Cards und More. Have a fantastic week, everyone! Happy crafting, yours Maike

Material / supplies:
Stempel / stamps: "Birthday Cake" von Dr. Digi
                              "Little Cat Agenda" von Mama Elephant
                              "Handwritten Notes" von Avery Elle
Stanze / die: "Stitched Mini Scallop Square Stax" von My Favorite Things

Challenges:
As You Like It Challenge "Fur or Feathers and why"
(I grew up with cats and had at least one every since, also I am afraid of birds flying at me or around me so it is definately fur for me ;o)

Dienstag, 1. August 2017

We have a Birthday! (Dots, dots, dots)

Halli Hallo ihr Lieben!
Heute startet die neue Challenge bei Cards und More, dieses Mal mit dem Thema "Dots, Dots, Dots", also Punkte, Punkte, Punkte ;o) Beim Durchsehen meines Blogs bin ich auf diese Karte von mir gestoßen und dachte, dass das Design auch mit Punkten statt mit Sternen gut aussehen würde. Lustigerweise erinnerten mich die vielen Punkte nach dem Stempeln an Planeten... ;o)

Heya my dear crafty friends!
Today starts a new challenge at the Cards und More Challenge Blog with the theme "Dots, Dots, Dots". When I looked around my cards for some inspiration I found this card and thought I could make this work with dots instead of stars. Funnily when I had finished stamping the dots I felt reminded of planets ;o)


Also habe ich mein süßes Set von MFT herausgesucht und mich entschieden, den Astronauten, seine Rakete und die Sternenballons (die eigentlich einem anderen der Jungs gehört) zu benutzen. Bevor ich die Elemente aufgeklebt habe, habe ich noch eine Linie freihand um die Karte gezogen und den Spruch gestempelt.

So I pulled ot this cute set by MFT and chose to use the astronaut, his rocket and some star shaped balloons which usually belong to a different boy from the set. Before I glued everything down I drew a black line around the edges of the card and stamped the birthday greeting.


Alle drei Teile habe ich mit Foamtape aufgeklebt, um darunter noch das Garn platzieren zu können, mit dem ich einerseits unseren Allspaziergänger mit seiner Rakete verbunden habe (denn wir wollen ja nicht, dass er da im Nirgendwo verschütt geht) und mit dem ich ihm die Ballons ins die Hand gegeben habe. Ich stelle mal wieder fest, dass ich Bakerstwine wirklich klasse finde auf Karten. Aus irgendeinem Grund vergesse ich aber andauernd es zu benutzen, bis es zu spät ist. Passiert euch das auch?
Den letzten Touch habe ich der Karte dann noch mit einem Glitzerstift verpasst, der sich so richtig auf den Ballons und dem Metallkörper der Rakete austoben durfte ;o) Ich hoffe, euch gefällt die Karte und dass ihr mit einem eigenen "Dots, Dots, Dots" Projekt bei Cards und More mitspielen mögt ;o) Habt einen wunderbaren August und bis bald!

I adhered all three items with foam tape, so that I could fit some bakers twine underneath to connect the little man with his rocket (we don't want him to get lost in space now, do we?) and so that it looks like he is holding the balloons in his hand. I like the texture that the bakers twine gives. For some reason I don't often think of using it, even though I really like it on cards. Does this happen to you guys as well?
To finish the card I used a glitter pen on the metal parts of the rocket and the balloons. I hope you like the card and that you are going to play along with us with your own version of a "Dots, Dots, Dots" project ;o) Have a wonderful month of August everyone and hopefully see you soon!


Material / supplies:
Stempel / stamps: "Space Explorer" by My Favorite Things
                              "Lots of Dots" von Simon Says Stamp

Ink Colours for the dot pattern: 


Dienstag, 4. Juli 2017

Summer Happiness

Halli Hallo ihr Lieben!
Nach der Luftmatratzen-Spinnerkarte von gestern geht es heute direkt mit noch einer Badevergnügen-Karte weiter. :o) Für die neue Cards und More Challenge mit dem schönen Titel "Girls just wanna have fun" habe ich diese Karte gebastelt:

Heya my dear crafty friends!
After yesterday's air matress-spinner card I'll follow up today with this bathing fun card :o) For the newest Cards und More Challenge with the fun theme "Girls just wanna have fun" I created this card:


Für meine Karte habe ich den Digistamp "Inner-Tube-Girl" unseres freundlichen Sponsors gewählt und es mit Copics coloriert. Meine Idee hinter dieser Karte war sie so aussehen zu lassen, wie ein gerahmtes Foto. Den quadratischen Rahmen um das Mädchen habe ich mit den gleichen Farben coloriert wie zuvor schon den Schwimmreifen, damit das Ganze eine optische Einheit wird. Außerdem habe ich noch drei Fische hinzugefügt, um noch ein wenig mehr Bewegung und Farbe auf die Karte zu bekommen, da das Gelb am Ende doch ziemlich kräftig war ;o) Unter den Rahmen habe ich zum Schluss noch einen auffälligen Spruch von Mama Elephant gestempelt und meine Karte war fertig. Ich hoffe, ihr habt Lust bekommen bei unserer Challenge mitzuspielen und vielleicht werdet ihr ja auch unser glücklicher Gewinner / unsere glückliche Gewinnerin von drei KennyK Digistamps ;o) Habt eine großartige Woche, ihr Lieben ;o)

I used our kind sponsor's image "Inner-Tube-Girl" and coloured it with Copic makers. My idea was to have the imiage part of the card look like a framed photo. I opted for using the same yellow for the frame that I had used for the tube to make the card look more finished. I also added the three pink fish to add a bit more (colour) to the card without distracting too much from the main image. Below the framed part I added a bold sentiment by Mama Elephant and my card was done. I hope you are going to join us for this fun challenge and maybe you will be the lucky winner of 3 KennyK Digi stamps ;o) Have a great week everyone!


Material / supplies:
Stempel / stamps: "Inner-Tube-Girl" von KennyK 
                            "Words Defined" von Waff
                            "Lucky Duck" von Gerda Steiner Designs

Challenges:
Simon Says Wednesday Challenge "Anything Goes"
MMM Challenges "Summer Brights"
Paper Crafty Happy "Anything Goes With a Girl"

Dienstag, 9. Mai 2017

Sending Hugs (Sheep)

Halli Halli ihr Lieben!
Hier kommt auch schon der zweite Post für den Tag ;o) Auf dem Cards und More Challenge Blog dreht sich in den nächsten zwei Wochen alles um typische "Frauenkarten". Ich habe mich für eine "klassische" rosa Karte entschieden, aber seht selbst:

Heya my dear crafty friends!
This is the second post of today and I am back with a card for the new Cards und More challenge. In the next two weeks we would like to see your version of a "Women's Card". I decided to go with a lot of pink, but have a look yourself:


Den gepunkteten Hintergrund habe ich selber gemacht, weil ich nichts Passendes an Papier für die Karte gefunden hatte. Dazu habe ich mir weißes Papier zurecht geschnitten und mit rosa Tinte (ich meine es war Cherry Blossom von SU) eingefärbt - zur Mitte hin bin ich immer etwas heller geworden, aber da ich die Mitte nachher ausgestanzt habe sieht man davon nicht mehr allzu viel... Dann habe ich mir meine durchlöcherte Schablone geschnappt und bin noch mal mit der gleichen Farbe aber nun mehr Druck an die Arbeit gegangen. 

I created the polka dotted background by lightly sponging on some pink ink (I believe it was Cherry Blossom by SU) and then going back with the same ink and a stencil, but this time I used a heavier hand. 


Die Schafe sind aus dem Spring Digi Bundle von Gerda Steiner. Die beiden Süßen habe ich ausgedruckt und dann mit Copics coloriert. Für das Schafsfell schattiere ich meist zuerst das ganze Tier und setze dann immer so kleine C-förmige Kringel ins Fell. Ich hoffe, ihr versteht, wie ich das meine. Wenn man ganz genau hinschaut, dann sieht man sie auch. Dann wirkt das Schaf so richtig schon fluffelig und dreidimensional. 

The sheep are from the Spring Digi Bundle by Gerda Steiner Designs, which I had printed out and coloured with Copic markers. To colour the sheep's fur I go ahead and do all the shading first. Next I colour in little c-shapes to make the wool look more fluffy and three-dimensional. 


Zum Schluss habe ich dann noch alles zurechtgestanzt und auf den weißen Streifen einen Spruch nebst Blumenverzierung gestempelt und um den Bogen eine schwarze Fakenaht gemacht, Damit war meine Karte fast fertig, es fehlten nur noch ein paar Liquid Pearls Punkte und ich war zufrieden. Ich hoffe, ihr macht mit bei Cards und More und zeigt uns eure Frauenkarte ;o) Viel Spaß und happy crafting, Maike :o)

Now I die cut all the different pieces, stamped a sentiment as well as some decorative flowers on a white piece of paper and used a black pen to create a faux stitched line around the window arch. Now my card was almost finished - I added some Liquid Pearls and called it done. I hope you will join us this time at Cards und More and share your card for a woman with us! Have fun and happy crafting, yours Maike ;o)

Material / supplies:
Stempel / stamps: "Spring Digital Stamp Bundle" von Gerda Steiner
                             "Woodland Wonders" von Avery Elle
Stanzen / dies: "Stitched Arch Stax" von My Favorite Things
Schablone / stencil: "Large Dots" von Simon Says Stamp

Dienstag, 14. März 2017

Fröhliche Weihnachtspinguine / Merry christmas penguins

Hallo ihr Lieben!
Eine Weihnachtskarte? Im März? Jetzt, wo gerade die Sonne raus kommt und wir alle keinen Schnee mehr sehen können? Die Antwort ist ja... und die Erklärung einfach: Ich brauche immer so viele Weihnachtskarten, dass ich unbedingt vorarbeiten muss und ich hoffe, ihr habt nichts dagegen, dass ich Pinguine im Weihnachtslichter mit euch teile auch wenn es gerade draußen anfängt wieder grün zu werden:

Heya my dear crafty friends!
A Christmas card? In March? Now, that the sun is showing her lovely face again and none of us wants to see any more snow? The answer is yes... and the explanation rather simple: I always need heaps of Christmas cards, so that I have to start as early as possible and I do hope you don't mind, that I am sharing penguins and Christmas lights with you ;o)


Diese Karte habe ich für die aktuelle "Für Kinder" Challenge auf dem Cards und More Challenge Blog gebastelt und sie war wirklich schnell zu machen. Ich finde diesen Digi von Sparkle N Sprinkle total niedlich, also wollte ich ihn als Fokus für meine Karte haben. Ich habe ihn ausgedruckt und mit Copics coloriert. Danach habe ich dann einen Schneekugel-Rahmen aus blauem und einen etwas größeren aus weißem Papier ausgestanzt und beide über das Bild geklebt. Um das Auge noch mehr auf die Pinguine zu lenken habe ich außerdem eine graue Matte hinzugefügt. Zuletzt habe ich dann noch zwei Tags mit Farben coloriert, die ich auch für das Bild benutzt habe und habe dann den Spruch aufgestempelt. Leider zeigen die Bilder nicht, wie viel Tiefe die verschiedenen Lagen (auch ohne Abstandshalter) geben, aber es macht wirklich einen großen Unterschied finde ich ;o) Ich wünsche euch allen viel Freude beim basteln und hoffe, ihr habt auch Wege gefunden weniger Stress mit Weihnachtskarten zu haben in diesem Jahr ;o)

This card was made for the current "For Kids" challenge at the "Cards und More Challenge blog" and came together quite easily. I love this cute image by Sparkle N Sprinkle, so I wanted to make it the focal point of my card. I printed it out and coloured it with Copics. Nexte I die cut the snow globe shape from the blue and once more from white paper and layered both on top of the image. I matted it with some grey cardstock to match the colour of the penguins and to pull it all together that way. Lastly I coloured two tags with colours I had used in the image, glued them together and stamped the sentiment "Fröhliche Weihnachten" (Merry Christmas) on the top one. Unfortunately the pictures do not really show the dimension that the three layers give, but believe me, it does make a difference ;o) Happy crafting, everyone and I hope you won't get stressed out by making Christmas cards this year ;o)


Material / supplies:
Stempel / stamps: "Brighten the Holidays" von Sparkle N Sprinkle
                              "Fröhliche Weihnachten" von Klartext Stempeln (retired?)
Stanzen/ dies: "Small stitched Rectangles" von Lawn Fawn

Dienstag, 17. Januar 2017

Still winter / Noch immer Winter

Halli Hallo ihr Lieben!
Die Temperaturen bei uns machen es mir leicht noch immer Winterkarten zu basteln... Habt ihr es gerade auch so a****kalt? Passend dazu gibt es auf dem Cards und More Challenge Blog ein neues Thema, das da lautet: "Noch immer Winter". Dies ist die Karte, die ich für euch als Inspiration gebastelt habe:

Heya my dear crafty friends!
The temperatures where I live dropped over the last couple of days and it became really cold (at least it feels so to me). Is it cold where you live? Well, the new Cards und More challenge is absolutely fitting for our whether and it is "Winter Still". This is the card I have made as inspiration:


Als erstes habe ich die Fenster in das gemusterte Papier und einen passenden Rahmen für das rechteckige Papier aus- gestanzt. Anschließend habe ich Transparentpapier mit kleinen weißen Punkten, die an Schnee erinnern, hinter die Fenster geklebt. Leider kann man das auf den Fotos nicht wirklich erkennen - wenn man die Karte in der Hand hält ist es aber zum Glück gut zu sehen. ;o) Dann habe ich diese niedlichen Pinguine von Gerda Steiner Designs mit Copics ausgemalt. Die Eisscholle und das Schild sind aus dem Set "Cool Day" von MFT.

I started by die cutting the windows and the frame to go behind the rectangle piece. Behind the windows I glued some vellum with white spots to make it look like it snowed, but the camera wasn't really able to pick that up. You have to look really closely to be able to see them in the photograph, but luckily it does show quite nicely in real life ;o) I coloured these cute penguins by Gerda Steiner Designs and added some elements from the "Cool Day" set by MFT.


Bevor ich alles an Ort und Stelle festgeklebt habe, habe ich noch großzügig Clear Wink of Stella auf alle Eis- und Schneeflächen gepinselt, damit es auch ordentlich glitzert, wenn man die Karte im Licht hin und her bewegt. Ich hoffe, ihr mögt die Karte und wünsche euch nun noch einen tollen Tag ;o)

Before I glued all the parts together I added some Clear Wink of Stella to the ice and the snow, so that it glitters, when you tilt it in the light. Hope you like the card! Have a fantastic day ;o)


Material / supplies:
Stempel / stamps: "December / January Bundle" von Gerda Steiner Designs --> Hurry up,
                               it is still on sale ;o)

                              "BB Cool Day" von My Favorite Things
Stanzen / dies: "Stitched Triple Peek-a-boo Window" & "Stitched Mini Scallop                         Rectangle STAX" von My Favorite Things

Challenges:

Dienstag, 20. Dezember 2016

Christmas Series Card #23 / Weihnachtsserie Karte #23 (Poinsettia)

Hallo ihr Lieben
und willkommen zum zweiten Blogpost des Tages! Das Thema unserer neuen Challenge bei Cards und More lautet "Weihnachten" und ich hoffe, dass ihr auch eure letzten Weihnachtskarten noch mit uns teilen werdet ;o) Ich hab mich entschieden eine sehr grafische Karte mit starken Kontrasten zu basteln - nicht mein normaler Stil würde ich behaupten, aber trotzdem gefällt sie mir echt gut:

Heya my crafty friends
and welcome to my second post today! The theme for our newest Cards und More challenge is "Christmas", so I am hoping that you will consider sharing your latest Christmas creations with us ;o) I decided to stray from my usual style a little bit and created a more graphic card with an unusual color combination - at least unusual for me ;o) It's different, but I really like it:


Zuerst habe ich den Hintergrund gestaltet. Dazu habe ich graues Papier, eine Schablone und weiße Embossing-Paste benutzt. Den optischen, aber auch den haptischen Effekt von Embossing-Paste mag ich persönlich total gerne, aber leider denk ich oft nicht daran sie zu benutzen, weil sie in einer Schublade steht und offenbar meine kreativen Prozesse sehr von dem gelenkt werden, was auf meinem Schreibtisch steht... Während der Hintergrund trocknete, habe ich den Weihnachtsstern mit Copics coloriert und habe die Tags vorbereitet.

I started by creating the background piece with some grey paper, a stencil and embossing paste. This raised look and especially the feel of dried embossing paste is always great, but I often don't think of using it... While the background dried I coloured the poinsettia image with Copics and also created the tags.


Als alles getrocknet, ausgestanzt und ausgeschnitten war, habe ich noch den Spruch auf das weiße Tag gestempelt und dann alle Teile auf die Karte geklebt. Da die Tags etwas verloren wirkten, habe ich noch das schwarze Washi-Tape hinzugefügt und in die Blütenmitte habe ich noch goldene Liquid Pearls getupft.

When everything was dry, die cut and fuzzy cut I stamped the sentiment on the white tag and glued everything to the card. The tags seemed to have no "right spot" on the layout so I added the black washi-tape and embellished the poinsetta with golden droplets of Liquid Pearls.


Ich würde mich freuen eure Weihnachtswerke auf dem Cards und More Blog bewundern zu können und wünsche euch - gerade nach dem gestrigen Tag - dass es euch gut geht, ihr all eure Kreativität nutzt, um die Welt ein wenig bunter und heller zu gestalten und wünsche euch allen von Herzen alles Liebe und Gute, eure Maike!!!

I would love to see your Christmas creations on the Cards und More blog and wish all of you - especially after what happened yesterday in Berlin - that you are well, that you can use your creativity to make our world a little bit more colourful and brighter and wish all of you the very best, yours Maike!!!

Material / supplies:
Stempel / stamps: "Christmas Poinsettia" von Sparkle N Sprinkle
Stanzen / dies: "Wonky Stitches Elle-ments" von Avery Elle
                         "Tags A Lot" von Mama Elephant
Schablone / stencil: "Delicate Petals" von Hero Arts

Challenges:

Dienstag, 22. November 2016

Christmas Series #13 Advent calender / Weihnachtsserie #13 Adventskalender

Halli Hallo ihr Lieben,
alles außer einer Karte dürft ihr bei der neusten Challenge auf dem Cards und More Blog verlinken ;o) Da wir kurz vor dem ersten Advent stehen, dachte ich, dass ein kleiner, aber feiner Adventskalender genau das richtige Projekt sei. Gedacht, getan ;o)

Heya my dearcrafty friends,
"anything but a card" is the theme of our newest challenge over at the Cards und More blog. Because December isn't too far away anymore I thought I would show you a different version of an Advent calender that is quick and easy to make ;o)


Es ist ja kein typischer 24-Türchen Adventskalender - aber ich denke, der glückliche Empfänger freut sich auch über Kleinigkeiten an den Adventssonntagen ;o) Die kleinen Boxen habe ich mit einer Stanze von Kulricke hergestellt und aus weißem, festen Papier habe ich dann noch das Tablett für sie gebastelt.

It is not the typical "open one box every day" - kind of Advent calender, but rather one where the lucky recipient gets to open one on every Advent Sundays before christmas. I created the little boxes with a die by Kulricke and made a simply tray for them.


Die Verzierungen habe ich mit den süßen Mama Elephant Rentieren und Designerpapier von Lawn Fawn gemacht und finde das Ergebnis wirklich super niedlich. Weil man diesen Kalender aber nicht so gut verschicken kann, habe ich noch eine flache Variante gebastelt, die ich mit Washitape schnell und einfach verziert habe.

I used Lawn Fawn papers and these cute reindeers to embellish the boxes and love how it turned out. I used some acetate to help the elements stand up. Because a more flat version is better for mailing I created a different version as well, using washi tape to decorate the tray.


Und hier noch einmal beide zusammen:
And here is another look at both of them:


Material / supplies:
Stempel / stamps: "Reindeer Games" von Mama Elephant
Stanzen / dies: "Pizzabox" von Kulricke
                         "LLd Stitched Numbers" von My Favorite Things

Challenges:
Simon Says Wednesday Challenge "Christmas Critters"
Hanna and Friends "Adventskalender / Advent Calender"
CRAFT Challenge "Christmas"

Addicted To Stamps Challenge "Die Cuts or Punches"
Penny Black and More "Anything Christmas"
Crafty Hazelnut Christmas Challenge "Anything Christmas Goes"

Dienstag, 27. September 2016

Hedgehog sending "Loads of Love"

Halli Hallo ihr Lieben!
Heute gibt es noch einen zweiten Post von mir ;o) für die Cards und More Challenge mit dem schönen Thema "Lots of Love" habe ich diese Karte gewerkelt:

Heya my dear crafty friends!
Today I would like to share another post with you, showing you the card I made for the lovely "Lots of Love" challenge at the Cards und More blog:


Ich hatte viel Freude daran diese Karte zu machen. Meine Inspiration kam von einer Herbstkarte, die ich vor kurzer Zeit gemacht habe, auf der ich diesem kleinen Heckenbewohner ein Herz in die Hand gedrückt hatte. Als ich dann anfing über die aktuelle Challenge auf Cards und more nachzudenken, kam ich immer wieder zu dieser Idee zurück und dachte, ich würde es vielleicht hinbekommen, dass es ausschaut, als würde das Igelchen Liebe bzw. Herzen in die Welt werfen. ;o)

I had loads of fun making this card. My inspiration came from a card I made a short while ago (--> click) where I paired this cute hedgehog with one of the bigger ones from the set and had him hold a heart in his paw. When I started thinking about what I wanted to make for the Cards und More challenge I kept going back to this idea and thought I could make it look like this cutie was spreading love / hearts. ;o)


Ich hoffe, ihr habt auch eine Idee für ein "Lots of Love / Alles Liebe" Projekt und teilt es mit uns auf Cards und More. Habt eine tolle Woche, mit vielen Sonnenstunden, viel Freude und Zeit, um zu tun, was euch Spaß macht! Happy crafting, Maike

I hope you have an idea for a "Lots of Love" project and are going to share it with us at the Cards und More challenge. Have a wonderful week everyone, sunny weather, loads of fun and enough time for doing the things you love! Happy crafting, Maike


Material / supplies:
Stempel / stamps: "Happy Hedgehogs" von My Favorite Things
                             "" von Simon Says Stamp
Stanzen / dies: "Stitched Scallop Basic Edges" & "Oval Shadows" von My Favorite Things

Paper: "Sweater Weather" von Lawn Fawn

Dienstag, 16. August 2016

Pink and Green

Huhu ihr Lieben!
"Pink und Grün" sind die Vorgaben für die neue Challenge bei Cards und More. Dabei dachte ich sofort an Blumen und die passende Wiese dazu, aber dann hüpfte noch ein kleiner Geselle in meine Gedanken und offenbar ist die Idee dann hängen geblieben ;o)

Heya my dear friends!
"Pink and Green" is the theme for the newest challenge over at Cards und More. My first thought was of flowers and a nice meadow, but then there hopped a little creature into my thoughts and obviously that idea stuck with me ;o)


Für meine Karte habe ich zuerst einen pinken Distress Ink Hintergrund gewischt. Dazu habe ich die Farben Picked Raspberries und Worn Lipstick benutzt. Daraus habe ich dann einen Rechteck ausgestanzt und davon dann noch einmal einen Kreis, der das Fenster für meine Shaker-Card werden sollte. Als nächstes habe ich den Kartenspruch direkt auf die Kartenbasis gestempelt und dazu zwei verschiedene Rosatöne verwendet.

For my card I created a pink Distress Ink background first, using Picked Raspberries and Worn Lipstick. I die cut a stitched rectangle out of it and also die cut a circle to become the window for the shaker area of the card. Next I stamped the sentiment directly onto the card base in two shades of pink as well.


Nun war es an der Zeit den Hauptakteur der Karte zu stempeln, schön giftgrün zu colorieren und dann auszuschneiden. Ich hab dem Fröschlein selbstverständlich auch noch eine Krone verpasst, aber keine güldene, nein, eine knallpinke und ich finde die Kombination einfach zu klasse ;o) Um das rosa Papier habe ich drei dünne Streifen Washitape geklebt, um den Frosch einen Platz zum Sitzen zu geben. Da ich wollte, dass die Sequins sich mehr oder weniger frei bewegen können, habe ich eine Doppellage 3M Tape um das Fenster herum gelegt und dort hinein dann eine Auswahl an weißen, klaren und rosa Sequins gegeben.

Now I stamped, coloured and fussy cut the cute frog and gave him a pink crown and I love the colour combination ;o) I added three thin stripes of washi tape to the pink panel, to give the little frog a place to sit. Because I wanted the sequins to be able to move I used a double layer of foam tape around the shaker area and filled it with seqins by Pretty Pink Posh.


Zum Schluss kam der schwierigste Teil, nämlich das Aufkleben auf die Kartenbasis - dabei benutze ich mittlerweile nur noch flüssigen Kleber, damit ich nach dem Zusammendrücken der beiden Teile noch einen Augenblick Zeit habe, die schlimmsten Schieflagen wieder ein wenig gerade zu rücken. Damit ist meine Karte nun fertig und ich würde mich freuen, wenn ihr etwas "Pink-Grünes" werkeln und bei uns einstellen würdet! Zu Gewinnen gibt es dieses Mal einen 5 Euro Gutschein für die Stempelküche! Also ran an den Basteltisch ;o) Bis bald und happy crafting!

All that was left to do now was to glue the panel to the card base.... This is always the hardest part for me. These days I only use liquid glue anymore, so that I have a little bit of time to wiggle the panel around. Otherwise my shaker cards would all look very wonky indeed ;o) My card is finished now and I would love to see your "green and pink" projects on the Cards und More blog. This time you can win a 5 Euro gift certificate to the Stempelküche Online Store. Hope to see you soon and happy crafting! ;o)

Material / supplies:
Stempel / stamps: "Critters ever after" von Lawn Fawn

Stanzen / dies: "Small Stitched Rectangle Stackables" von Lawn Fawn
Sequins: "Marshmallow", "Clear" & "Ballerina" von Pretty Pink Posh
Washi: "Black and White Stripe" von Little B

Challenges:
Crafting From the Heart "Anything goes"
Paper Creator Challenge "Keep it Simple"
Delicious Doodles "All creatures great and small"
Pile it On "Make Your Own Background"
Related Posts Plugin for WordPress, Blogger...