Posts mit dem Label Monochrome werden angezeigt. Alle Posts anzeigen

Donnerstag, 2. März 2023

Alles Gute zum Geburtstag (Monochrom)

Heya my dear crafty friends,
I am a day late again, but again, I hope you'll forgive me, since I have been feeling poorly for the last few days. However, I would still love to share my make for the newest Challenge Up Your Life challenge with you. The theme is "Monochrome" and this is what I came up with:


I love this cute image and it was perfect for this challenge, because the animal itself only needed black and white to look good and so I could give it a lovely pink sweater and pair it with a light pink background.


The pink letters were coloured with Copic markers and the rest was stamped in jet black ink. I'll admit I added a little bit of colour with this heart I placed in the hand of my critter, but as it is so tiny and kind of neutral coloured I think I'll get away with it or what do you think? 


I hope you are going to join us in this month' challenge. We would love to see what you come up with! Thanks for stopping by and happy crafting to you! Yours Maike

Supplies: tba


Donnerstag, 26. April 2018

Get Inspired by Manu ;o)


Halli Hallo ihr Lieben!
Die liebe Manu von "A Breeze of Creativity and Joy" hatte Anfang des Jahres die schöne Idee ihre "Get Inspired" Challenge zu starten. Sie fand, dass man so oft schöne Designs und Karten bei anderen Craftern sieht und hat das zum Anlass genommen, ihre Challenge ins Leben zu rufen. Dabei schaut Manu sich bei den Projekten eines anderen Crafters um, um sich von einem der Werke inspirieren zu lassen und derjenige macht das Gleiche mit einer von ihren Kreationen. Manu hat mich gefragt, ob ich Lust hätte im April bei ihrer Challenge mitzumachen und natürlich hab ich da sofort ja gesagt ;o)

Heya my dear crafty friends!
The lovely Manu with her blog "A Breeze of Creativity and Joy" had an awesome idea at the beginning of the year. She found, that she would find so many fabulous designs on the internet, that she decided to start her own challene, where she would find an inspiring project by another crafter and create something with that in mind. And that crafter would do the same with one of Manu's creations as inspiration. She was kind enough to ask me to play along in April and I was thrilled to do so ;o)
http://butterkipferl.blogspot.de/

Dies ist die zuckersüße Karte, die ich als meine Inspirationsquelle ausgewählt habe:

This is the sweet card I chose to be my source of inspiration:


Ich hab mich sofort in diese monochrome CAS Karte verliebt. Das Stencelling im Hintergrund sieht klasse aus und ich bin begeistert gewesen, wie sehr dieses Design den Bären als Fokus strahlen lässt. Außerdem habe ich mir vorgenommen, öfter farbige Kartenbasen zu benutzen und Manus Challenge war eine perfekte Gelegenheit.

I loved the monochrome and CAS look, the subtle stencelling in back and the fact that the design let's the image shine very much. Also I am trying to use more coloured card bases in my creations and thought this would be a perfect opportunity to do so.


Ich bin zwar etwas von dem monochromen Look abgewichen, weil ich fand, dass nur grau und blau ein wenig zu "blahhh" ausgesehen hätten, habe mich aber ansonsten sagen wir mal, sehr direkt inspirieren lassen ;o) Vielen Dank noch mal an Manu, es hat mir große Freude gemacht mich von deinen wundervollen Werken inspirieren zu lassen! Und vielen Dank auch an euch für euer Interesse und vielleicht schaut ihr auch einmal bei Manu vorbei uns lasst euch inspirieren. Alles Liebe und happy crafting, eure Maike

I admit, I swayed a little from the monochrome look, but just the blue and grey together looked a bit "blahhh" so I had to add the pop of colour ;o) Other than that Manu's card design has inspired me rather clearly I'd say... Thank you again to Manu for letting me join in with her wonderful challenge this month. I had a lot of fun looking through all your fantastic projects. And thank you so much to all of you for your support and interest. You should definately hop on over to Manu's blog - maybe you'll find some great inspiration there, too. Take care, have a lovely day and happy crafting, yours Maike


Material / supplies:
Stempel / stamps: "BB Happy Hippo" von My Favorite Things
Stanzen / dies: "Stitched Circle Stax" von My Favorite Things
                         "Small Stitched Rectangle Dies" von Lawn Fawn
Schablone / stencil: "Balloons" by Echo Park

Sonntag, 4. Februar 2018

Have a Tail-Wagging Good Time

Hallo ihr Lieben!
"Gelb und Grau" ist die neue Vorgabe für Challenge der nächsten zwei Wochen bei Challenge Up Your Life und hier seht ihr meine Inspirationskarte:

 Heya my dear crafty friends!
"Yellow and Grey" is the theme for the new challenge over at Challenge Up Your Life for the coming fortnight. This is my take on the task:


Als ich über die Farbe "Gelb" nachgedacht habe, ist mir dieses Mal sofort Sonnenschein in den Kopf gekommen - wahrscheinlich weil ich seit November kaum welchen gesehen habe.... Also habe ich meine tolle Schablone von Create A Smile rausgesucht und für den Hintergrund meiner Karte ein paar wundervoll sonnengelbe Sonnenstrahlen gewischt. Als nächstes habe ich aus weißem Papier einen Rahmen und zwei "Schnee"-Hügel ausgestanzt und schon einmal auf der Kartenbasis zusammen geklebt.

When I thought about the colour yellow the first thing that came to my mind was sunshine - something we have been missing dearly in Germany for the past three month - so I got out my wonderful stencil by Create A Smile and created the rays for my background piece. Next I die cut the frame and two hills from white cardstock and glued all those pieces together.


Jetzt hatte ich schon einen Hintergrund, der mir gefiel und musste jetzt nur noch ein passendes Element für den Vordergrund finden. Als ich diesen niedlichen Kerl in einem meiner Stempelset entdeckte, war klar, dass er auf die Karte musste. Ich habe ihn mit Memento Tuxedo Black gestempelt, anschließend mit Copics coloriert und ausgeschnitten. Als er seinen Platz auf dem Hügel gefunden hatte, habe ich den Spruch so halb um ihn herum gestempelt. Wie immer war mir meine Karte so noch etwas zu leer, also habe ich die Szene um das "Woof! Woof!" mit gelben Alphabetstickern ergänzt und diese tollen klaren Sternchenpailetten aufgeklebt. Damit war meine Karte fertig ;o) Ich hoffe, sie gefällt euch und ich konnte euch vielleicht sogar inspirieren euch auch an das "Gelb-Grau"-Thema zu wagen. Falls ja, würde ich mich sehr freuen, wenn ihr euer Werk bei Challenge Up Your Life teilen würdet. Habt ein wunderbares Restwochenende und happy crafting wünscht euch, eure Maike

Now I had a lovely background, but I still needed a focal image, so I searched through my supplies and found this adorable dog with its scarf and knew that he would look perfect combined with the scene . I stamped the dog and coloured it wil Copic markers and also stamped the sentiment. And because the card looked much too empty at this point I added the "Woof! Woof!" with alphabet stickers and also these cute clear star sequins. That was my card done ;o) I hope you like my card and that maybe I could inspire you to challenge yourself with our theme. Hope to see your project in our gallery at Challenge Up Your Life. Have a wonderful weekend and happy crafting, your Maike


Material / supplies:
Stempel / stamps: "Puppy Pals" von My Favorite Things
Stanzen / dies: "Stitched Snowdrifts" & "Stitched Rectangle Scallop Frame" von My Favorite Things
Stencil: "Focal Point" von Create A Smile

Challenges:
Simon Says Stamp Wednesday Challenge "Anything Goes"
Seize The Birthday "Anything Goes / Topping: Candles"
CAS on Sundays "Colour Me Pretty"
As You Like IT Challenges "Favorite Way To Add Stitching And Why"
--> I own loads of dies with the faux stitching edge because I love the way it adds a lot of interest to a card without adding anything "extra" or bulk. 

Dienstag, 7. November 2017

Christmas Series Card #5 / Weihnachtsserie Karte #5 (Polar Bear Luke)

 
Halli Hallo ihr Lieben!
Teil 5 meiner Weihnachtsserie ist gleichzeitig auch meine Interpretation des Challenge-Bildes von der neuen PINspirational Challenge. Dieses Mal habe ich mich an den Farben orientiert und nicht am Motiv:

Heya my dear crafty friend!
Part 5 of my Christmas series is also my interpretation of the new theme at PINspirational challenges. This time I have used the colours as inspiration rather than the theme:

http://pinspirationalchallenges.blogspot.de/2017/11/pinspirational-challenge-203.html

Zuerst habe ich diesen wundervollen Hintergrundstempel von Purple Onions rot auf den roten Cardstock gestempelt, um einen Ton in Ton - Look zu erhalten. Nachdem die Tinte getrocknet war habe ich die Kreise mit den Sternen hinzugefügt. Diese habe ich mit Versamark gestempelt und anschließend mit dem Platinum Pulver von Ranger embosst. Ich liebe diesen goldenen Schimmern, den das Pulver gibt.

I started by creating the background by stamping the lovely background stamp by Purple Onions in red on to a red cardstock. After that had dried I added the circle and stars stamps. This one I stamped with Versamark and used Platinum embossing powder by Ranger to give it this lovely golden sheen.


Die Motive (Eisbär und Geschenk) habe ich mit Zigs coloriert und ausgeschnitten. Auf ein Sentiment habe ich verzichtet, das auf dem Hintergrund ja schon alles steht. Noch ein Stück Garn dazu und meine Karte war fertig. Sehr schön schnell gemacht und super geeignet, wenn man damit eine Massenproduktion plant ;o) Habt eine schöne Woche und bis hoffentlich bald! Happy crafting, eure Maike
- - - - -
PS: Hast Du Lust an meinem Weihnachtsgewinnspiel teilzunehmen und vielleicht einen $25 Gutschein für einen Onlinebastelshop Deiner Wahl? Dann klick hier ;o)

I coloured the main images (polar bear and present) with Zig markers and fussy cut them. Because I had everything I wanted to say stamped on the background panel, I decided to abstain from adding a sentiment this time.  All that was left to do now was to add a piece of twine and my card was done. It was very quick and easy to make, so in case you are thinking of a Christmas card mass production this might be the design for you?! ;o) Have a wonderful week and hopefully I'll see you soon! Happy crafting, yours Maike
- - - - -
PS: If you would like to win a $25 gift certificate to an online craft store of your choice, don't forget to enter my giveaway by clicking here ;o)


Material / supplies:
Stempel / stamps: "Luke" von Kulricke
                              "Sternenkranz" von Charlie und Paulchen
                              "Happy Christmas Background" von Purple Onion Design
Stanzen / dies: "All prettied up" von Mama Elephant

Challenges:
Merry Monday Challenge "Kraft and Red"
Get Creative Challenge "Holidays"
Crafty Friends Challenge "Christmas"
Send a Smile 4 Kids "Happy Holidays 4 Kids"
Simply Create Too "CAS"

Dienstag, 26. September 2017

I'm here - penguin


Halli Hallo ihr Lieben!
Mich auf wenige Farben zu beschränken fällt mir wirklich immer sehr schwer. Dieses Mal wusste ich aber zum Glück recht schnell, was ich für die aktuelle Challenge auf Cards und More machen wollte, als ich dieses Farbschema sah:

Heya my dear crafty friends!
I do have a hard time confining myself to only one or two colours on a card (or anything I create really...). This time however I knew quite quickly what I wanted to make, when I saw the colour scheme for the newest challenge at Cards und More:


Felix mit seinem Friesennerz hatte es mir auf dem Stempelmekka angetan und ich bin so froh, dass er bei mir eingezogen ist, denn ich finde, er ist die perfekte Besetzung für diese Karte. Was meint ihr?

Felix (the penguin) with his coat was one of the stamps I found at the Stempelmekka (a fair in Germany all about stamps). And I am so glad I did find him, because I think he is the perfect image for this card and colour scheme. What do you think?


Coloriert habe ich ihn mit Zig-Markern, bevor ich ihn dann ausgeschnitten und auf den gewischten Wolkenhintergrund geklebt habe. Den Herzregen hatte ich zuvor mit dem Nuvo Embellishment Mousse in Lemon Sorbet auf den Hintergrund aufgetragen.

I coloured the penguin with Zig markers before fussy cutting him out. I glued him on the background piece which I had created using Simon Says Fog Ink and the MFT cloud stencil. I also layered the shower of hearts on top using the Nuvo Embellishment Mousse in Lemon Sorbet.


I hope you are going to join us for this challenge and I am looking forward to seeing your creations - and as always we have a fun prize for the winner. This time it is a surprise sponsored by Elisa! Have a great week and happy crafting, yours Maike ;o)

Material / supplies:
Stempel / stamps: "Felix mit Kostüm" von Kulricke
                              "Get Well Gang" von WPlus9 (sentiment)
Stanzen / dies: "All Prettied Up" von Mama Elephant
                         "Blueprints 29" von My Favorite Things (tag)
Schablone / stencil: "Falling Hearts" von Simon Says Stamp

Challenges:
Simon Says Wednesday Challenge "Pop it up"

Samstag, 16. September 2017

Happy Birthday Birka - Happy Crafty Girls Blog Hop

Halli Hallo ihr Lieben!

 Und ganz besonders hallo Birka,
wenn Du hierher gehopst bist!
Herzlichen Glückwunsch zu Deinem Geburtstag!!!

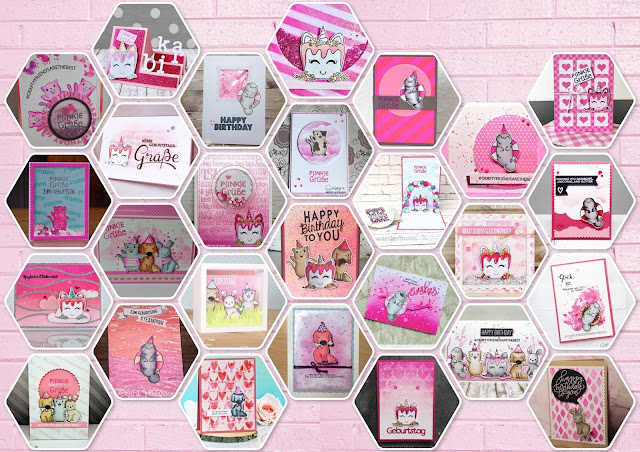
Seit Mooooo-na-ten planen wir eine riesengroße Geburtstagsüberraschung für Birka von "Mit Herz und Schere" - ihr kennt sie und ihre wundervollen Karten sicherlich alle ;o) Wie ihr Blogname ja schon verrät hat sie ein Herz fürs Basteln aber auch und vor allem für die Menschen hinter den Scheren und Blogs. Mittlerweile kenne ich sooo viele liebe, talentierte, tolle, herzliche, wunderbare Menschen und das nur, weil sie uns quasi zusammen geführt hat. Und weil wir alle finden, dass Birka dafür mal ein Mega-Danke verdient hat und wir sie einfach mal so richtig aus den Socken hauen wollten, haben wir alle Birka eine pinke Geburtstagskarte gewerkelt (sie ist absolut #teampink) und für sie und euch einen Blog-Hop daraus gemacht ;o) Das hier ist die Karte, die von mir für Birka in die Post in die Schürzentasche von Jessi von der Stempelbar gehüpft ist ;o)

Heya my dear crafty friends!
Today is a very special day: It is Birka's birthday. Some of you may know her and her awesome cards from her Blog "Mit Herz und Schere" or her Instagram account "Biiirka". Through her I got to know sooo many lovely, talented and wonderful people and we all thought / think that she deserves a huge Thank You and an spectacular surprise for it. Birka absolutely loves pink which is why we all created a pink card for her and organised this Blog-Hop for her and you of course ;o) This is the card I created for her:


Hier findet ihr die Hopser-Reihenfolge:
Here you find the links to all stops from the hop:

Maike (Maikreations) --> Du bist hier / You are here

Und hier schon mal ein kleines Schmankerl für die Augen / And this is a preview for you of what we have in store for you:


Und das Tollste ist, dass ihr auch Mitmachen könnt! ;o) Wie? Ganz einfach. Hüpft einfach zu unserem Blog und stellt dort eine pinke Geburtstagskarte für Birka ein. Insgesamt gibt es 11 Sponsoren, die allesamt ganz wunderbare Preise zur Verfügung gestellt haben! Vielen Dank dafür! Dann gibt es auch noch ein ganz exklusives Stempelset mit den selbstgezeichneten Stempeln von einigen der zeichenbegabten Happy Crafty Friends zu gewinnen ;o) Aber schaut selbst: klick!

And the best thing about it is, that you can join in with the fun! ;o) How? That's easy: Hop to our blog and link up your pink birthday card for Birka. We have 11 generous sponsors who are giving away awesome prizes and you can also win a very exclusive cling stamp set with hand-drawn images by some of our drawing-talented Happy Crafty Friends ;o) But have a look yourself: click!


Falls ihr euch fragt, wie meine Karte entstanden ist, hier ein ganz kurzes Rezept: Den Hintergrund habe ich mit den genialen Embossing Mousses von Nuvo in Peony Pink und Pink Flame hergestellt. Die Mousse ist vielseitig einsetzbar, trocknet super schnell und gibt einen genialen metallischen Schimmer (wie man hoffentlich in den Fotos erahnen kann...). Nach dem Trocknen habe ich in das Papier ein Fenster hineingestanzt und es mit einem Geburtstagswörter-Embossingfolder geprägt. Die Stempel stammen - bis auf die Herzen -aus dem Set, das ihr gewinnen könntet ;o)

In case you are wondering how I made my card, here is a short recipe: I created the background using the awesome Embossing Mousses by Nuvo in Peony Pink and Pink Flame. The mousse can be used in many ways, dries super fast and has this brilliant metallic sheen when it is dry (which I hope you can guess from the pictures...). After everything was dry I die cut the round window from the paper and also embossed it with some cute birthday-words. The stamps I used are mostly from the set that you could win ;o)


Es wäre klasse, wenn ihr Lust und Zeit hättet unsere Überraschung für Birka noch größer zu machen, in dem ihr auch eine pinke Geburtstagskarte bastelst und auf dem Happy Crafty Friends Blog einstellst. Das ist übrigens auch der Weg zu einem Gewinn unserer elf Sponsoren ;o))) * ich erwähns nur noch mal so am Rand ;o) Also ran an den Basteltisch, nachdem ihr vielleicht noch mal mit einem Sektchen oder ähnlichem auf unser Geburtstags"kind" Birka angestoßen habt!

Habt ein Wahnsinns-Wochenende und happy crafting ;o) Eure Maike

It would be brilliant if you would make the surprise even bigger for Birka by creating a pink birthday and linking it to our Happy Crafty Friends blog. This would also be the way to win one of the prizes of our eleven sponsors ;o))) *just saying ;o) So start creating everyone, maybe after you lifted a glass of Prosecco or something like it to our dear birthday girl Birka!

Have an awesome weekend and happy crafting ;o) Yours Maike


Wenn ihr eure Werke auf Instagram zeigt, dann benutzt doch bitte die Hashtags
When you post your creations to  Instagram please use the hashtags

#happycraftyfriends and #birkasbirthdayohp

Material / supplies:
Stempel / stamps: "Exclusive Handdrawn Images Set" by the Happy Crafty Friends
                             (not available to buy - but you could win it or get the Digis here)
                             "Tons of Hearts" von Simon Says Stamp
Stanzen / dies: "Stitched Rectangle Stax" & "Peek-a-Boo Circle Windows"
                          von My Favorite Things
Embossing Folder: "Birthday Embossing Folder" von Taylored Expressions

Donnerstag, 31. Dezember 2015

Stinkin' good New Year

Hallo ihr Lieben!
Am letzten Tag des Jahres habe ich noch einmal passend eine "Happy New Year" Karte für euch! Irgendwie kam mir die englische Phrase "stinkin' cute" in den Kopf, als ich das süße Stinktier gesehen habe und über mehrerer Schleifen, Loopings und Ausflüge in Sackgassen in meinem Hirn ist letztendlich diese Karte entstanden:

Heya my dear friends!
On this very last day of this year I thought I would share anoter "Happy New Year" card with you, with a somewhat unusual sentiment ;o) When I saw this little skunk I thought of the phrase "stinkin' cute" and that led me to the saying on this card:


 Als erstes habe ich immer wieder das Wort "twentysixteen" (zwanzig-sechszehn) auf den Hintergrund gestempelt und es mit den "Wonky Stitches" ausgestanzt. Dann habe ich die Notizblockform zweimal ausgestanzt: einmal aus weißem und einmal aus silber-glitzerndem Papier ausgestanzt. Aus dem weißen Papier habe ich 2 Hügel gestanzt. Auf das schmalere Teil habe ich "New Year" gestempelt und es mit Abstandshaltern auf das silberne Papier geklebt.

I started with stamping the word "twentysixteen" repeatedly to the background piece and cut it out using the "Wonky Stitches" die. Next I die cut the memo pad paper shape from some white and also some silver glitter paper. I cut the white piece down with some stitched hill dies and glued them down on the glitter paper using foam tape for the bottom piece, after stamping the words "New Year".


Den erstes Teil vom Kartenspruch habe ich auf schwarzen Cardstock mit "Opaque Bright White" Embossing Pulver from WOW! embossed und die Enden zu Fähnchen zugeschnitten. Nun musste ich nur noch das süße Stinktier aufstempeln und colorieren und ein paar Glittersterne auf der Karte verteilen.

I heat embossed the sentiment on black cardstock using "Opaque Bright White" embossing powder from WOW! and cut the ends into banner shapes. Now all that was left to do was to stamp and colour this cute skunk and also die cut some glittery stars to scatter them around the card. 


Ich wünsche allen meinen Blogleserinnen und -lesern einen guten Rutsch in ein fabelhaftes, kreatives, entspanntes, wunderschönes, aufregendes und vor allem gesundes Neues Jahr!  

Wishing all my readers a fabulous, creative, relaxing, wonderful, awesome and healthy New Year!

Material / supplies:
Stempel / stamps: "Woodland Cuties" von Your Next Stamp
                           "Jessie's ABCs" von Lawn Fawn
Stanzen / dies: "Memo Pad Card" von Technique Tuesday
                      "Stitched Hillside Borders" von Lawn Fawn
                      "Wonky Stitches" von Avery Elle
                      "Mini Stars" von Simon Says Stamp

Challenges:
Stampavie and more "Something new" (Hope the New Year counts ;o)

Mittwoch, 15. April 2015

Monochrome Card - Inspiration für die Stempelküche Challenge

Hallöchen zusammen!!!
Heute habe ich meine zweite Karte für die Stempelküche Challenge für euch. Das Thema dieses Mal lautet:

Hello everyone!!!
Today I'd like to show you my second card as guest-designer on the Stempelküche Challenge Blog. This coming fortnight's theme is "monochrome".


Aus irgendeinem Grund hat es ziemlich lange gedauert, bis ich mich entschieden hatte, in welche Richtung mein Beitrag gehen sollte. Am Ende habe ich mich für eine sanfte Farbe ("Fresh Peach" von Hero Arts) auf weißem Hintergrund entschieden.

For some reason it took me quite some time to figure out where I wanted to go with my entry. In the end I decided on a soft colour ("Fresh Peach" by Hero Arts) on a white background.


Ich habe verschiedene Muster in Fresh Peach auf weißes Papier gestempelt und diese mit einer 6-Eck-Stanze von Sizzix ausgeschnitten. Danach habe ich die Teile so auf der Kartenbasis arrangiert, dass möglichst keine gleichen Muster nebeneinander lagen. Den ausgestanzten Schmetterling habe ich mit der gleichen Farbe "abgeschwämmt" und nur den Körper auf die Karte geklebt, damit man die Flügel aufstellen kann. Anschließend habe ich drei Mal den Geburtstaggruß ausgestanzt und aufeinandergeklebt, damit es sich noch mehr vom Hintergrund anheben kann. Zum Schluss bin ich über das "happy birthday" mit meinem Wink of Stella Glitterpen drüber gegangen - jetzt schimmert es richtig schön, wenn man die Karte in der Hand dreht.

I stamped a couple of different patterns in "Fresh Peach" on some white cardstock and cut them out using a hexagon die by Sizzix. I then arranged the pieces on my card base, so that no identical pattern lay next to each other and glued the body of the butterfly down. This way you can still lift up its wings to give the card more dimension. I cut out the "happy birthday" word die three times and glued them on top of each other to give the sentiment a little something more and also added my Wink of Stella Clear Glitterpen over it. Now it has this really nice shimmer when you move the card.


Ich hoffe, ihr habt auch Lust bekommen bei der Challenge mitzumachen und meine Karte konnte euch ein wenig inspirieren. Bin gespannt auf eure Werke ;o)

Hope you are going to play along with us for the "monochrome" Challenge and that my card inspired you a bit. I am looking forward to your creations ;o)


Material / supplies:
Stempel / stamps: "Fine Chevron", "Wood Plank" & "Romantic Script" von My Favorite Things
                            "Tiny Stars Background" von Hero Arts
                            "Handcarved" von Stampin Up

Stanzen / dies: "1 1/2" Hexagons for Paper" von Sizzix
                      "Princess Butterfly" von Poppystamps
                      "Happy Birthday Border" von Lawn Fawn


Freitag, 13. März 2015

Happy Birthday (White on white)

Hallo zusammen und einen wunderschönen Freitag euch allen!
Heute möchte ich euch eine elegante weiß-auf-weiß Karte zeigen.

Hello there and happy Friday!!!
Today I would like to show you a very elegant card with a white on white look. 


Als erstes habe ich den Schmetterling, das Tag & das Rechteck ausgestanzt und Letzteres anschließend erst geprägt - so kommt das Muster besser zur Geltung. Danach habe ich nur noch das "Happy Birthday" auf das Tag gestempelt, die Teile aufgeklebt und mit den klaren Sequins den Look abgerundet.

At first I die cut all the pieces that I needed (butterfly, tag and Background panel) and then embossed the panel with this cute garden-scene embossing folder. If you do the embossing before the die cutting you end up squashing the raised areas down a bit... as me how I know... ;o) Now all that was left to do was to stamp the sentiment on the tag, glue all the pieces on the card and scatter a few clear sequins to finish off the card.


Material / supply:
Stempel / stamps: "on edge 3x4" von Simon Says Stamp
                            "Birthday Messages" von Hero Arts

Embossing Folder: "Floral" von Darice

Stanze / die: "Whidbey Butterfly" von Poppystamps


Ich möchte mit dieser Karte an folgenden Challenges teilnehmen:
I would like to enter this card here:


Simon Wednesday Challenge Blog


Freitag, 6. Februar 2015

With Sympathy

Leider werden nicht nur Geburtstags-, sondern auch immer mal wieder Beileidskarten benötigt. Schon seit längerer Zeit habe ich mir mal vorgenommen welche auf Vorrat zu machen, aber das kriege ich irgendwie nicht hin... Anfang der Woche musste ich eine für die Oma einer Freundin machen und wollte sie erst gar nicht hier einstellen. Dann ist mir aber eingefallen, dass ich gerade für Beileidskarten immer Inspirationen von anderen Kartenbastlern brauche um überhaupt anzufangen. Vielleicht geht es euch ja ähnlich??? Nur für den Fall - hier ist mein Ergebnis:

Unfortunately it is not only birthday cards I need, but condolence cards as well. In the past I have often thought that I should make some of those to have them at hand when I need them, but for some reason I never manage to do so... A couple of days ago the grandmother of a friend died and thought long and hard about writing a blog post about it. However, I realized that whenever I need to create a sympathy card I need to look at some of my fellow card makers for some inspiration. Maybe you are the same??? Just in case - here is my card.
Related Posts Plugin for WordPress, Blogger...