Posts mit dem Label Taylored Expressions werden angezeigt. Alle Posts anzeigen

Montag, 7. Mai 2018

Waving Hello Shaker Card

Halli Hallo ihr Lieben!
Für die Crafty Cardmakers und das Thema "Kein Designpapier" habe ich folgende Karte gewerkelt: 

Heya my dear crafty friends!
I created this card for the Crafty Cardmakers and the new challenge theme "No Patterned Paper":


Zuerst habe ich die Hillside Cover Die ausgestanzt und diese mit Distress Oxide Inks und der Hilfe meiner wundervollen Stencil Brushes eingefärbt. Für den Grund habe ich Vintage Photo und für das Wasser Salty Ocean und Peacock Feathers benutzt. Als nächstes habe ich dann alle Unterwasserlebewesen mit Memento auf Copic freundliches Papier gestempelt und mit eben solchen dann coloriert. Die meisten von ihnen habe ich um das ebenfalls gestempelte Sentiment herum direkt aufgeklebt, nur eine Qualle und ein Büschel Seegras habe ich für später zur Seite gelegt.

I had started by die cutting the Hillside Cover die and did some ink blending with Distress Oxide Inks using Stencil Brushes to get a lighter result than if I had used the foam blending tool. For the ground I used Vintage Photo and for the water Salty Ocean and Peacock Feathers. Next I stamped all images with Memento Ink and coloured them using Copic markers. I glued most the elements directly to the hill piece around the stamped sentiment, except for one jelly fish and a bit of sea grass.


Die beiden wollte ich nämlcih auf die Folie des Shakers kleben um noch etwas mehr Tiefe zu erzeugen. Dank des rechteckigen Rahmens war der Shakerteil leicht herzustellen. Zuerst habe ich eine zurechtgeschnittene Folie mit Scor Tape festgeklebt und dann doppelt gelegtes Foamtape komplett außen herum geklebt. In diese Vertiefung habe ich die Pailletten geschüttet und anschließend habe ich den Wasserhintergrund aufgeklebt - natürlich verkehrt herum, damit man ihn später durch die Folie sehen kann und nicht die etwas unansehnlichere Rückseite davon. Auf die habe ich ebenfalls großzügig Scor Tape geklebt und den Shaker so auf der Kartenbasis befestigt.

I wanted them to go on the front of my shaker to create even more dimension. The shaker was quick to make thanks to this rectangle frame to which I added a piece of acetate with very strong Score Tape and a double layer of foam adhesive. Next I added the shaker pieces, removed the protective foil from the adhesive and glued the water piece to it upside down. Using Score Tape again I then added that piece to my card front and also glued the two missing elements to the outside of the shaker.
 
Damit sollte meine Karte eigentlich fertig sein, aber das weiße Stück Papier, das ich innen heineingeklebt hatte, war mir irgendwie zu grell und zu langweilig gleichzeitig... Also habe ich den Tintenfisch noch einmal in lila gestempelt und für einen sanfteren Look mit Buntstiften coloriert. Mit dem Thema "Wasser" kann man echt viel anstellen finde ich und deshalb würde ich mich sehr freuen, wenn ihr nun auch Lust habt dazu etwas zu kreieren und mit uns zu teilen. Habt eine schöne Woche und happy crafting, wünscht euch eure Maike ;o)

My card could have been done at that point, but I felt, that the inside was too white against the purple so I decided to add another octopus to the inside. This one was coloured with coloured pencils to give it a softer look. There is so much you could create to follow our "Water" theme and I would love to see your creation in our gallery, so why not get crafty?! Have a great week and happy crafting, yours Maike ;o)

Material / supplies:
Stempel / stamps: "Octopi my Heart" & "So Jelly" von Lawn Fawn
                             "Little Mermaids" von The Greeting Farm
Stanzen / dies: "Hillside Cover" von Mama Elephant
                        "Build a Scene - Underwater" von Taylored Expressions

Dienstag, 10. April 2018

Congratulations Mermaid


Halli Hallo ihr Lieben!
Bei der Papercraft Challenge startet heute eine neue Aufgabe für euch. Dieses Mal haben wir ein Bingofeld für euch:

Heya my dear crafty friends!
Over at the Papercraft Challenge blog we have a whole new task for you. This time we have a bingo for you:
http://papercraft-challenges.blogspot.de/2018/04/challenge-009-bingo.html

Ich habe mich für die mittlere Zeile entschieden, wobei ich bei den vielen kleinen Fischmotiven sagen würde, dass auch die Diagonale von oben links nach unten rechts funktionieren würde, oder was meint ihr?

I decided to go with the middle row, but with all the tiny fish images on the card I'd daresay the diagonal going from the top left to the bottom right would have worked too. Would you agree?


Zuerst habe ich, um diese Karte zu machen, eine ganze Menge Elemente gestempelt und mit Copics coloriert.  Es sollte nämlich eine richtig schöne Szene werden und daher wusste ich, dass ich viele Fische neben der Meerjungfrau brauchen würde. Als nächstes habe ich den Hintergrund mit den Distress Oxide Inks in den Farben "Blueprint Sketch", "Salty Ocean" und "Peacock Feathers" direkt auf die Front meiner Kartenbasis aufgetragen und nach dem Trocknen geprägt. Damit der Bereich in der Mitte glatt bleibt habe ich einen Embossing Diffuser von Tim Holtz benutzt. Um den Bereich noch ein wenig mehr herauszustellen habe ich einen Ring aus weißem Papier ausgestanzt und darauf den Spruch gestempelt, bevor ich ihn mit Abstandspads aufgeklebt habe.

To create this card I first stamped and coloured a lot of underwater images, because I wanted to create a little scene. Next I used an ink blending tool and Distress Oxide Inks in "Blueprint Sketch", "Salty Ocean" and "Peacock Feathers" to create the background directly on the front of the card base. I used an Embossing Diffuser by Tim Holtz to leave the circle in the middle without texture. In order to highlight that section I die cut a huge circle frame from white paper and before adding it to the card using foam tape stamped the sentiment on it.


Alles, was nun noch zu tun war, war die vorher colorierten Elemente zu einer Szene zu arrangieren und sie festzukleben. Da auf der Karte schon ziemlich viel los ist, habe ich mit den "Clear Droplets" von Pretty Pink Posh nur dezente Embellishments hinzugefügt. Falls ihr übrigens auch kein Fan von glänzenden Kleberückständen seid, empfehle ich euch speziell für diese Tropfen das "Multi Matte Medium" von Ranger. Da es matt trocknet sieht man von kleinen Fehlerchen fast gar nichts. Ich hoffe, euch gefällt meine Karte und ihr macht mit bei unserer Bingo-Challenge! Habt eine großartige Woche und happy crafting ;o)
Now all that was left to so was to arrange all the previously coloured images and glue them on. Because there was quite a lot going on already I only used a few clear "Clear Droplets" by Pretty Pink Posh to embellish my card. If you want to avoid shiny glue marks on your card I highly recomment using "Multi Matte Medium" by Ranger. It dries matte so even if something spills out from under the droplets you can't see it once it is dry. I hope you like my card and that you will join us for our Bingo-Challenge! Have an amazing week and happy crafting ;o)

Material / supplies:
Stempel / stamps: "Little Mermaids" von The Greeting Farm
Stanzen / dies: "Blueprints Set" von My Favorite Things (discontinued?)
Embossing Folder: "Bubbles" von Taylored Expressions

Challenges:

Samstag, 16. September 2017

Happy Birthday Birka - Happy Crafty Girls Blog Hop

Halli Hallo ihr Lieben!

 Und ganz besonders hallo Birka,
wenn Du hierher gehopst bist!
Herzlichen Glückwunsch zu Deinem Geburtstag!!!

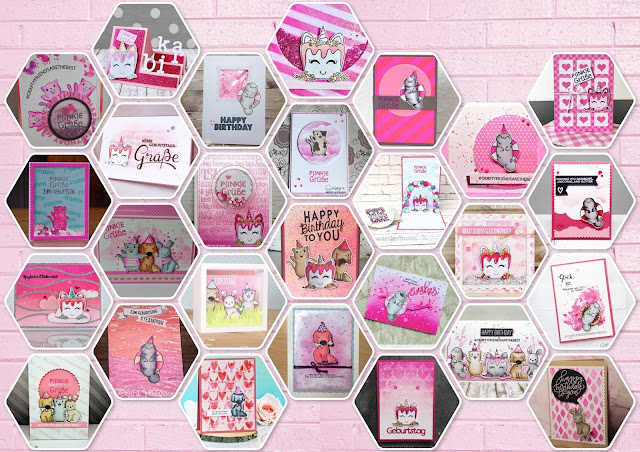
Seit Mooooo-na-ten planen wir eine riesengroße Geburtstagsüberraschung für Birka von "Mit Herz und Schere" - ihr kennt sie und ihre wundervollen Karten sicherlich alle ;o) Wie ihr Blogname ja schon verrät hat sie ein Herz fürs Basteln aber auch und vor allem für die Menschen hinter den Scheren und Blogs. Mittlerweile kenne ich sooo viele liebe, talentierte, tolle, herzliche, wunderbare Menschen und das nur, weil sie uns quasi zusammen geführt hat. Und weil wir alle finden, dass Birka dafür mal ein Mega-Danke verdient hat und wir sie einfach mal so richtig aus den Socken hauen wollten, haben wir alle Birka eine pinke Geburtstagskarte gewerkelt (sie ist absolut #teampink) und für sie und euch einen Blog-Hop daraus gemacht ;o) Das hier ist die Karte, die von mir für Birka in die Post in die Schürzentasche von Jessi von der Stempelbar gehüpft ist ;o)

Heya my dear crafty friends!
Today is a very special day: It is Birka's birthday. Some of you may know her and her awesome cards from her Blog "Mit Herz und Schere" or her Instagram account "Biiirka". Through her I got to know sooo many lovely, talented and wonderful people and we all thought / think that she deserves a huge Thank You and an spectacular surprise for it. Birka absolutely loves pink which is why we all created a pink card for her and organised this Blog-Hop for her and you of course ;o) This is the card I created for her:


Hier findet ihr die Hopser-Reihenfolge:
Here you find the links to all stops from the hop:

Maike (Maikreations) --> Du bist hier / You are here

Und hier schon mal ein kleines Schmankerl für die Augen / And this is a preview for you of what we have in store for you:


Und das Tollste ist, dass ihr auch Mitmachen könnt! ;o) Wie? Ganz einfach. Hüpft einfach zu unserem Blog und stellt dort eine pinke Geburtstagskarte für Birka ein. Insgesamt gibt es 11 Sponsoren, die allesamt ganz wunderbare Preise zur Verfügung gestellt haben! Vielen Dank dafür! Dann gibt es auch noch ein ganz exklusives Stempelset mit den selbstgezeichneten Stempeln von einigen der zeichenbegabten Happy Crafty Friends zu gewinnen ;o) Aber schaut selbst: klick!

And the best thing about it is, that you can join in with the fun! ;o) How? That's easy: Hop to our blog and link up your pink birthday card for Birka. We have 11 generous sponsors who are giving away awesome prizes and you can also win a very exclusive cling stamp set with hand-drawn images by some of our drawing-talented Happy Crafty Friends ;o) But have a look yourself: click!


Falls ihr euch fragt, wie meine Karte entstanden ist, hier ein ganz kurzes Rezept: Den Hintergrund habe ich mit den genialen Embossing Mousses von Nuvo in Peony Pink und Pink Flame hergestellt. Die Mousse ist vielseitig einsetzbar, trocknet super schnell und gibt einen genialen metallischen Schimmer (wie man hoffentlich in den Fotos erahnen kann...). Nach dem Trocknen habe ich in das Papier ein Fenster hineingestanzt und es mit einem Geburtstagswörter-Embossingfolder geprägt. Die Stempel stammen - bis auf die Herzen -aus dem Set, das ihr gewinnen könntet ;o)

In case you are wondering how I made my card, here is a short recipe: I created the background using the awesome Embossing Mousses by Nuvo in Peony Pink and Pink Flame. The mousse can be used in many ways, dries super fast and has this brilliant metallic sheen when it is dry (which I hope you can guess from the pictures...). After everything was dry I die cut the round window from the paper and also embossed it with some cute birthday-words. The stamps I used are mostly from the set that you could win ;o)


Es wäre klasse, wenn ihr Lust und Zeit hättet unsere Überraschung für Birka noch größer zu machen, in dem ihr auch eine pinke Geburtstagskarte bastelst und auf dem Happy Crafty Friends Blog einstellst. Das ist übrigens auch der Weg zu einem Gewinn unserer elf Sponsoren ;o))) * ich erwähns nur noch mal so am Rand ;o) Also ran an den Basteltisch, nachdem ihr vielleicht noch mal mit einem Sektchen oder ähnlichem auf unser Geburtstags"kind" Birka angestoßen habt!

Habt ein Wahnsinns-Wochenende und happy crafting ;o) Eure Maike

It would be brilliant if you would make the surprise even bigger for Birka by creating a pink birthday and linking it to our Happy Crafty Friends blog. This would also be the way to win one of the prizes of our eleven sponsors ;o))) *just saying ;o) So start creating everyone, maybe after you lifted a glass of Prosecco or something like it to our dear birthday girl Birka!

Have an awesome weekend and happy crafting ;o) Yours Maike


Wenn ihr eure Werke auf Instagram zeigt, dann benutzt doch bitte die Hashtags
When you post your creations to  Instagram please use the hashtags

#happycraftyfriends and #birkasbirthdayohp

Material / supplies:
Stempel / stamps: "Exclusive Handdrawn Images Set" by the Happy Crafty Friends
                             (not available to buy - but you could win it or get the Digis here)
                             "Tons of Hearts" von Simon Says Stamp
Stanzen / dies: "Stitched Rectangle Stax" & "Peek-a-Boo Circle Windows"
                          von My Favorite Things
Embossing Folder: "Birthday Embossing Folder" von Taylored Expressions
Samstag, 24. Juni 2017

Happy Birthday card for a dog lover ;o)

Halli Hallo ihr Lieben!
"Katzen und Hunde" sind das neuste Thema von Challenge Up Your Life. Wer meinen Blog schon länger kennt, hätte jetzt sicher eine Katzenkarte erwartet, oder? Aber genau weil ich sonst so häufig meine Katzenstempel heraussuche, habe ich mich dieses Mal für die niedlichen Hunde entschieden ;o)

Heya my dear friends!
"Cats and Dogs" are the new challenge theme over at Challenge Up Your Life. If you know my blog, you will certainly have anticipated that I'd be using cats, am I right? But because I tend to use my cat stmaps far more often than any others anyways I thought I would use the cute dogs this time.;o)


Als erstes habe ich die Szene mit den Hunden gestempelt und mit Copics coloriert. Ich habe mir vorgestellt, dass sie in ihrem Lieblingspark sind, um ein Gruppenfoto für ihren Kumpel zu machen, der bald Geburtstag hat. Manchmal denke ich wirklich komische Sachen ;o) Als nächstes habe ich den Polaroidrahmen aus gemustertem und noch mal aus schwarzem Papier ausgestanzt. So konnte ich den schwarzen Rahmen mit einer quadratischen Stanze noch einmal zurechtschneiden und hatte die perfekte Größe inklusive der leicht abgerundeten Ecken innen.

I started by colouring the scene with the dogs. I imagined them being in their favourite park and taking a group picture for their friend whose birthday is coming up. Sometimes I do think strange things ;o) Next I die cut the polaroid frame from patterned paper and also one from black. That way I could die cut it again with a square die and have the perfect size and kept those slightly rounded edges on the inside.


Als nächstes habe ich den Spruch mit weißem Pulver auf rotes Papier embossed und beide Enden schräg abgeschnitten. Nachdem ich alle Einzelteile zu einem zusammengefügt hatte, habe ich sie auf die Kartenbasis geklebt, auf die ich zuvor noch ein geprägtes Stück Papier aufgeklebt hatte. Ich liebe die süßen Embossing Folder von Taylored Expressions. Ich wünschte mir allerdings, dass sie (und so manch anderer Hersteller auch) die Folder so designen würden, dass man auch eine Top-Folding-Kartenbasis direkt prägen könnte. Bis jetzt kenne ich das nur von Stampin Up, glaube ich. Kennt ihr vielleicht noch andere?

Next I white embossed the sentiment on a red strip of cardstock and cut both ends to an angle. After I assembled all the pieces I glued them to a card base that I had stuck a dry embossed piece of white paper on. I love those really cute folders by Taylored Expressions. I just wished they (and many other companies) would design their folders so that you could insert your top-folding cardbase and dry emboss that, rather than having to use yet another piece of paper stuck onto your card. I have only ever see that with Stampin Up folders I think. Do you know any other manufactures that make them that way?


Ich freu mich wirklich über das Endergebis. Es ist außerdem eine Karte, die auch für Männer geeignet ist ohne überwiegend blau oder grau zu sein und ich musste nicht auf meine süßen Viehchers verzichten. (Ihr erkennt sicherlich, ich brauchte dringend Männer-Geburtstagskarten *grins) Viel Spaß beim Basteln ;o)

I am really happy about how this card turned out. It is a male card without using blues or greys and omitting my cute critters. (You might have guessed, that I am in desperate need of some male birthday cards *grin) Happy crafting, everyone ;o)

Material / supplies:
Stempel / stamps: "BB Lucky Dog" von My Favorite Things
Stanzen / dies: "LLD - Insert it - InstaFrame" von My Favorite Things
                         (retired, but I linked some other Polaroid dies for you here and here)
                         "Stitched Squares Wafer" von Simon Says Stamp
Embossing Folder: "Graphic Impressions - birthday" von Taylored Expressions

Samstag, 10. Dezember 2016

Christmas Series Card #18 / Weihnachtsserie Karte #18 (Yeti sending Hugs)

Halli Hallo ihr Lieben!
Ab heute möchten wir vom Challenge Up Your Life Team Projekte mit "Transparentpapier" von euch sehen. Ich habe mich für eine eher winterliche Szene entschieden, weil das Vellum klasse geeignet dafür ist.

Heya my dear crafty friends!
Today's challenge at the Challenge Up Your Life blog asks for "Vellum" being part of your project. For my inspiration card I decided on a witery scene, because I thought that Vellum would work well for that.

Als erstes habe ich den Yeti, seinen Schal und eine Reihe Tannenbäume gestempelt, sie mit Copics coloriert und dann ausgeschnitten. Als nächstes habe ich ein Rechteck aus Glitterpapier und ein weiteres, etwas kleineres aus weißem Papier ausgeschnitten. Das Letztere wurde dann noch 2 Mal durch die Big Shot gejagt: einmal, um die Fenster auszuschneiden und ein weiteres Mal, um die Schneeflocken zu embossen.

I started by stamping and colouring the Yeti, his scarf and a bunch of trees, coloured them with Copics and fussy cut them out. Next I cut a rectangle from some glitter paper and one slightly smaller oone from white paper. The latter was sent through the Big Shot twice: once to die cut the windows and the next time to dry emboss the snow on there. 


Als nächstes habe ich das Transparentpapier hinter die Fenster geklebt und ich muss euch sagen, das sieht wirklich klasse aus mit all dem Glitzergedöns dahiner. Leider habe ich es nicht geschafft, den Effekt auf einem Foto sichtbar zu machen. Aber ich hoffe, ihr probiert es zu Hause auch einmal aus und vielleicht findet ihr den Effekt ja auch so klasse wie ich... Den Spruch habe ich mit StazOn Jet Black Ink auf das Transparentpapier gestempelt und dann alles zusammengeklebt. Ich würde mich freuen, wenn ihr eure Vellum-Projekte mit uns bei CUYL teilen würdet ;o) Habt ein wunderschönes Wochenende ;o)

My next step was to glue some Vellum behind the windows and I have to tell you, it looks awesome, when you tilt it in the light, with the glitter behind it. Unfortunately I wasn't able to catch the effect on camera. I am hoping that you will give it a try at home and maybe you'll like the effect as much as I do... I stamped the greeting on the vellum using StazOn Jet Black Ink and glued everything together. I hope you'll join us and show us your "Vellum" projects on CUYL ;o) Happy weekend, everyone ;o)


Material / supplies:
Stempel / stamps: "BB Beast Friends" von My Favorite Things
Stanzen / dies: "Stitched Triple Peek-a-Boo Windows" von My Favorite Things
Embossing Folder: "Snowfall" von Taylored Expressions

Challenges:

Mittwoch, 10. Februar 2016

Happy happy happy Day

Huhu ihr Lieben!
Bei all dem Regen zieht mich irgendwie gar nichts nach draußen... Wie geht es euch da? Seid ihr taff und zieht euch passend an oder nehmt ihr es - wie ich - als Ausrede um stundenlang am Basteltisch zu werkeln? Mit viel Zeit an meinem Schreibtisch und inspiriert durch den Guest Designer Call von Gerda Steiner habe ich gestern diese Karte fertiggestellt:

Heya my dear friends!
It is constantly raining here where I live, so I do not feel the urge to go outside... How about you? Are you the type to wear appropriate clothes and go outside regardless of the rain or is bad weather a great excuse - just as it is for me - to stay at home and craft? Because of a lot of time at my desk and inspired by the guest designer call from Gerda Steiner Designs I made this card:


Als erstes habe ich die Ränder abgeklebt, um den Steifen in der Mitte im Ombre Look einzufärben. Dazu habe ich mein Ink Blending Tool und Distress Inks in den Farben "Worn Lipstick" und "Spun Sugar". Als nächstes habe ich dann die Ränder mit einem Embossing Folder geprägt. Ich finde den Effekt total schön - es gibt der Karte in meinen Augen auch einen ziemlich professionellen Touch.

First I masked off the edges and used a blending tool to create an Ombre-look with Distress Inks. I used "Worn Lipstick" and "Spun Sugar". The next step was to dry emboss the areas to either sides of the coloured strip. I love the effect that gives - makes the card look really professional in my opinion.


Die beiden süßen Katzen habe ich mit Memento Jet Black gestempelt und mit Copics coloriert. Da ich noch ein bisschen mehr Tiefe auf der Karte haben wollte, habe ich den Spruch in weiß auf ein Transparentpapier embossed, das ich vorher schon in Fahnenform ausgestanzt hatte. Dieses Fähnchen habe ich dann an eine Leine aus Bakers Twine "gehängt".

I stamped the two cute cats in Memento Jet Black ink and coloured them using Copic markers. Because I wanted a little bit of dimension for my card I decided to heat emboss the sentiment on a vellum flag that I had die cut previously. I "hung" this flag on a string of bakers twine using some Tombow Mono Multi glue. 


Material / supplies:
Stempel / stamps: "Playful Kitten" von Gerda Steiner Designs
                             "Birthday Wishes" von Pink and Main
Embossing Folder: "Graphic Impressions - Birthday" von Taylored Expression

Montag, 8. Februar 2016

Great chemistry love card

Hallöchen ihr Lieben!
Ich hoffe, ihr hattet ein wunderbares Wochenende! Ich habe dieses Wochenende mal den Basteltisch gegen den Zoo und eine interaktive Ausstellung zu verschiedenen Arbeitsfeldern getauscht und ich muss sagen, meine Füße freuen sich heute noch mehr aufs Basteln als ich ;o) Für den Start der neuen "Crafty Cardmakers" Challenge zum Thema "Love, love, love" habe ich diese Karte hier macht:

Heya my dear crafty friends!
I hope you had a wonderful weekend! I have been to a really nice zoo on Saturday and visited an interactive exhibition, that showed many interesting things regarding different fields of work. It was quite a lot of fun, but let me tell you, my feet are now wuite happy to be back at my craft table ;o) For the start of the new "Love, love, love" challenge over at the "Crafty Cardmakers" I made this card:


Zuerst habe ich die Kolben in Regenbogenfarben auf mein weißen Papier gestempelt. Dazu habe ich das Misti benutzt, damit der Abstand vom unteren Rand immer der gleiche blieb und die Abstände zwischen den Gefäßen auch nicht zu sehr abwich. Aus dem bestempelten Papier habe ich dann das Wort "love" ausgestanzt und noch drei Mal aus grauem Papier.

First I stamped the flasks in rainbow order on a white panel. I have used the Misti for the stamping this time, because I wanted to make sure, that the images would all be the same distance from the bottom part of the panel and have would also have an equal distance between them. Next I die cut the word "love" from the stamped piece and die cut it three more times from some grey cardstock.


Die 4 Stanzteile habe ich zusammen- und dann wieder an die richtige Stelle auf der Karte geklebt. So erhält man einen wie ich finde ziemlich coolen Schatteneffekt, der das Stanzteil betont, ohne etwas von dem Gestempelten wegzunehmen.Wichtig ist nur, dass man die Innenteile der Buchstaben behält und gut drauf aufpasst, damit man sie schlussendlich wieder hinzufügen kann. Um mir etwas Arbeit zu ersparen, klebe ich ein Stück Papier hinter das Loch vom Stanzteil, das komplett mit Kleber bedeckt ist. So kann ich alles einfach hinlegen und festdrücken und muss nicht noch auf die winzigen Teile Klebstoff aufbringen. Bei mir funktioniert es meistens ganz gut ;o)

After I had glued all four pieces together, I put the word love back where it belongs. This way you get a really cool shadow effect, that emphazises the die cut piece, without taking away from the stamped or coloured piece. Just make sure to keep all the itty bitty parts from the first die cut, so that you can put them back to complete the scene once you have glued the stacked piece down. To save me some grief I usually back the die cut area with a piece of paper that I have fully covered with adhesive. It makes the "putting everything back where it belongs" part a lot quicker and easier for me ;o)


Zum Schluss habe ich noch den Spruch auf den grauen Cardstock weiß embossed, den ich auch als Kartenbasis benutzen wollte, hab das Papier zugeschnitten und eine falsche Zickzack-Naht am Rand zugefügt. Danach habe ich das weiße Papier mit Abstandshaltern auf die Kartenbasis aufgeklebt und die Karte war fertig ;o)

Last I added a sentiment to the upper left of the card, which I have cut into a banner shape and added some 
decorative faux stitching to. After I had put the panel on some foam tape and added it to the card base, my card was done. ;o)


Material / supplies:
Stempel / stamps: "Love is the solution" von Taylored Expressions
Stanzen / dies: "Scripty love" & "Stitched Borders" von Lawn Fawn

Mittwoch, 2. Dezember 2015

Christmas Series Card # 12 / Weihnachtsserie Karte # 12 (Winterberry in the City)

Hallo ihr Lieben!
"Winterberry" ist dieser niedliche Schneemann aus der Stacey Yacula Serie von Purple Onion Designs und mit ihm wollte ich eine eher untypische Schneemannszene gestalten. Heraus kam diese Karte:

Hello my dear crafty friends!
"Winterberry" is this very cute snowman from the Stacey Yacula series over at Purple Onion Designs. I wanted to create a rather non typical snowman scene with him and this is what came out of it:


Als erstes habe ich die Stadt mit schwarzer Tinte auf den grauen Kartenrohling gestempelt und einen Schneehügel aus Transparentpapier zurechtgeschnitten, auf den ich meinen Spruch "Holiday Wishes" ("Weihnachtsgrüße") stempeln konnte. Dazu habe ich Versamark benutzt und weißes Zing!-Embossingpulver von American Crafts. (Ihr werdet feststellen, dass es im Vergleich zu den Schneeflocken leider nicht wirklich weiß ist -also würde ich vermutlich eher zu einem anderen Pulver tendieren, wenn ich die Karte ein zweites Mal machen würde...) 

First I stamped the city scape of London on my grey card base using black ink and I cut a snowy hill from vellum big enough so that I could stamp my sentiment on it. I have used some Versamark Ink and white Zing!- embossing powder by Amercian Crafts. (You might have noticed already that the sentiment isn't really white compared with the snowflakes - so if I ever made another card like this I would definately try a different embossing powder...)


Als nächstes habe ich den Schneemann in Memento "Gray Flannel" gestempelt, mit Copics ausgemalt und ausgeschnitten, damit ich ihn schon mal als Platzhalter auf die Karte legen konnte. Die ausgestanzten Schneeflocken habe ich dann um ihn herum verteilt und nachdem ich mit der Platzierung zufrieden war aufgeklebt. Zum Schluss habe ich "Winterberry" mit Abstandshaltern auf die Karte geklebt.

Next I stamped the snowman in Memento "Gray Flannel", coloured him with Copics and fussy cut him out. I put him down on my card, so that I would know exactly where he would go in the end and placed the snowflakes all around him. When I liked where they wer placed I glued them down using Multi Medium Matte from Ranger and also added "Winterberry" to the card with some foam tapes.


Mit Winterberry ist nun bereits die Hälfte der Weihnachtsserie um - kaum zu fassen, wie schnell das nun ging... Hoffe, ich habe euch auf dem Weg bis hierher schon ein bisschen inspirieren können :o)
Eine wunderschöne und kreative Adventszeit wünscht euch
eure Maike :o)

This card with Winterberry marks the end of the first half of the Christmas Series - can't believe how quickly time went by. I hope I was able to inspire you or give you a good tip along the way so far ;o)
Have a wonderful and creative Advent season,

yours Maike :o)

Material / supplies:
Stempel / stamps: "Winterberry" von Purple Onion Designs
                           "Tim Holtz Cityscapes Stamp Set" von Stampers Anonymous
                           "Simply Stamped - Pinecones" von Taylored Expressions
Stanzen / dies: "Mini Snowflakes" von Lawn Fawn

Colouring: Copics BG18, BG15, BG13, BG32
                            R85, R83, R81
                            YR07, YR16, Y38,
                            E27, E25, E23

Samstag, 3. Oktober 2015

Herbstliche Merci-Verpackung / Autumnal chocolate gift box


Halli Hallo ihr Lieben!
Heute habe ich einen ganz besonderen Post für euch. Einerseits zeige ich euch heute mal eine kleine Geschenkbox in der man eine Kleinigkeit an einen lieben Menschen verschenken kann und zum anderen darf ich euch nun mitteilen, dass ich für die kommenden zwei Monate Gastdesignerin für den "Challenge Up Your Life" Blog sein darf ;o))) Ich freu mich wirklich sehr und hoffe, euch gefällt mein erster Beitrag!

Unser Banner zum Mitnehmen
Hello dear crafty friends!
Today I have a special post for you! On the one hand I am not going to show you a card today, but a little box that fits a small treat for someone very nice and on the other hand I can share with you some fantastic news: I am going to be the guest designer over at the "Challenge Up Your Life" blog for the next two months. ;o)))) I am really very excited and hope you'll like my first submission!


Zuerst habe ich mir einen "Schlachtplan" zurechtgelegt, um vier Merci-Schokoladenriegel in einer hübschen Box verpacken zu können. Dazu habe ich ausgemessen, wie viel Platz 4 Schokoriegel nebeneinander benötigen und mit diesen Angaben dann den Rohling für meine Box zurechtgeschnitten und -gefalzt. Das Papier muss auf die Größe 5 1/4" auf 10 3/4" geschnitten und dann so gefalzt werden, wie ihr es auf dem folgenden Bild seht. Achtung: Gefalzt wird nur bei den gepunkteten Linien - die Linie, an der die Maße stehen wird nicht gefalzt.

First I needed to make a plan for my box. I wanted to insert 4 chocolate bars called "Merci" to it, so I measured out how much space they needed. The paper for this box needs to be cut to 5 1/4" by 10 3/4" and then you need to score them like you can see in the following picture. Attention: You only need to score where you see the dotted line - the line with the measurements is no score line.
Als nächstes muss einiges weggeschnitten werden. Was übrig bleibt seht ihr hier:

Next you need to cut off a bit of you paper. In the following picture you see what your paper should look like after you cut out what isn't needed:

Nun muss die Box noch zusammengeklebt werden. Falls ihr - wie ich - ein Sichtfenster integrieren möchtet ist das jetzt der Zeitpunkt gekommen, aus dem ganz rechten Quadrat eine Form eurer Wahl herauszuschneiden. Um das Ahornblatt auch durch das Designerpapier an der richtigen Stelle zu stanzen, habe ich vor dem Ausstanzen das gemusterte Papier mit einem wieder ablösbaren Kleber vorübergehend befestigt und das ganze dann durch meine Big Shot gejagt. Bevor ich die Box endgültig zusammengeklebt habe, habe ich die Plastikfolie dazwischengeklebt, alle anderen Papiere aufgeklebt und die Innengestaltung der Box erledigt. Ich erwähne das hier, weil die Box auf dem Foto bereits die zweite ist, die ich fertiggestellt habe, weil ich nämlich die Folie vergessen hatte und es wirklich schwierig war, die Musterpapiere anständig aufzukleben.

Now the paper needs to become a box ;o) If you would like to have a window in your box, like I did, now is the time to cut it out of the square on the right. In order to have the acorn leaf at the right space in both the box and the patterned paper I glued the designer paper down temporarily and sent both through my Big Shot. Before I put the box together I glued the acetate between the box and the patterned paper, added the paper for the lid and also stencilled in the acorns. I am saying this here, because the box you see in the picture is actaully the second one I made, because I had forgotten the acetate and also the paper on the front. 


Zum Schluss habe ich nur noch den Streifen mit dem "just a little something" ("nur eine Kleinigkeit") hinzugefügt und dem dem Fuchs mit "Walnut Stain" einen Hügel angedeutet und ihn darauf geklebt. Der Fuchs ist übrigens eine Stanze, die ich mit Copics coloriert habe. Den Körper habe ich dafür 3 Mal ausgestanzt, um ihn ein wenig stabiler zu machen.

All that was left to do now was to glue down the sentiment strip "just a little something", colour in an area for the fox something to stand on and glue him down. The fox is made from a die cut which I have coloured using my Copic markers. I die cut the body three times to give it more thickness and make it more sturdy. 


Material / supplies:
Stempel / stamps: "Woodland Gifts" von Mama Elephant

Stanzen / dies: "Fox Item #TE497" von Taylored Expressions
                       "Decorative Edges Shallow" von Clearly Besotted
                       "Stitched Leaves" von Lawn Fawn

Designer Paper: "Sweater Weather 6x6 Pad" von Lawn Fawn

Coloring: Copics (E99, E97, E37, R20, E51, E53)
Related Posts Plugin for WordPress, Blogger...