Posts mit dem Label Window Card werden angezeigt. Alle Posts anzeigen

Dienstag, 25. August 2020

Hay Chick


Hay everyone ;o)
Every second Tuesday is very PINspirational - or so I find ;o) We have a new challenge for you over at PINspirational Challenges today and this is the inspiration picture:


I love the chicken images I have by Purple Onions Design, so I immediatly thought of them when I saw this picture. I started my card with the die cutting part (rectangle and next the peek-a-boo windows) to have an inkling on where I would have to place the images I wanted to use. I had cut a piece of Copic friendly paper to size and made sure you could still see what I wanted to be visible when I placed the window piece back on top - I hope that makes sense ;o)


When I had the scene stamped and coloured I added the sentiment "HAY CHICK" with letter stickers by Create A Smile Stamps in yellow and light green and also that cute little chick and then used foam tape to pop the panel up. Lastly I added the speech bubble, just to add another fun element to the card.In order to really draw the eye towards the chicks I decided to use a yellow panel under the blue one as well and that finished my card. I hope you like it and that the chickens or anything elso in the picture inspires you to create a card or other crafty project. If so I would love to see it in our gallery at PINspirational Challenges. 


Supplies:
Dies: "Peek-A-Boo Windows" by My Favorite Things (discontinued)

If you like the images, maybe you like this card as well:


Challenges:

Freitag, 1. Mai 2020

Tippe Tappe - a card for a vet

Heya everyone,
I hope you are all doing good and that crafting or other hobbies, people, phone-calls, ... help you through this strange time. Challenge Up Your Life's new theme for the month of May is "Animals", so I am hopeful our gallery will overflow with your lovely projects at the end of the month ;o) This is my inspiration card:


A friend of mine needed a card for a vet who had opened their own office (or is it clinic?) and I had so much fun making this one for her. This is the front of the card and I wanted it to look like you were looking through the windows into the office. 


Though the windows you can only see the dog and the cat, but when you open the card...


...you will find a few more animals as well. The card can be opened one more time to give room for a text and - as I understood it - loads of signatures from friends to wish the vet good luck. I hope you like the card and I hope even more that you will link an "Animal" themed project to our gallery at Challenge Up Your Life for us to see! ;o) Please take care everyone and happy crafting, yours Maike


Dienstag, 13. März 2018

Happy Birthday Wild Thing


Halli Hallo ihr Lieben!
Ab heute gibt es eine neue Challenge bei Pinspirational und dies hier ist unser niedliches Inspirationsbild für euch:

Heya my dear crafty friends!
Today is the start of a new PINspirational challenge and this is the cute inspiration picture we have for you this time:

http://pinspirationalchallenges.blogspot.de/2018/03/pinspirational-challenge-211.html

Ihr habt sicherlich keine Schwierigkeiten zu erkennen, wo ich die Inspiration für meine Karte her habe, oder? Dieses schwingende Äffchen hat mich sofort an einen Stempel erinnert, den ich von Clearly Besotted habe und der schon lange einmal auf eine Karte wollte ;o) Ich habe ihn auf Copic-freundliches Papier gestempelt und mit den E70er und E50er Stiften coloriert, bevor ich ihn maskiert und den blauen Himmel mit Salty Ocean Distress Oxide Ink gewischt habe. Für den Löwenkörper habe ich die YR20er-Serie benutzt und finde, das gibt ein richtig schön passenden Farbton. Seine Mähne ist ebenfalls wie der freche Affe mit der E70er-Serie coloriert.

I am sure you don't have any difficulties in seeing where I got my inspiration from, right? This  monkey swinging from the branch reminded me very much of a stamp by Clearly Besotted which I haven't used very often before and I felt it would be perfect for this card. I stamped the cheeky monkey on some Copic friendly paper and coloured it with the E70th- and the E50th- series. Next I put a mask over him and coloured the area around him blue using Salty Ocean Distress Oxide Ink. For the lion I used the YR20th-series and think it looks very good on a lion. What do you think? And because I didn't want to have too many difdferent shades of brown on my card I used the same colours I had used on the monkey for the lion's mane as well.


Ich hatte mir vorgestellt, dass der Affe durch eine Öffnung schaut, also habe ich ein zuvor mit grünen Pünktchen bestempeltes Papier mit einer Rechteckstanze und anschließend das Fenster ausgestanzt, um es direkt über das sportliche Äffchen zu kleben. Da ich dieses Mal zur Abwechslung eine gründe Kartenbasis gewählt habe, diese mir aber zu dunkel war, habe ich noch eine orange Lage dazwischen geklebt und finde es so viel besser. Auch, weil dadurch die Farbe des Löwen betont wird ;o) Den ersten Teil des Spruchs habe ich auf schwarzes Papier embosst und auseinander geschnitten, um dem Affen das "happy" in die Hand zu geben und das zweite Wort darunter kleben zu können. Den Rest des Spruchs habe ich dann nur noch in schwarz neben den Löwen gestempelt, den ich auf einem "Drop Shadow" sitzend auf die Karte geklebt habe.

I wanted the monkey to look through an opening, so I die cut a rectangle from some white paper I had stamped green dots on and die cut an aperture from that and glued that piece directly over the piece of paper with the monkey. Because I used a green card base for a change, but didn't like that it was so dark, I layered my white piece on some orange to bring out the colour of the lion a little more and that worked much better. ;o) I heat embossed the first part of the sentiment on black cardstock and cut it apart, so I could place the first piece in the monkey's hand and put the second one beneath it. I stamped the rest of my sentiment next to the lion's head in black ink and adhered the cute lion sitting on a drop shadow to the card as well.


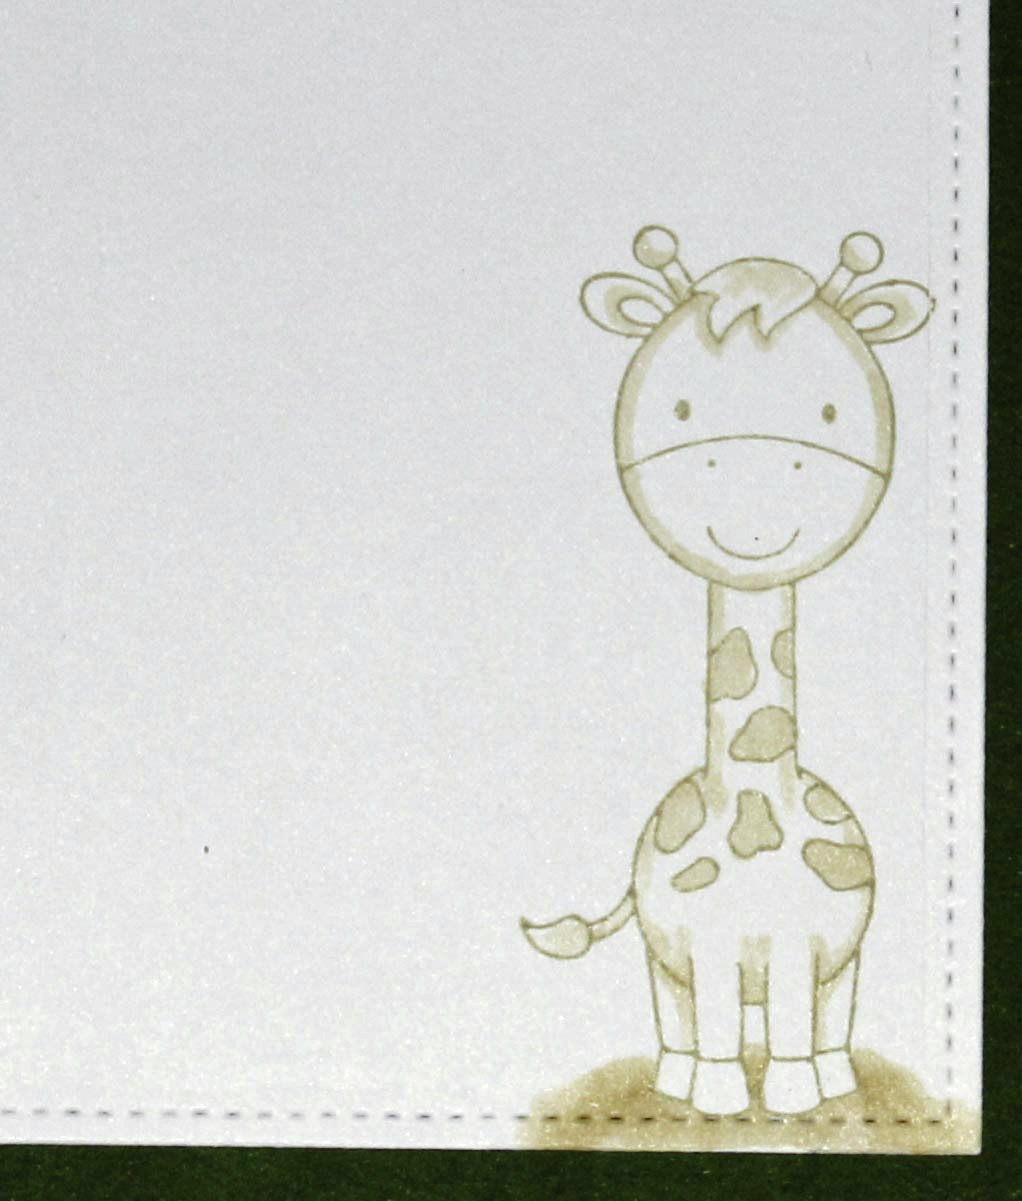
Um das Thema auch im Inneren der Karte fortzusetzen habe ich ein weißes Rechteck ausgestanzt und an den unteren, rechten Rand die Giraffe aus dem Set gestempelt. Sie habe ich ganz leicht / hell coloriert, um sie ein wenig mehr von der weißen Umgebung abzusetzen und ihr durch Schattierungen etwas Tiefe zu geben. Ich hoffe, ihr habt Lust bekommen bei uns mitzuspielen. Dieses Mal könnt ihr einen 1ß$-Gutschein zum Online Shop unseres freundlichen Sponsors "Little Blue Button" zu gewinnen. Habt eine wundervolle Woche und ich wünsche euch allen happy crafting ;o) Eure Maike

In order to continue the outside to the inside as well I placed a white stitched rectangle there and stamped the image of the giraffe to the bottom right. I only coloured it very lightly just to give it a tiny bit of interest.  I hope you are going to play along with us. This time you could be the lucky winner of a $10-voucher to the online store of our kind sponsow "Little Blue Button". Have a great week and happy crafting, everyone ;o) Yours Maike

Material / supplies:
Stempel / stamps: "Wild Thing" von Clearly Besotted
                             (On sale right now- going to retire, so be quick :o)
                         von My Favorite Things

Montag, 11. Dezember 2017

Christmas Series #20 / Weihnachtsserie #20 (POD Sugar Plum)

Halli Hallo ihr Lieben!
Die Crafty Cardmakers möchten euch auch auf den letzten Metern noch bei der Produktion eurer Weihnachtskarten unterstützen, weshalb das Thema der neuen Challenge schlicht "Weihnachten" heißt. Dies ist meine Inspirationskarte:

Heya my dear crafty friends!
The Crafty Cardmakers would like to help you get those last Christmas projects finished so our theme for the newest challenge is "Christmas". This is my take on the theme:


Dieser neue Stempel von Purple Onion Designs nennt sich "Sugar Plum" und ich liebe dieses schläfrige Häschen in seinem großen Ohrensessel ;o) Ich habe ihn und auch den Beistelltischt nebst den Gaben für Santa mit Copics coloriert. Da ich eine Fensterkarte machen wollte, habe ich aus der Kartenfront einen Kreis ausgestanzt und dann noch einen Rahmen für drum herum. Bevor ich den allerdings aufkleben konnte kamen noch die nächsten Schritte:  die Karte kurzfristig mit Hilfe von ablösbarem Kleber verschließen (damit der innere Kreis mitgestaltet wird) und alles mit "Fog" Stempelfarbe einfärben.

I love this cute new image called "Sugar Plum" by Purple Onion Designs ;o) I coloured the bunny in his chair and also  the table with all the goodies for Santa with Copic markers. I knew I wanted to make this a window card, so I die cut a circle from the card front and a frame to go around the opening. Before I adhered the frame though I started on the background. I temporarily glued the card shut and added "Fog" ink over it, so the inside circle would be covered with ink as well.


Als die Stempelfarbe getrocknet war, habe ich Nuvo Glitterpaste durch eine Sternen-Schablone von Creat a Smile aufgetragen und ich find das Ergebnis klasse. Besonders auch, weil der Glitter im richtigen Winkel fast grün aussieht und somit richtig toll zum Hasenhut passt ;o) Als nächstes habe ich ein Stück weißes Papier zurechtgeschnitten, das "Merry Christmas" daraus ausgestanzt und noch einen Spruch dazu gestempelt. Nun konnte ich alles an seinen Platz kleben und meine Karte war fertig. Ich hoffe, sie gefällt euch und vielleicht habt ihr ja Lust eure last-minute Weihnachtsprojekte bei den Crafty Cardmakers mit uns zu teilen. Habt eine wundervolle Woche und happy crafting wünscht euch, eure Maike

Once the ink was dry I added some Nuvo glitter paste through a star stencil and I love the effect. Especially because the glitter looks green in a certain light which looks great with the bunny's green hat ;o) Next I cut a piece of white paper, die cut the words "Merry Christmas" from it and added a second sentiment below it. Now I could glue everything in its place and my card was done. I hope you like it and that you will share your "Christmas" creations with us at the Crafty Cardmakers. Have a wonderful week and happy crafting, yours Maike


PS: Ich wollte euch nur noch einmal schnell an mein Gewinnspiel erinnern, das immer noch aktuell ist. Falls ihr mehr darüber erfahren möchtet, wie ihr einen $25 Gutschein für einen Online-Bastelshop eurer Wahl gewinnen könnt, klickt hier ;o)

PS: Just wanted to remind you of my giveaway that is still going on. If you'd fancy a chance to win a $25 gift certificate to an online-craft-store of your choice, just click here ;o)
_   _   _   _   _

Material / supplies:
Stempel / stamps: "Sugar Plum" & "Cookies for Santa" von Purple Onion Designs
                              "Winter Pals" von WPlus9
Stanzen / dies: "Merry Christmas Border Die" von Lil' Inkers
                         "Stitched Circle Scallop Edge Frames" & "Circle Stax Set 1"
                         von My Favorite Things
Schablone / stencil: "Big Stars Polka" von Create a Smile

Challenges:

Samstag, 9. Dezember 2017

Christmas Series #19 / Weihnachtsserie #19 (Engel)

Halli Hallo zusammen!
Heute möchte ich meine Inspirationskatrte für die neue Herausforderung bei Challenge Up Your Life zeigen. Ich nehme an, ihr seid schon drauf gekommen - das Thema dieses Mal heißt "Engel":

Hello there!
Today I would like to share my inspiration card with you that I have made for the newest task at the Challenge Up Your Life blog. I bet you have guessed it already - it is all about "Angels" this time:


Nachdem ich diesen niedlichen Engel coloriert habe (zweimal übrigens, weil beim ersten Mal die Haare grell-orange geworden sind, statt blond...) hat es bis zur Fertigstellung der Karte nicht mehr lang gedauert ;o) Ich habe einen Hintergrund mit Distress Inks in Salty Ocean (auch, wenn man davon nicht viel sieht), Blue Lagoon und Chipped Saphire gewischt und diesen mit Wasser und verwässertem Perfect Pearls Pulver bespritzt, um einen realistischeren Himmel hinzubekommen.

After I had the cute angel coloured in the card came together quite quickly. I created a blue background using Distress Inks in Salty Ocean (though that got lost a bit), Blue Lagoon and Chipped Saphire and splattered water and watered down perfect pearly powder on to there, to give it a more realistic sky-look.


Als nächstes habe ich das Fenster aus einem weißen Panel ausgestanzt, eine Wolke aus weißem Papier und ein paar Sterne aus einem Papier, das ich zuvor mit dem fluoriszierenden FY1 Copic angemalt habe. Ein brauchbares Foto von dem sanften Leuchten habe ich aber leider nicht hinbekommen... Den Spruch habe ich mit dem "Liquid Platinum" Embossing Pulver auf der Vorderseite der Karte zum Glänzen gebracht und so eine Verbindung zum Hintergrund hergestellt. Nun musste ich nur noch alle Elemente an die richtige Stelle kleben und war fertig. Ich hoffe, ihr habt alle ein zauberhaftes zweites Adventswochenende und dass ihr vielleicht Lust und Zeit habt, selber ein Engelprojekt zu starten und mit uns zu teilen. Happy crafting und passt auf euch auf, ihr Lieben! Eure Maike

Next I die cut a window from a white panel, a cloud, also from white paper and some stars from a paper I had coloured with a FY1 Copic marker that glows in the dark. Unfortunately I couldn't get a proper picture of the glow... I embossed the sentiment and used "Liquid Platinum" embossing powder to continue the shimmer of the background to the front of the card. Now all that was left to do was to assemble all the elements. I hope you have a great weekend everyone and that you will join us with an project featuring an angel as well. Happy crafting, everyone and take care, yours Maike


Material / supplies:
Stempel / stamps: "Angel" von C.C.Designs (unfortunately discontinued)
                              "Friede, Freude, Lebkuchen" von Create a Smile (Sentiment)
Stanzen / dies: "Puffy Clouds" & "Peek-A-Boo Wonky Windows" von My Favorite Things
                         "Mini Stars Craft Die" von Simon Says Stamp

Challenges:

Samstag, 25. November 2017

Christmas card #12 / Weihnachtsserie Karte #12 (Simon's reindeer)

Halli Hallo ihr lieben Kreativen 
und herzlich willkommen auf meinem Blog. Heute möchte ich meine Inspirationskarte für die neue Challenge Up Your Life Herausforderung teilen. Es geht um "Bäume", also bleibt es ganz euch überlassen, ob ihr eure Weihnachtskartenproduktion vorantreiben möchtet, oder ihr in eine ganz andere Richtung geht ;o) Hier ist aber erst einmal meine - natürlich Weihnachts- Karte:

Heya my dear creative friends
and welcome to my blog. Today I would like to share with you my inspiration card for the newest Challenge Up Your Life task which is to create any kind of crafty project with "Trees". This gives you the opportunity to get more Christmas cards ready, but you don't have to if you are not feeling the vibe yet ;o) Here is my take on the inspiration:


Begonnen habe ich damit das Hintergrundpapier zu gestalten. Dazu habe ich ein paar Stempel aus dem Set in rot auf das rote Papier gestempelt und so mein eigenes Designpapier hergestellt sozusagen ;o) Daraus habe ich das Fenster ausgestanzt, welches ich auch noch einmal aus weißem Papier gestanzt, kreisrund ausgeschnitten und auf das rote Papier als Rahmen aufgeklebt habe.

I started by making my own designer paper for the background. I stamped a few of stamps from the set in red on red cardstock to get a tone on tone look. Next I die cut the window from it and also from a white piece of paper, which I die cut once more with a circle die and then glued it to the red paper as a kind of frame.


Und nun kam mein Lieblingsteil: das Colorieren ;o) Als erstes habe ich den Hintergrund mit dem großen Weihnachtsbaum gestaltet. Um dem Ganzen einen etwas heimeligen Touch zu geben, habe ich eine hölzerne Fußleiste und einen weichen Teppich dazugezeichnet. Die Tapete wurde schlussendlich ganz hellgrau, damit man sie optisch gut von dem Rahmen unterscheiden kann. Zum Schluss habe ich dann Rudolph coloriert und ihn ausgeschnitten, damit er vorne auf der Karte Platz nehmen konnte. Den Spruch habe ich neben den Baum gestempelt, da dort so viel "freie Fläche" war. Ich hoffe, ihr mögt meine Weihnachtsbaumkarte und habt vielleicht auch Lust bekommen ein Baumprojekt in Angriff zu nehmen und mit uns bei CUYL innerhalb der nächsten 2 Wochen zu teilen ;o) Habt ein wundervolles, entspannendes und tolles Wochenende! Happy crafting wünscht euch eure Maike ;o)


Material / supplies:
Stempel / stamps: "Merry and Bright" von Simon Says Stamp
Stanzen / dies: "Columbus Circle - Framed Tags" von Mama Elephant

Challenges:

Freitag, 3. November 2017

Christmas Series Card #4 / Weihnachtsserie Karte #4

Halli Hallo ihr Lieben
und willkommen zum vierten Teil meiner Weihnachtsserie Heute möchte ich mit euch meinen ersten Versuch einer Shadowbox teilen. Dank Birkas fabelhaftem Video, musste ich mir nicht einmal selber mein Hirn zermatern ;o)

Heya my dear crafty friends
and welcome to part four of my Christmas series. Today I would like to share my first shadow box card, which turned out really great thanks to Birkas fantastic video ;o)


Um diese Art Karte zu machen braucht man nur 2 Papiere in der Höhe, die die Karte später haben soll. Die muss man auf die Breite schneiden, die die Maße der Breite der Karte, die Tiefe plus etwa 1/4 Inch für die Klebelasche zusammenaddiert ergeben. Gefalzt wird an den gleichen Stellen, einmal von links und einmal von rechts aus gesehen. Wenn man die Papiere faltet erhält man 2 Teile, die wie ein eckiges "J" aussehen und die müssen dann nur noch aneinander geklebt werden. Vergesst nicht, vorher noch ein Fenster in eines der Papiere zu schneiden oder stanzen ;o)

To make this kind of card you need two pieces of paper that are the height you want your card be. To figure out the width you need to add up the measurements of the width of the front of the card, plus the depth, plus about 1/4 of an inch for adhering both papers together. You score them at those same measurements, only one time starting from the left and the next time starting from the right. Once you fold the papers, you will get two kind of "J" shapes that now have to be glued together. Before you do though, don't forget to cut or die cut a window from one of the papers ;o)


Die meisten Stempel, die ich benutzt habe, sind von Neat and Tangled - nur das Sternenbanner ist aus einem der neueren Mama Elephant Releases. Um das Design der Schattenbox auch voll auszukosten, habe ich noch zwei Papierstreifen in den unteren Teil geklebt. Die Maße dieser Teile sind: Höhe, wie ihr das möchtet und in der Breite so breit, wie die Kartenfront, plus 1/2 Inch extra, damit ihr an jeder Seite eine 1/4 Inch Klebelasche habt. Einige meiner Elemente, zum Beispiel den Bären und den Pinguin, habe ich mit einem weiteren Stück Papier verstärkt, dass ich einfach hinten drauf geklebt habe. Den anderen reichte die vorhandene Klebefläche, um fest zu bleiben, weshalb ich diese in Ruhe gelassen habe ;o)

Most of the images I have used are from Neat and Tangled - only the star banner is from one of the newer Mama Elephant releases. In oder to make use of the shadow box design I have inserted two pieces of paper. Measurements of this paper: hight as desired and the width of the paper is the width of the card front plus 1/2 inch, so you can have to 1/4 inch flaps at the side to adhere the paper. Some images, like the bear and the penguin, needed a little strip of paper as reinforcement glued to their backs, but all the other elements for sturdy enough as they were so I left them be ;o)

Blick von oben. / View from the top.

Und so kann man die Karte dann flach zusammenfalten.
And this is how you can fold the card and fit it in an envelope.


Ich hoffe, euch hat meine Karte gefallen! Falls ihr es noch nicht getan habt, vergesst nicht euch als Follower für meinen Blog einzutragen, um keine Weihnachtskarteninspiration zu verpassen und schaut auch noch einmal bei meinem Giveaway vorbei: klick. Habt ein wunderbares Wochenende und happy crafting, eure Maike ;o)

I hope you like my card! If you haven't done so already, why not follow by blog to not miss a single Christmas card inspiration and also have a look at my giveaway: click. Have a wonderful weekend and happy crafting, yours Maike ;o)

Material / supplies:
Stempel / stamps: "Beary Merry" von Neat and Tangled (plus coordinating dies)
                              "Sentiments from a Yeti" von Mama Elephant (plus coordinating dies)
Stanzen / dies: "Mini Scalop Square Stax" von My Favorite Things (window)

Challenges:
As you like it Challenge "Christmas or not Christmas and Why?"
Definately Christmas, because I love to share this annual series & like to get a headstart on my Christmas card production ;o)

Samstag, 28. Oktober 2017

Christmas Series Card # 2 / Weihnachtsserie Karte # 2 (North Pole)

Halli Hallo ihr Lieben!
2 oder mehr Stanzen zu benutzen ist die Herausforderung auf dem Challenge Up Your Life Blog. Also habe ich meine Stanzen herausgekramt und die zweite Karte für meine Weihnachtsserie gebastelt ;o)

Heya my dear crafty friends!
2 or more die cuts are the theme for our new challenge at Challenge Up Your Life. So I got out a lot of my dies and created this card for CUYL and as my second card for my Christmas series ;o)


Zuerst habe ich aus gemustertem Papier von Lawn Fawn - ich liebe diesen Schneeflockenhintergrund - das abgerundete Rechteck mit der "Tür" ausgestanzt. Den Rahmen habe ich mit "Stormy Sky" Distress Ink abgedunkelt, um den Fokus mehr auf den inneren Teil zu lenken, aber trotzdem das Muster nicht völlig zu verbergen. Dann habe ich den mittleren Teil mit den Hügeln, Bergen, Bäumen und dem "North Pole" Schild dekoriert. Auf letzteres habe ich vor dem Aufkleben noch etwas von dem "Schneestift" gegeben, den ich mir letztes Jahr bei einem Discounter gekauft habe und war überrascht, wie toll der Effekt wird, wenn man diese Schneeflüssigkeit heiß macht. Es wird ein wirklich schöner 3D-Schnee und sieht klasse aus!

I started by die cutting the frame with the door from some patterned paper by Lawn Fawn - I love this snowy background! In order to have the focus more on the door-part I darkened the frame with "Stormy Sky" Distress Ink. That way the pattern is still visible but a lot more subtle. Next I decorated the inner part with mountains, snowy hills, trees and the "North Pole" sign. For the sign I have used a snow pen for the first time and was excited to see how well it worked. I love this 3D effect and the snow looks almost real!


Wenn man das Törchen öffnet sieht man Santa, der gerade fröhlich durch den Schnee stapft. Vielleicht ist er ja auf dem Weg zu Dir?! ;o) Coloriert habe ich mit Copic Markern und dem Stern auf dem Tannenbaum habe ich später noch etwas Glitzer verpasst. Ich hoffe, euch gefällt meine Karte und ihr habt nun Lust bekommen auch eure Stanzen rauszukramen und euer Werk später bei Challenge Up Your Life zu verlinken und / oder euch an die Weihnachtskarten zu begeben ;o) Mittwoch folgt die dritte Karte der Serie und falls ihr den ersten Beitrag noch nicht gesehen habt, klickt einfach hier (klick), da findet ihr alle Informationen über die Weihnachtsserie und das angeschlossene Giveaway ;o) Und nun: Habt ein schönes Wochenende und happy crafting, eure Maike ;o)))

When the recipient opens the little door part, he or she can see Santa walking happily in the snow carrying a Christmas tree. Wondering where he is going to? ;o) I coloured everything with Copic markers and added a bit of glitter to the star. I hope I could inspire you to get out your dies to share your creation with us at Challenge Up Your Life and / or to get started with your Christmas cards ;o) The next card of my Christmas series will be published on Wednesday and just in case you haven't seen the first card yet, simply click here (click) to find all the information about the series and the giveaway ;o) Have a great week everyone and happy crafting, yours Maike ;o)))


Material / supplies:
Stempel / stamps: "Santa's Wonderland" von Neat and Tangled
                              "Me and my Yeti" von Mama Elephant
Stanzen / dies: "Stitched Basic Edges" & "Blueprints 30" von My Favorite Things
                         "Snow Capped Mountains" von Mama Elephant

Challenges:

Montag, 18. September 2017

Hedgehog Birthday Cake Card

Halli Hallo ihr Lieben!
Der Herbst zieht wieder bei uns im Land ein... Warum ich das Mitte September so keck behaupte? Erstens weil ich letzte Woche bereits auf Grund von blauen Fingern in der Wohnung die Heizung anmachen musste, zweitens, weil die Bäume draußen langsam kahl werden und drittens, weil "Herbst" das neue Challengethema bei den Crafty Cardmakers ist. Zu einer "Happy Fall" Karte konnte ich mich aber noch nicht überreden, - ich hoffe nämlich noch immer darauf, dass der Sommer ein Einsehen hat und noch mal für ein paar Wochen vorbei schaut -  also habe ich eine Geburtstagskarte mit einem der süßen MFT-Igel gemacht. Schaut mal:

Heya my dear crafty friends!
Autumn is (almost) upon us... You probably ask yourself why I am mentioning this mid September? First of all, because we had to turn on our heating again last week already after my fingers turned blue from the cold one afternoon, secondly because the trees outside seem to have already lost more leaves than they have left on their branches and thirdly because "Autumn" ist the new challenge theme at the Crafty Cardmakers. However, I could not yet bring myself to make a "Happy Fall" card, because I am secretely hoping that summer will return for a few (more) precious weeks, so I made a birthday card with one of the cute hedgehog stamps by MFT. But have a look yourself:


Zuerst habe ich den Hintergrund  mit den selben Nuvo Mouse Farben gesteltet, die ich auch schon für die Karte vom Samstag für Birkas Geburtstag benutzt haben. [Allerdings habe ich da noch einen Embossing Folder benutzt und mit dem metallischen Look von dem Mousse sieht das noch mal ganz anders aus - klickt eingach *hier*, wenn ihr die Karte auch sehen möchtet und ihr eventuell auch noch bei der pinken Challenge von uns Happy Crafty Friends mitmachen und mehr als ein Dutzend toller Preise gewinnen möchtet ;o) ] Während der Hintergrund trocknete - was wirklich rasend schnell geht - habe ich die süßen Motive mit Copics coloriert und sie ausgeschnitten.

I started by creating a background with the same Nuvo Mousse colours I had used on Saturday's card for Birka's birthday. [But on that one I used an embossing folder and it gives the background a completely different look - click *here" if you'd like to see it and maybe you feel like joining in on our challenge from the Happy Crafty Friends as well?! There are more than 11 prizes to be won - just saying ;o) ] While the background was drying - which takes almost no time at all - I coloured my images with Copic markers and fussy cut them out. 


Alles, was ich dann noch tun musste, was das Rechteck mit dem Fenster aus dem Hintergrund zu stanzen und die Sprüche zu stempeln, bevor ich dann alles an der richtigen Stelle festgeklebt habe. Ich hoffe, ihr habt Zeit und Lust an unserer "Herbst"-Challenge bei den Crafty Cardmakers mitzumachen. Happy crafting und habt eine fantastische Woche ;o) Das wünscht euch eure Maike

All that was left to do now was to die cut the rectangle and the window from the background piece and add the sentiments before adhering all the different elements. I hope you are going to join us for our "Autumn" challenge at the Crafty Cardmaker! Happy crafting and have a fabulous week ;o) Yours Maike


Material / supplies:
Stempel / stamps: "Happy Hedgehogs" & "Happy Hippos" & "Beary Special Birthday"
                              von My Favorite Things
                         von My Favorite Things

Challenges:

Samstag, 16. September 2017

Happy Birthday Birka - Happy Crafty Girls Blog Hop

Halli Hallo ihr Lieben!

 Und ganz besonders hallo Birka,
wenn Du hierher gehopst bist!
Herzlichen Glückwunsch zu Deinem Geburtstag!!!

Seit Mooooo-na-ten planen wir eine riesengroße Geburtstagsüberraschung für Birka von "Mit Herz und Schere" - ihr kennt sie und ihre wundervollen Karten sicherlich alle ;o) Wie ihr Blogname ja schon verrät hat sie ein Herz fürs Basteln aber auch und vor allem für die Menschen hinter den Scheren und Blogs. Mittlerweile kenne ich sooo viele liebe, talentierte, tolle, herzliche, wunderbare Menschen und das nur, weil sie uns quasi zusammen geführt hat. Und weil wir alle finden, dass Birka dafür mal ein Mega-Danke verdient hat und wir sie einfach mal so richtig aus den Socken hauen wollten, haben wir alle Birka eine pinke Geburtstagskarte gewerkelt (sie ist absolut #teampink) und für sie und euch einen Blog-Hop daraus gemacht ;o) Das hier ist die Karte, die von mir für Birka in die Post in die Schürzentasche von Jessi von der Stempelbar gehüpft ist ;o)

Heya my dear crafty friends!
Today is a very special day: It is Birka's birthday. Some of you may know her and her awesome cards from her Blog "Mit Herz und Schere" or her Instagram account "Biiirka". Through her I got to know sooo many lovely, talented and wonderful people and we all thought / think that she deserves a huge Thank You and an spectacular surprise for it. Birka absolutely loves pink which is why we all created a pink card for her and organised this Blog-Hop for her and you of course ;o) This is the card I created for her:


Hier findet ihr die Hopser-Reihenfolge:
Here you find the links to all stops from the hop:

Maike (Maikreations) --> Du bist hier / You are here

Und hier schon mal ein kleines Schmankerl für die Augen / And this is a preview for you of what we have in store for you:


Und das Tollste ist, dass ihr auch Mitmachen könnt! ;o) Wie? Ganz einfach. Hüpft einfach zu unserem Blog und stellt dort eine pinke Geburtstagskarte für Birka ein. Insgesamt gibt es 11 Sponsoren, die allesamt ganz wunderbare Preise zur Verfügung gestellt haben! Vielen Dank dafür! Dann gibt es auch noch ein ganz exklusives Stempelset mit den selbstgezeichneten Stempeln von einigen der zeichenbegabten Happy Crafty Friends zu gewinnen ;o) Aber schaut selbst: klick!

And the best thing about it is, that you can join in with the fun! ;o) How? That's easy: Hop to our blog and link up your pink birthday card for Birka. We have 11 generous sponsors who are giving away awesome prizes and you can also win a very exclusive cling stamp set with hand-drawn images by some of our drawing-talented Happy Crafty Friends ;o) But have a look yourself: click!


Falls ihr euch fragt, wie meine Karte entstanden ist, hier ein ganz kurzes Rezept: Den Hintergrund habe ich mit den genialen Embossing Mousses von Nuvo in Peony Pink und Pink Flame hergestellt. Die Mousse ist vielseitig einsetzbar, trocknet super schnell und gibt einen genialen metallischen Schimmer (wie man hoffentlich in den Fotos erahnen kann...). Nach dem Trocknen habe ich in das Papier ein Fenster hineingestanzt und es mit einem Geburtstagswörter-Embossingfolder geprägt. Die Stempel stammen - bis auf die Herzen -aus dem Set, das ihr gewinnen könntet ;o)

In case you are wondering how I made my card, here is a short recipe: I created the background using the awesome Embossing Mousses by Nuvo in Peony Pink and Pink Flame. The mousse can be used in many ways, dries super fast and has this brilliant metallic sheen when it is dry (which I hope you can guess from the pictures...). After everything was dry I die cut the round window from the paper and also embossed it with some cute birthday-words. The stamps I used are mostly from the set that you could win ;o)


Es wäre klasse, wenn ihr Lust und Zeit hättet unsere Überraschung für Birka noch größer zu machen, in dem ihr auch eine pinke Geburtstagskarte bastelst und auf dem Happy Crafty Friends Blog einstellst. Das ist übrigens auch der Weg zu einem Gewinn unserer elf Sponsoren ;o))) * ich erwähns nur noch mal so am Rand ;o) Also ran an den Basteltisch, nachdem ihr vielleicht noch mal mit einem Sektchen oder ähnlichem auf unser Geburtstags"kind" Birka angestoßen habt!

Habt ein Wahnsinns-Wochenende und happy crafting ;o) Eure Maike

It would be brilliant if you would make the surprise even bigger for Birka by creating a pink birthday and linking it to our Happy Crafty Friends blog. This would also be the way to win one of the prizes of our eleven sponsors ;o))) *just saying ;o) So start creating everyone, maybe after you lifted a glass of Prosecco or something like it to our dear birthday girl Birka!

Have an awesome weekend and happy crafting ;o) Yours Maike


Wenn ihr eure Werke auf Instagram zeigt, dann benutzt doch bitte die Hashtags
When you post your creations to  Instagram please use the hashtags

#happycraftyfriends and #birkasbirthdayohp

Material / supplies:
Stempel / stamps: "Exclusive Handdrawn Images Set" by the Happy Crafty Friends
                             (not available to buy - but you could win it or get the Digis here)
                             "Tons of Hearts" von Simon Says Stamp
Stanzen / dies: "Stitched Rectangle Stax" & "Peek-a-Boo Circle Windows"
                          von My Favorite Things
Embossing Folder: "Birthday Embossing Folder" von Taylored Expressions

Dienstag, 6. Juni 2017

That Bites!

Halli Hallo ihr Lieben!
Wie versprochen geht es zügig weiter mit den neuen Karten. Diese hier ist als DT-Karte für die aktuelle Cards und More Challenge zum Thema "Under the Sea" entstanden:

Heya my dear crafty friends!
Like I promised there will be a lot more going on here and so here is another new card as my DT creation for the current "Under the Sea" challenge at the Cards und More blog:


Ich habe die Fensterstanze ("Triple Peek-a-Boo Windows") von MFT benutzt, um meine bissigen Kerlchen in Szene zu setzen. Dazu habe ich sie einmal aus einem schönes Rechteck und einmal aus Schmierpapier ausgestanzt. Letzteres habe ich als Maske benutzt, um die Blautöne auf die Kartenbasis zu wischen. Ich wollte unbedingt, dass der Leuchtefisch in ganz dunkelblauem Wasser schwimmt und habe mich daher für einen Ombre-Look entschieden, bei dem es nach oben hin immer heller und karibischer wurde ;o)

I used the "Triple Peek-a-Boo Windows" from MFT to set my scene. I die cut them once out of a nice stitched rectangle and another time from some scratch paper I had on my desk. That way I could use the windows in the scratch paper as masks to add some colour to the card base. I went for an ombre look, because I wanted that fish with the "lamp" on its nose to swim through very dark water and the water to gradually get lighter towards the top. 


Bevor ich das Rechteck mit den Fenstern mit Abstandshaltern aufkleben konnte, musste ich noch schnell den Spruch und ein paar Wasserbläschen stempeln. Als nächstes habe ich die Fische auf Aquarelpapier gestempelt und mit Zigs ausgemalt. Nachdem sie alle auf dem Trockenen lagen ;o)  habe ich sie ebenfalls mit Foam Tape in die Öffnungen hineingeklebt. Dabei habe ich die unteren beiden Meeresbewohner ein wenig über den Rand der Fenster hinausragen lassen, um das Ganze Design etwas aufzulockern. Damit war meine Karte auch schon fertig ;o) Vielleicht habt ihr ja auch Lust bekommen ein "Unter Wasser"-Werk zu zaubern und es dann auf dem Cards und More Blog zu verlinken! Zu gewinnen gibt es übrigens eine Überraschung aus der Stempelküche. Ich wünsche euch viel Glück und happy crafting! Eure Maike ;o)

Before I adhered the window panel to the card base with some foam tape I stamped the sentiment and also added some water bubbles. Next I stamped and coloured the fish using Zig markers. After they had all dried completely I glued them into the windows using foam again and my card was done. I hope you are going to join us with a "Under the Sea" creation and with some luck you could win a surprise from our kind sponsor the "Stempelküche". Good luck and happy crafting, yours Maike ;o)


Material / supplies:
Stempel / stamps: "That Bites" von Avery Elle
Stanzen / dies: "Triple Peek-a-Boo Windows" von My Favorite Things
Related Posts Plugin for WordPress, Blogger...