Dienstag, 27. Februar 2018

Peeking Easter Friends

Halli Hallo ihr Lieben!
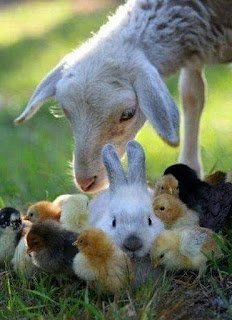
Auch, wenn es bei uns gerade furchtbar kalt ist, machen die Sonne und der blaue Himmel schon Hoffnung, dass der Frühling nicht mehr allzu lange auf sich warten lässt. Also passt eine Karte mit Hasen, Küken und Lämmchen genau wie auf dem PINspirational Bild doch eigentlich ganz gut gerade, oder? Hier ist meine Karte dazu:

Heya my dear crafty friends!
Even though it is really, really cold at the moment here in Germany, we do get a lot of sunshine and the blue sky let's us dream of spring. So a card with a bunny, a chick and a little lamb - just like the PINspirational picture for our newest challenge -  fits right in, wouldn't you agree? This is my take on the inspiuration:


Und hier könnt ihr das Inspirationsbild sehen: / And here is the inspirational picture:

http://pinspirationalchallenges.blogspot.de/2018/02/pinspirational-challenge-210.html

Für meine Karte habe ich das neue Set "Peeking Easter Friends" von Gerda Steiner benutzt. Ich finde die Tierchen total niedlich ;o) Ich habe die Drei mit Copics coloriert, noch zwei Ostereier zusätzlich eingefärbt und dann alles ausgeschnitten. Als nächstes habe ich das pinke Papier auf die Kartenbasis geklebt und mit Distress Inks in Tumbled Glass, Twisted Citron und ein wenig Lucky Clover den Hintergrund gestaltet.

For my card I played with the new stamp set by Gerda Steiner called "Peeking Easter Friends" which is totally cute I think ;o) I coloured the images with Copic markers and fussy cut them. Next I glued the pink paper to the card base and made a background for the cute critters using Distress Inks in Tumbled Glass, Twisted Citron and a tiny bit of Lucky Clover.


Nach dem Trocknen habe ich es mit einer Borderstanze zurechtgestanzt und ebenfalls auf die Kartenbasis geklebt. Bevor ich es aber richtig festgedrückt habe ist schnell noch das Schäfchen dahinter gehüpft. Zum Schluss habe ich dann nur noch das Spruchband , das Küken und den Hasen aufgeklebt. Damit die Ohren etwas abstehen, habe ich dort ein wenig Foamtape benutzt, ansonsten klebt alles flach auf der Karte. Ich hoffe, dass euch unser PINspirational Foto inspirieren kann. Wenn ihr mitspielt habt ihr dieses Mal die Chance ein Digi von unserem freundlichen Sponsor "Sasayaki Glitter" zu gewinnen ;o) Habt eine tolle, nicht zu eisige Woche! Happy crafting, eure Maike

After the background piece had dried I die cut a nice edge with a border die and glued it to the card base as well. Before I pressed it down properly I let the little sheep sneak behind the edge ;o) Now I glued down the sentiment banner, the chick and then the bunny. I wanted the bunny's ears to have a bit more dimension so I used fowm tape behind them - everything else is glued flat to the card. I hope you are going to play along with us and let yourself be inspired by our PINspirational picture. This time the lucky winner will get 1 digi from our kind sponsor "Sasayaki Glitter" ;o) Have a great week and happy crafting, yours Maike


Material / supplies:
Stempel / stamps: "Peeking Easter Friends" von Gerda Steiner Designs
Stanze / die: "" von My Favorite Things

Samstag, 17. Februar 2018

Wishing you happiness, lots of smiles and the best day ever (GSD bunnies)

Halli Hallo ihr lieben Kreativen!
Für Challenge Up Your Life habe ich die heutige Inspirationskarte gemacht. Es geht um "Frühlingsboten" und für mich zählen dazu auf jeden Fall Tulpen - auf meinem Esstisch steht gerade ein ganzer Strauß und im Garten hoffe ich auch auf mehrere Dutzend *grins. Diesen Digi von Gerda Steiner fand ich einfach zu putzig und da es mich daran erinnert hat, dass der Frühling nun endlich vor der Tür steht, habe ich es zum Mittelpunkt meiner Karte gemacht:

Heya my dear crafty friends!
Today's card was made as an inspiration for the newest task at Challenge Up Your Life. This time we would like to see "" on your projects and for me the number one sign for spring is a tulip - I have a bunch of them in a vase on my table right now and am also waiting *im*patiently for them to grow in the garden as well. When I saw this cute image by Gerda Steiner Designs I instantly knew that I wanted to make it the focus of my card for today:


Nachdem ich die beiden Häschen coloriert hatte, habe ich mich an ihr "Surrounding" begeben ;o) Zuerst habe ich den Hintergrund in Mint Julep gestempelt und mit der Stanze von Mama Elephant noch in Form gebracht. Als nächstes kam das Misti für den großen Sentiment-Stempel zum Einsatz - ohne wäre der Abdruck mit Sicherheit nicht halb so schön geworden...

After I had coloured the cute bunnies, I started on their background ;o) First I stamped the stripes in Mint Julep and die cut the piece with the die by Mama Elephant to give it a nice finish. Next I stamped the huge sentiment using my Misti - without it I bet the result wouldn't be nearly as crisp as it is now...


Um die restlichen Wörter an geeignete Stellen stempeln zu können, habe ich zuerst die Hasen zusammen mit einem Drop-Shadow aus Vellum auf die Karte geklebt. Danach habe ich noch die rosa Tropfen hinzugefügt, damit die Farbe der Blume noch einmal auf der Karte auftaucht. Ich würde mich freuen, wenn auch ihr eure Lieblings-Frühlingsboten mit uns teilen würdet. Habt ein wunderbares Wochenende, ihr Lieben - der Frühling kommt immer näher ;o) Happy crafting, wünscht euch eure Maike

In order to stamp the rest of the sentiments where they would fit and look good I had to adhere the drop shadow and the bunnies first. After the stamping I added a few pink Nuvo Drops to bring out the colour of the flower even more. I would love to see your spring creations in our gallery. Have a wonderful weekend my crafty friends  - spring is almost here ;o) Happy crafting, yours Maike


Material / supplies:
Stempel / stamps: "Spring Bunny Friends" von Gerda Steiner Designs
                             "Wishing You" von Mama Elephant
                             "Watercolor Stripes" von My Favorite Things
Stanzen / dies: "All Prettied Up" von Mama Elephant
                         "Oval Shadows" von My Favorite Things

Challenges:
Aud Sentiments Challenge "For a friend"
Seize The Birthday Challenge "Anything Birthday Goes / topping: tea or coffee"
As You Like It Challenge "Favourite Way To Add A Sentiment and Why"
-> I love to stamp my sentiments, because I like the variety of the saying and I love that I can easily add a sentiment at the end, when I forgot to plan ahead as I usually do...

Dienstag, 13. Februar 2018

Have a Sweet Day

Halli Hallo meine Lieben!
"Sweets for my Sweet" ist das Thema der neuen Papercraft Challenge. Ich habe schon seit einiger Zeit diesen süßen Hasen mit dem überdimensionierten Lolli von Your Next Stamp in meiner Sammlung und jetzt hatte ich endlich mal eine passende Aufgabe für das Schleckermäulchen:

Hello there my crafty friends!
"Sweets for my Sweet" is the theme of our newest Papercraft Challenge. I have had this cute bunny with its huge lillipop in my stash for quite some time now and finally I had the perfect opportunity for this sweety:


Für den Hintergrund habe ich ein grünes Stück Papier an den Rändern dunkler eingefärbt und nach dem Trocknen diesen genialen Hintergrundstempel von Create A Smile darüber embossed. Als Fokussierhilfe habe ich - passend zu den vielen Kreisen im Hintergrund - einen runden Rahmen aus weißem Papier ausgestanzt und mit Transparentpapier hinterlegt. Die Hasendame habe ich so darauf geklebt, dass es ausschaut, als würde sie auf dem unteren Rand sitzen. 

To start with I have used a piece of green cardstock for my background. With some "Lucky Clover" Distress Ink I darkened up the edges to give it more depth and also heat embossed this awesome background stamp from Create A Smile on top after it had all dried. In order to create a place for this cute bunny girl to sit I die cut a circle frame from white paper and glued vellum to the back of it. When I placed the bunny I placed her in a fashion that it looks like she is sitting on the rim of the frame if that makes sense... 


Meinen Spruch habe ich teils gestempelt und die Lücke mit Buchstaben-Aufklebern gefüllt. Ich wollte, dass sich die Farbe des Lollis noch einmal auf der Karte wiederfindet und das geht am besten mit weißen Alphastickern, die man dann entsprechend einfärbt ;o) Den Lolli habe ich zum Schluss noch mit einem Glitzerkleber überzogen sowie eine weiße "Naht" mit einem Gelpen hinzugefügt und damit war meine Karte fertig. Ich hoffe, sie gefällt euch und ich konnte euch vielleicht dazu inspirieren bei uns mitzuspielen. Die liebe Elisa hat einen Überraschungspreis für den Gewinner, also lohnt es sich sogar doppelt mitzumachen ;o) Habt eine schöne Restwoche und happy crafting wünscht euch eure Maike

My sentiment was partly stamped and partly created with letter stickers. I wanted the pink to appear a third time on the card (knowing that the eye likes groups of threes) and that for me is always easiest made with white alpha stickers that I can colour every colour I want. To finish the card I covered the lolli with glitter glue and added a white faux stitching line around the edge of the background paper. I hope you like my card and that I could possibly inspire you to play along with us. Dear Elisa has a surprise for the winner, so that would even be two reasons to play along ;o) Have a great rest of your week and happy crafting, yours Maike


Material / supplies:
Stempel / stamps: "Sprinkles - Sugar Rush" von Your Next Stamp
                             "Stars 'n Scribbles" von Create A Smile
Stanzen / dies: "Single Stitch Line Circle Frame" von My Favorite Things

Challenges:
Your Next Stamp Challenge #82 "Color Challenge" (Green, pink and light pink)

Retro Rubber Challenge Blog "Dotty for You"
-> Background stamp by CAS is a rubber stamp and also appr. one year old.

Hope You're Feline Better Soon


Halli Hallo ihr Lieben!
Bei Herzchen und Rosa denkt man ja gerade im Moment häufig an den Valentinstag - ich habe das Inspirationsbild der neusten PINspirational Challenge allerdings als Anlass genommen, um eine Gute-Besserungs-Karte zu basteln. Die fehlen oft bei mir im Vorrat und wenn ich dann mal eine brauche, habe ich meist keine Zeit schnell eine zu machen. Hier seht ihr das Inspirationsbild:

Heya my dear crafty friends!
When one sees hearts and the colours pink and red usually - especially at this time of year - people think of a Valentine - however, I wanted to show, that the theme of our newest challenge at PINspirational Challenges fits well with get well cards also. And seeing that I seem to lack them in my stash whenever I really need one I decided to create one of these. This is our inspiration picture:
 
http://pinspirationalchallenges.blogspot.de/2018/02/pinspirational-challenge-209.html


Ich habe momentan ja wirklich viel Freude mit allen möglichen Schablonen, aber die von Create A Smile benutze ich besonders gerne. Einerseits sind sie toll designed und man kann sie eigentlich fast immer nutzen und was mir außerdem so gefällt ist, dass sie aus einer so schön dicken Folie gestanzt sind.  Mit "Spun Sugar" Distress Ink habe ich sowohl Innen als auch Außen einen Farbverlauf von unten rechts nach oben links gewischt und anschließend die Herzen aufgetragen. Da ich die Farbe außen intensiver haben wollte, habe ich dort "Picked Raspberry" benutzt - innen bin ich bei "Spun Sugar" geblieben.

I used one of Create a Smile's wonderfully sturdy stencils to create the background, using "Spun Sugar" and "Picked Raspberry" Distress Ink for the outside of the card and just the "Spun Sugar" for the inside. For both I created a gradiant from the bottom right to the top left with the light pink and afterwards added the hearts using the stencils.


Aus der Front habe ich mit einem Skalpellmesser ein Quadrat ausgeschnitten und von beiden Seiten einen quadratischen Rahmen aufgeklebt, um ein Fenster zu erhalten, aus dem die Katze herausschauen kann. Geöffnet sieht die Karte dann so aus:

I cut a square from the card front using a craft knife and added a square frame to both sides, so that I would have a window for the cat to look through. This is what the card looks like when you open it:


Alles, was nun noch zu tun war, war die Katze und alle weiteren Elemente aufzukleben und den Spruch außen unter das Fenster zu stempeln. Falls es euch nun auch in den Fingern juckt eine Karte passend zu unserem Inspirationsbild zu basteln, würde ich mich sehr freuen, wenn ihr es in der PINspirational Gallerie verlinken würdet. Zu Gewinnen gibt es dieses Mal 2 Digis von unserem freundlichen Sponsor "Pattie's Creations". Habt einen schönen, kreativen Tag und happy crafting, eure Maike

All that was left to do now was to glue down the cat and all the other elements and also to stamp the sentiment. In case your fingers are now itching from wanting to create something I would love to see your creation in our gallery. You also get the chance to win 2 digi stamps from our kind sponsor "Pattie's Creations" ;o) Have a wonderful and creative week everyone and happy crafting, yours Maike


Material / supplies:
Stempel / stamps: "Smitten Kitten" von My Favorite Things
Stanzen / dies: "Single Stitch Line Rounded Square Frame" von My Favorite Things
Schablone / stencil: "Big Hearts Polka" von Create A Smile

Challenges:

Montag, 12. Februar 2018

With Lots Of Love - Panda

Halli Hallo ihr Lieben!
Ich hoffe, ihr hattet ein jeckes Wochenende und habt nicht zu sehr gefroren ;o) Da Karneval ja nicht so unbedingt in jedem Land ein Thema ist, der Valentinstag aber schon, lautet das neue Thema bei den Crafty Cardmakers ab heute "Love and Romance". Dies ist meine Inspirationskarte für euch:

Heya my dear crafty friends!
With Valentine's Day just around the corner, the Crafty Cardmakers thought that the new theme "Love and Romance" would work perfectly ;o) This is my inspiration for you:


Zuerst habe ich natürlich diesen süßen Panda coloriert. Er ist das Challengebild von Gerda Steiner aus dem letzten Monat. Falls ihr die Challenge nicht kennt, schaut doch mal hier - denn mit einem Digi, das man kauft, kann man monatlich ein weiteres Digi gratis von Gerda Steiner bekommen, solange man an ihrer Progressive Challenge teilnimmt. Aber nun zurück zur Karte: Als nächstes habe ich den roten Rahmen ausgestanzt und noch ein weißes Papier so zurechtgeschnitten, dass es genau zwischen die Faux-Stitching-Line passt. Dieses habe ich dann im unteren Bereich leicht grün und im oberen blau eingefärbt, damit der Panda ein nettes Plätzchen zum Sitzen hat.

First I had to colour this cute panda image. It is the digi stamp for Gerda Steiners Progressive Challenge from last month. In case you don't know about her challenge yet, have a look here - I love her challenge because with one single digi you purchase, you can get many, many more free only by entering her challenge every month. But let's go back to the card: I die cut a scalloped square from red cardstock and also cut a piece of white paper to fit in between the faux-stitched lines. I added a light layer of green ink to the bottom and blue to the top to give the panda a lovely place to sit.


Danach habe ich nur noch den Spruch in die obere rechte Ecke von meinem Hintergrundpapier gestempelt, alles zusammengeklebt und die Herzchen hinzugefügt. Ich hoffe, euch gefällt meine Karte und würde mich freuen, eure Werke in unserer Gallerie zu entdecken. Habt eine wunderbare Woche mit hoffentlich vielen Sonnenstunden und happy crafting, eure Maike ;o)

Afterwards I stamped the sentiment to the upper right corner, glued everything together and added the mini hearts I had die cut from the same red paper as the square. I hope you like my card and I would love to see your creations in our gallery. Have a wonderful week with many hours of sunshine and happy crafting, yours Maike ;o)


Material / supplies:
Stempel / stamps: "Panda in Love" von Gerda Steiner Designs
                              "Mini Messages" von Mama Elephant
Stanzen / dies: "Stitched Mini Scallop Frame" von My Favorite Things
                         "Mini Hearts Set" von Simon Says Stamps
Embossing Folder: "Amy Tangerine - Love Spun" von American Crafts (discontinued?)

Challenges:

Dienstag, 6. Februar 2018

Winner of the Blog Hop for Maaike

Halli Hallo ihr Lieben!
Heute gibt es nur einen kurzen Post von mir, in der ich euch mitteilen möchte, dass Fikreta von "Bad Kitty's Craft Room" bei Maaikes Blog Hop als Gewinnerin ausgelost wurde ;o) Liebe Fikreta, melde dich bitte bis Freitag Morgen bei mir und sage mir, welchen Gewinn Du Dir ausgesucht hast!
Herzlichen Glückwunsch noch einmal und herzlichen Dank an alle für ihre lieben Kommentare und dafür, dass ihr den YouTube-Hop von Maaike so tatkräftig unterstützt habt ;o)
Habt eine tolle Woche und happy crafting, eure Maike

Heya my dear crafty friends!
Today I'll only have a quick post for you, letting you know that Fikreta of "Bad Kitty's Craft Room" was chosen by a random number generator as the winner of my giveaway for Maaike's Blog Hop. Dear Fikreta, please contact me until Friday morning and let me know which prize you would prefer ;o)
Congratulations again and thank you to all of you who participated and left comments on the blog posts, watched the videos along the hop and helped raise awareness for those "smaller" YouTube channels ;o)
Have a wonderful week and happy crafting, yours Maike

PS: And because I don't like posts without a picture and I have seen that Fikreta likes cats, here are my cats saying hello and congrats as well ;o)


Sonntag, 4. Februar 2018

Have a Tail-Wagging Good Time

Hallo ihr Lieben!
"Gelb und Grau" ist die neue Vorgabe für Challenge der nächsten zwei Wochen bei Challenge Up Your Life und hier seht ihr meine Inspirationskarte:

 Heya my dear crafty friends!
"Yellow and Grey" is the theme for the new challenge over at Challenge Up Your Life for the coming fortnight. This is my take on the task:


Als ich über die Farbe "Gelb" nachgedacht habe, ist mir dieses Mal sofort Sonnenschein in den Kopf gekommen - wahrscheinlich weil ich seit November kaum welchen gesehen habe.... Also habe ich meine tolle Schablone von Create A Smile rausgesucht und für den Hintergrund meiner Karte ein paar wundervoll sonnengelbe Sonnenstrahlen gewischt. Als nächstes habe ich aus weißem Papier einen Rahmen und zwei "Schnee"-Hügel ausgestanzt und schon einmal auf der Kartenbasis zusammen geklebt.

When I thought about the colour yellow the first thing that came to my mind was sunshine - something we have been missing dearly in Germany for the past three month - so I got out my wonderful stencil by Create A Smile and created the rays for my background piece. Next I die cut the frame and two hills from white cardstock and glued all those pieces together.


Jetzt hatte ich schon einen Hintergrund, der mir gefiel und musste jetzt nur noch ein passendes Element für den Vordergrund finden. Als ich diesen niedlichen Kerl in einem meiner Stempelset entdeckte, war klar, dass er auf die Karte musste. Ich habe ihn mit Memento Tuxedo Black gestempelt, anschließend mit Copics coloriert und ausgeschnitten. Als er seinen Platz auf dem Hügel gefunden hatte, habe ich den Spruch so halb um ihn herum gestempelt. Wie immer war mir meine Karte so noch etwas zu leer, also habe ich die Szene um das "Woof! Woof!" mit gelben Alphabetstickern ergänzt und diese tollen klaren Sternchenpailetten aufgeklebt. Damit war meine Karte fertig ;o) Ich hoffe, sie gefällt euch und ich konnte euch vielleicht sogar inspirieren euch auch an das "Gelb-Grau"-Thema zu wagen. Falls ja, würde ich mich sehr freuen, wenn ihr euer Werk bei Challenge Up Your Life teilen würdet. Habt ein wunderbares Restwochenende und happy crafting wünscht euch, eure Maike

Now I had a lovely background, but I still needed a focal image, so I searched through my supplies and found this adorable dog with its scarf and knew that he would look perfect combined with the scene . I stamped the dog and coloured it wil Copic markers and also stamped the sentiment. And because the card looked much too empty at this point I added the "Woof! Woof!" with alphabet stickers and also these cute clear star sequins. That was my card done ;o) I hope you like my card and that maybe I could inspire you to challenge yourself with our theme. Hope to see your project in our gallery at Challenge Up Your Life. Have a wonderful weekend and happy crafting, your Maike


Material / supplies:
Stempel / stamps: "Puppy Pals" von My Favorite Things
Stanzen / dies: "Stitched Snowdrifts" & "Stitched Rectangle Scallop Frame" von My Favorite Things
Stencil: "Focal Point" von Create A Smile

Challenges:
Simon Says Stamp Wednesday Challenge "Anything Goes"
Seize The Birthday "Anything Goes / Topping: Candles"
CAS on Sundays "Colour Me Pretty"
As You Like IT Challenges "Favorite Way To Add Stitching And Why"
--> I own loads of dies with the faux stitching edge because I love the way it adds a lot of interest to a card without adding anything "extra" or bulk. 

Samstag, 3. Februar 2018

Celebrate - Maaike Uithoven's 2000 follower celebration blog hop


Halli Hallo zusammen!
Vor einer ganzen Weile haben Maaike von "Cards by Maaike" und ich Karten in Collaboration hergestellt. (Klickt hier, für unsere Collaboration.) Vor Kurzem hat sie gefragt, ob ich an einem Blog-Hop teilnehmen würde, der ihre nunmehr fast 2000 Follower auf YouTube feiert und natürlich habe ich zugesagt. Falls ihr ihren Kanal noch nicht kennt, klickt einfach hier ;o)


Heya everyone!
A long while back Maaike of "Cards by Maaike" created a few cards for a collaboration we had - have a look here if you are interested in learning more about it ;o) Not so long ago, she has asked me if I would take part in celebrating her almost 2000 followers on YouTube and of course I said yes. In case you don't know her channel yet, just click here ;o)

https://youtu.be/PEjPkcSAuxg

Die anderen Teilnehmer des Blogs haben alle ebenfalls einen YouTube Kanal und haben anlässlich von Maaikes Meilenstein ein Video für euch aufgenommen. Schon allein dafür lohnt es sich, bei den anderen Craftern vorbeizuschauen, aber es gibt zusätzlich noch bei jedem Stop im Hop etwas zu gewinnen... Unter allen meinen Followern, die hier bis morgen Abend (04.02.2018) einen Kommentar hinterlasse verlose ich einen Preis, den ihr euch selber auswählen dürft: entweder die beiden Karten, die ich für den Hop gebastelt habe oder einen $10 Gutschein für einen Onlinebstelshop eurer Wahl ;o) Nun aber zu meinen Karte:

The other participants all have a YouTube channel as well and made a video for you because of Maaike's milestone. That alone would be worth it to hop over to their channels, don't you think? As an addition you will have the chance to win something at each stop from the hop though... From me you could win either the cards I have created for this hop or a $10 gift certificate to an online craft shop of your choice if you are a follower of my blog and  leave a comment under this post by tomorrow night (04.02.2018). But now, let's take a closer look at the cards:


Zuerst habe ich den Hintergrund mit drei verschiedenen Farben Distress Inks verblendet: Wilted Violet, Seedless Preserves und Picked Raspberry. Danach habe ich sowohl eine kleine Menge Copic Opaque White als auch Perfect Pearls Pulver in dem Farbton Perfect Pearls etwas mit Wasser verdünnt und auf den Hintergrund gesprenkelt ;o) Während der Hintergrund trocknete habe ich  die Elemente für meine Karte gestempelt, coloriert und ausgeschnitten. Dabei habe ich Zig Marker für die Katze und Copics für den kleinen Bären benutzt.

I started by creating a background with three colours of Distress Inks: Wilted Violet, Seedless Preserves and Picked Raspberry. Next I splattered Copic Opaque White over the coloured background as well as some watered done Perfect Pearls powder in the colour Perfect Pearls :o) While that dried I coloured and fussy cut the images for my cards. I used Zig markers for the cat and Copics for the little bear.


Aus dem Hintergrund, den ich auf Kartengröße zurechtgeschnitten hatte, habe ich die Sprechblase mit dem Schriftzug "Celebrate" ausgestanzt. Für die Karte mit dem Bären habe ich das "Original" zu einem Shakerfenster gemacht. Dazu habe ich Folie hinter das Stanzteil geklebt und dann Foamtape am Rand aufgeklebt. Damit die Sterne nicht komplett am Boden liegen, habe ich jeweils einen schmalen Streifen Foamtape von links nach rechts hinter den Zwischenraum der Buchstaben geklebt. Für meine zweite Karte habe ich dann die "Reste" verwendet ;o) In Verbindung mit der Sprechblase in weiß und für den Schatten noch einmal in grau, sieht man ihr gar nicht an, dass sie ein Nebenprodukt ist, oder???

I cut the background piece to size and die cut the "celebrate" speechbubble from it. For the card with the bear, I made a shaker out of the "original" die cut. I glued clear acetate behind the piece and added foam tape around the edge and from left to right where the gaps between the letters are, so that the shaker material wouldn't only be at the bottom. For my second card I used the "scrap pieces" ;o) In combination with the speechbubble dir cut from white and another time from grey paper as a shadow, you wouldn't guess, that it was a by product, or would you?


Damit ihr nun auch Maaike zu ihrem Meilenstein gratulieren und all die anderen Teilnehmer des Hops besuchen könnt, habe ich hier noch mal die Liste aller Stops für euch ;o) Viel Spaß beim Hoppen, happy crafting und bis hoffentlich bald! (Bis Montag vielleicht, um zu sehen, ob du der glückliche Gewinner bist? *grins) Habt ein schönes Wochenende, eure Maike

Below you can find a list of all the people that are taking part in the blog hop so that you could congratulate Maaike to her milestone and watch all the other celebration card videos if you'd like to ;o) Have fun with the hop, happy crafting and I'll hopefully see you soon! (Monday perhaps, to see if you are the lucky winner? *grin) Have a wonderful weekend, yours Maike

Hop along list:
Maaike Uithoven (Congratulations again, Maaike ;o)
Maikreations <-- You are here 


Material / supplies:
Stempel / stamps: "Playful Kitten" von Gerda Steiner Designs
                              "BB Bitty Bears" von My Favorite Things
Stanze / die: "Celebrate Speech Bubble" von My Favorite Things


Related Posts Plugin for WordPress, Blogger...