Posts mit dem Label Nuvo werden angezeigt. Alle Posts anzeigen

Dienstag, 29. Januar 2019

Happy Happy Happy Panda

Heya my dear crafty friends!
Today's card is my inspiration for the new "Texture" challenge at the Crafty Cardmakers. I added texture in lots of ways to this birthday card. Can you spot them?


An easy way to add texture to a card is an embossing folder I find. Because I wanted it to take it up a notch I used Nuvo Embellishment Mousse for the top background which adds a metallic look. Next I created the second background for the back using Distress Oxide Ink. Dripping wate on Distress Inks and drying it with a paper towel would have given some texture on that piece as well, but I decided against it because I wanted the window area to look crisp and clean - compared to the rest at least ;o)


Another way to add texture to a card is dimension, so I created three for this card. The third one being the balloon which I die cut from some "nuvo'ed" paper and added an extry layer of enamel dots. I hope you like the card and that you are going to enter a card with texture to our gallery ;o) Have a wonderful week and happy crafting, yours Maike

A close-up, so you can see the layers and the shine a bit better ;o)
Material / supplies:
Stempel / stamps: "Happy Pandas" von My Favorite Things (discontinued)
                              "Birthday Wishes" von Pink and Main (discontinued)
Stanzen / dies: "Party Balloons" & "Small Stitched Rectangles" von Lawn Fawn
Embossing Folder: "Graphic Impressions -Birthday" von Taylored Expressions


Dienstag, 3. Juli 2018

"Aloha" - Girl and Turtle


Hallo zusammen!
Bei der Pinspirational Challenge startet heute eine neue Herausforderung für euch. Dieses Mal gibt es ein tolles Inspirationsbild für den Sommer und die anstehenden Ferien. Aber schaut selbst:

Heya everyone!
Over at the PINspirational blog we have a new challenge for you. This time the inspiration pic is perfect for the summer time and the upcoming time of vacations. But look for yourself:

http://pinspirationalchallenges.blogspot.com/2018/07/pinspirational-challenge-219.html

Ich habe mich für das Strandthema ganz allgemein entschieden und für meine Karte sowohl einen Himmel als auch den Strand gewerkelt. Für den Himmel habe ich die wunderbar schimmernden Nuvo Pasten und eine Schablone benutzt, für den Strand habe ich allerdings Distress Inks in den Farben Fossilized Amber and Vintage Photo benutzt. The Stempelbilder habe ich mit Copics coloriert.

I chose to go with the beach theme in general and for my card I created a cloud background with the lovely and shimmery Nuvo paste and also ink up some paper in sand colours. I have used Distress Inks for this in Fossilized Amber and Vintage Photo. The images are from My Favorite Things and are all coloured with Copic markers.


Wenn ihr dieses Mal (wieder?) mitmacht, habt ihr die Chance auf einen tollen Preis von unserem freundlichen Sponsor "Elisabeth Bell". Ich würde mich freuen euer Projekt in unserer Gallerie zu sehen! Habt eine sonnige Woche und happy craftingm wünscht euch eure Maike

In case you feel like taking part in our challenge you'll have the chance to win a fabulous prize by our very kind sponsor "Elisabeth Bell". I would love to see your project in our gallery and hope you'll have a great and sunny week! Happy crafting, yours Maike


Material / supplies:
Stempel / stamps: "BB Polynesian Paradise" von My Favorite Things
Stanzen / dies: "All Prettied Up" von Mama Elephant
                         "Stitched Hillside Border" von Lawn Fawn
                         "Stitched Circle Die" von My Favorite Things

Dienstag, 5. Juni 2018

You arrrrr amazing (Pirat & Mermaid)

Halli Hallo ihr Lieben!
Wie versprochen gibt es nun die zweite Karte von mir am heutigen Tag. Dieses Mal als Inspiration für das Thema "Kinder" bei der Papercraft-Challenge:

Heya my dear crafty friends!
As promised here is the second card I am sharing today. This time as an inspiration for the new challenge theme "Children" at Papercraft-Challenges:


Als erstes habe ich den Hintergrund gestaltet. Dazu habe ich Nuvo Mousse in zwei verschiedenen Blautönen flächig auf weißen Cardstock aufgetragen und kurz trocknen lassen. Anschließend bin ich noch einmal mit den selben Farben drüber gegangen, habe aber dieses Mal eine Schablone benutzt. Das Papier konnte ich dann erst einmal an die Seite legen und trocknen lassen. Normalerweise gestalte ich direkt mindestens zwei Hintergründe, wenn ich das ganze Zeug schon einmal rausgesucht habe und so habe ich es auch dieses Mal wieder gemacht. Also wundert euch nicht, wenn ihr einen sehr ähnlichen Hintergrund noch einmal auf einer meiner Karten erspäht. ;o)

First I started with creating the background. I used Nuvo Embellishment Mousse in two different shades of blue more or less evenly on a whole piece of white paper and let it dry for a few minutes. Next I used those same colours again but also used a stencil to get the awesome pattern plus the shimmer and shine from the mousse ;o) This piece was left to dry as well. Usually when I create backgrounds of the messier kind I try to create a piece so big that I will get at least two background pieces from it. That way - to me - it is worth the fuss and all the cleaning plus I have another great piece ready when I need something like this again the next time. ;o)


Als nächstes habe ich alle Elemente, die ich noch für meine Szene brauchte gestempelt, coloriert und ausgestanzt / ausgeschnitten. Außerdem habe ich noch die Holzplanken als Hintergrund für das Piratenmädchen mit Copics gemalt, von dem sie sich richtzig gut absetzen würde. Es passiert ja nicht oft, dass Stempel (besonders "Menschen"stempel) von verschiedenen Firmen gut zusammenpassen, aber ich finde bei diesen beiden ist das der Fall. Das kann natürlich gut an der Perspektive liegen, die die Karte hier zeigt, aber wie auch immer, ich freu mich, dass es so gut geklappt hat. Ich hoffe, ihr mögt die Karte auch und habt nun Lust bekommen vielleicht auch ein "Kinder"-projekt zu gestalten und mit uns zu teilen ;o) Habt eine fantastische Woche und happy crafting, eure Maike

Next I stamped, coloured and die cut all the other elements I needed to create the scene I had in mind. I also coloured a piece of paper with Copics to create a woodplank background for the little pirate girl.  It isn't often that images from different companies (especially "people" images") go together so well as these and maybe it is just the perspective of the scene that they do, but I just love the look of them together. I hope you are going to join us with a "Children" card of your own ;o) Have an awesome week and happy crafting, yours Maike ;o)


Material / supplies:
Stempel / stamps: "Little Mermaids" von The Greeting Farm
                              "Party Like A Pirate" von MY Favorite Things
Stanze / die: "All Prettied Up" von Mama Elephant (ich mag die halt echt gern ;o))
                      "Ocean View Porthole" von My Favorite Things
Schablone / Stencil: "Cascading Scallop" von My Favorite Things

Montag, 12. März 2018

Happy Dance Critters

Halli Hallo ihr Lieben!
Lasst uns das Thema "Grün" für die neue Challenge der Crafty Cardmakers angehen, ja? ;o) Hier ist meine Karte zum Thema:


Heya my dear crafty friends!
Let's "Go Green" for the new Challenge at Crafty Cardmakers, shall we? ;o) This is my take on the theme:


Zuerst habe ich den Hintergrund mit der Nuvo Embellishment Paste in verschiedenen zusammengemischten Farben bestrichen (Citrus Green, Spring Green und einer kleinen Menge Teal) und trocknen lassen. Anschließend habe ich aus dem Papier ein Rechteck und daraus die Fenster ausgestanzt, bevor ich es mit einem der "Next Level" Folder geprägt habe. In Kombination mit der metallisch glänzenden Oberfläche sieht das 3D-Embossing noch mal genialer aus, finde ich ;o)

First I created the background piece with Nuvo Embellishment Paste in Citrus Green, Spring Green and a tiny bit of Teal. I mixed them together until I got the shade of green that I wanted and used a blending tool to get the paste on my paper and then set it aside to dry. Once it was completely dry I die cut a rectangle from the paper and the three windows from the rectangle. Next I used a "Next Level" Folder to emboss the metallic looking piece and really love the effect that gives.


Die Fenster habe ich noch einmal aus Papier in orange ausgestanzt, mit einem Glitzerstift komplett bedeckt und in die äußeren Öffnungen geklebt, damit die Tierchen, die ich mit Copics coloriert und ausgeschnitten hatte, deutlicher zu sehen sind. Für Orange habe ich mich entschieden, weil es die Kontrastfarbe zu Grün ist und die Farben daher sicher gut zusammen passen... Meinen Spruch habe ich dieses Mal geklebt, statt ihn zu stempeln und um das Auge ein wenig zu leiten und den Hintergrund etwas aufzubrechen, habe ich noch die Sternchen aufgeklebt. Fertig war meine Karte. Ich hoffe, sie gefällt euch. Habt auch eine Idee für unsere "Go Green" Challenge? Dann würde ich mich freuen, wenn ihr euer Werk bei den Crafty Cardmakers verlinken würdet. Habt eine tolle Woche und happy crafting wünsche ich euch, eure Maike ;o)

I die cut the windows from some orange paper as well and covered two of them with glitter and adhered them to the apertures on the left and right, so that the colour of the critters, which I had coloured with Copics earlier, would pop even more. I used orange because it is the contrasting colour for / to (?) green. My sentiment is glued on rather than stamped on as usual this time and in order to guide the eyes a little I also added the tiny stars and my card was done. I hope you like it. If you do have an idea for our "Go Green" challenge I would love to see your project in our gallery ;o) Have a wonderful week and happy crafting, yours Maike ;o)


Material / supplies:
Stempel / stamps: "Mini Happy Dance" & "Mini Sticky Note" von Your Next Stamps 
Stanzen / dies: "Stitched Triple Peek-a-Boo Windows" von My Favorite Things
Embossing Folder: "Dotted Next Level Embossing Folder" von We R Memory Keepers
                               --> linked to Simon Says Stamp
Anderes / other: Nuvo Embellishment Paste & Alpha Stickers by Create a Smile

Samstag, 17. Februar 2018

Wishing you happiness, lots of smiles and the best day ever (GSD bunnies)

Halli Hallo ihr lieben Kreativen!
Für Challenge Up Your Life habe ich die heutige Inspirationskarte gemacht. Es geht um "Frühlingsboten" und für mich zählen dazu auf jeden Fall Tulpen - auf meinem Esstisch steht gerade ein ganzer Strauß und im Garten hoffe ich auch auf mehrere Dutzend *grins. Diesen Digi von Gerda Steiner fand ich einfach zu putzig und da es mich daran erinnert hat, dass der Frühling nun endlich vor der Tür steht, habe ich es zum Mittelpunkt meiner Karte gemacht:

Heya my dear crafty friends!
Today's card was made as an inspiration for the newest task at Challenge Up Your Life. This time we would like to see "" on your projects and for me the number one sign for spring is a tulip - I have a bunch of them in a vase on my table right now and am also waiting *im*patiently for them to grow in the garden as well. When I saw this cute image by Gerda Steiner Designs I instantly knew that I wanted to make it the focus of my card for today:


Nachdem ich die beiden Häschen coloriert hatte, habe ich mich an ihr "Surrounding" begeben ;o) Zuerst habe ich den Hintergrund in Mint Julep gestempelt und mit der Stanze von Mama Elephant noch in Form gebracht. Als nächstes kam das Misti für den großen Sentiment-Stempel zum Einsatz - ohne wäre der Abdruck mit Sicherheit nicht halb so schön geworden...

After I had coloured the cute bunnies, I started on their background ;o) First I stamped the stripes in Mint Julep and die cut the piece with the die by Mama Elephant to give it a nice finish. Next I stamped the huge sentiment using my Misti - without it I bet the result wouldn't be nearly as crisp as it is now...


Um die restlichen Wörter an geeignete Stellen stempeln zu können, habe ich zuerst die Hasen zusammen mit einem Drop-Shadow aus Vellum auf die Karte geklebt. Danach habe ich noch die rosa Tropfen hinzugefügt, damit die Farbe der Blume noch einmal auf der Karte auftaucht. Ich würde mich freuen, wenn auch ihr eure Lieblings-Frühlingsboten mit uns teilen würdet. Habt ein wunderbares Wochenende, ihr Lieben - der Frühling kommt immer näher ;o) Happy crafting, wünscht euch eure Maike

In order to stamp the rest of the sentiments where they would fit and look good I had to adhere the drop shadow and the bunnies first. After the stamping I added a few pink Nuvo Drops to bring out the colour of the flower even more. I would love to see your spring creations in our gallery. Have a wonderful weekend my crafty friends  - spring is almost here ;o) Happy crafting, yours Maike


Material / supplies:
Stempel / stamps: "Spring Bunny Friends" von Gerda Steiner Designs
                             "Wishing You" von Mama Elephant
                             "Watercolor Stripes" von My Favorite Things
Stanzen / dies: "All Prettied Up" von Mama Elephant
                         "Oval Shadows" von My Favorite Things

Challenges:
Aud Sentiments Challenge "For a friend"
Seize The Birthday Challenge "Anything Birthday Goes / topping: tea or coffee"
As You Like It Challenge "Favourite Way To Add A Sentiment and Why"
-> I love to stamp my sentiments, because I like the variety of the saying and I love that I can easily add a sentiment at the end, when I forgot to plan ahead as I usually do...

Dienstag, 26. September 2017

I'm here - penguin


Halli Hallo ihr Lieben!
Mich auf wenige Farben zu beschränken fällt mir wirklich immer sehr schwer. Dieses Mal wusste ich aber zum Glück recht schnell, was ich für die aktuelle Challenge auf Cards und More machen wollte, als ich dieses Farbschema sah:

Heya my dear crafty friends!
I do have a hard time confining myself to only one or two colours on a card (or anything I create really...). This time however I knew quite quickly what I wanted to make, when I saw the colour scheme for the newest challenge at Cards und More:


Felix mit seinem Friesennerz hatte es mir auf dem Stempelmekka angetan und ich bin so froh, dass er bei mir eingezogen ist, denn ich finde, er ist die perfekte Besetzung für diese Karte. Was meint ihr?

Felix (the penguin) with his coat was one of the stamps I found at the Stempelmekka (a fair in Germany all about stamps). And I am so glad I did find him, because I think he is the perfect image for this card and colour scheme. What do you think?


Coloriert habe ich ihn mit Zig-Markern, bevor ich ihn dann ausgeschnitten und auf den gewischten Wolkenhintergrund geklebt habe. Den Herzregen hatte ich zuvor mit dem Nuvo Embellishment Mousse in Lemon Sorbet auf den Hintergrund aufgetragen.

I coloured the penguin with Zig markers before fussy cutting him out. I glued him on the background piece which I had created using Simon Says Fog Ink and the MFT cloud stencil. I also layered the shower of hearts on top using the Nuvo Embellishment Mousse in Lemon Sorbet.


I hope you are going to join us for this challenge and I am looking forward to seeing your creations - and as always we have a fun prize for the winner. This time it is a surprise sponsored by Elisa! Have a great week and happy crafting, yours Maike ;o)

Material / supplies:
Stempel / stamps: "Felix mit Kostüm" von Kulricke
                              "Get Well Gang" von WPlus9 (sentiment)
Stanzen / dies: "All Prettied Up" von Mama Elephant
                         "Blueprints 29" von My Favorite Things (tag)
Schablone / stencil: "Falling Hearts" von Simon Says Stamp

Challenges:
Simon Says Wednesday Challenge "Pop it up"

Montag, 18. September 2017

Hedgehog Birthday Cake Card

Halli Hallo ihr Lieben!
Der Herbst zieht wieder bei uns im Land ein... Warum ich das Mitte September so keck behaupte? Erstens weil ich letzte Woche bereits auf Grund von blauen Fingern in der Wohnung die Heizung anmachen musste, zweitens, weil die Bäume draußen langsam kahl werden und drittens, weil "Herbst" das neue Challengethema bei den Crafty Cardmakers ist. Zu einer "Happy Fall" Karte konnte ich mich aber noch nicht überreden, - ich hoffe nämlich noch immer darauf, dass der Sommer ein Einsehen hat und noch mal für ein paar Wochen vorbei schaut -  also habe ich eine Geburtstagskarte mit einem der süßen MFT-Igel gemacht. Schaut mal:

Heya my dear crafty friends!
Autumn is (almost) upon us... You probably ask yourself why I am mentioning this mid September? First of all, because we had to turn on our heating again last week already after my fingers turned blue from the cold one afternoon, secondly because the trees outside seem to have already lost more leaves than they have left on their branches and thirdly because "Autumn" ist the new challenge theme at the Crafty Cardmakers. However, I could not yet bring myself to make a "Happy Fall" card, because I am secretely hoping that summer will return for a few (more) precious weeks, so I made a birthday card with one of the cute hedgehog stamps by MFT. But have a look yourself:


Zuerst habe ich den Hintergrund  mit den selben Nuvo Mouse Farben gesteltet, die ich auch schon für die Karte vom Samstag für Birkas Geburtstag benutzt haben. [Allerdings habe ich da noch einen Embossing Folder benutzt und mit dem metallischen Look von dem Mousse sieht das noch mal ganz anders aus - klickt eingach *hier*, wenn ihr die Karte auch sehen möchtet und ihr eventuell auch noch bei der pinken Challenge von uns Happy Crafty Friends mitmachen und mehr als ein Dutzend toller Preise gewinnen möchtet ;o) ] Während der Hintergrund trocknete - was wirklich rasend schnell geht - habe ich die süßen Motive mit Copics coloriert und sie ausgeschnitten.

I started by creating a background with the same Nuvo Mousse colours I had used on Saturday's card for Birka's birthday. [But on that one I used an embossing folder and it gives the background a completely different look - click *here" if you'd like to see it and maybe you feel like joining in on our challenge from the Happy Crafty Friends as well?! There are more than 11 prizes to be won - just saying ;o) ] While the background was drying - which takes almost no time at all - I coloured my images with Copic markers and fussy cut them out. 


Alles, was ich dann noch tun musste, was das Rechteck mit dem Fenster aus dem Hintergrund zu stanzen und die Sprüche zu stempeln, bevor ich dann alles an der richtigen Stelle festgeklebt habe. Ich hoffe, ihr habt Zeit und Lust an unserer "Herbst"-Challenge bei den Crafty Cardmakers mitzumachen. Happy crafting und habt eine fantastische Woche ;o) Das wünscht euch eure Maike

All that was left to do now was to die cut the rectangle and the window from the background piece and add the sentiments before adhering all the different elements. I hope you are going to join us for our "Autumn" challenge at the Crafty Cardmaker! Happy crafting and have a fabulous week ;o) Yours Maike


Material / supplies:
Stempel / stamps: "Happy Hedgehogs" & "Happy Hippos" & "Beary Special Birthday"
                              von My Favorite Things
                         von My Favorite Things

Challenges:

Samstag, 16. September 2017

Happy Birthday Birka - Happy Crafty Girls Blog Hop

Halli Hallo ihr Lieben!

 Und ganz besonders hallo Birka,
wenn Du hierher gehopst bist!
Herzlichen Glückwunsch zu Deinem Geburtstag!!!

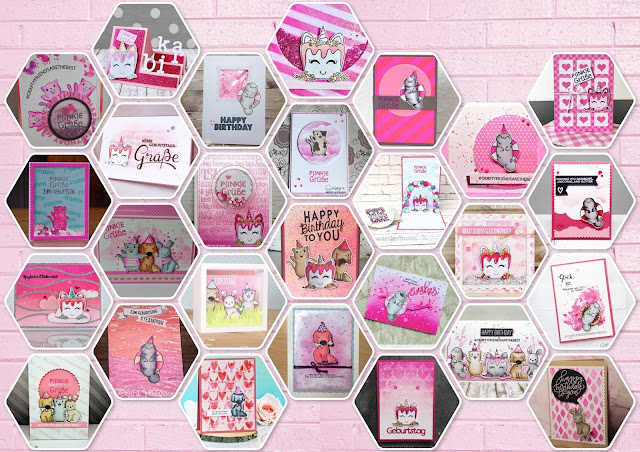
Seit Mooooo-na-ten planen wir eine riesengroße Geburtstagsüberraschung für Birka von "Mit Herz und Schere" - ihr kennt sie und ihre wundervollen Karten sicherlich alle ;o) Wie ihr Blogname ja schon verrät hat sie ein Herz fürs Basteln aber auch und vor allem für die Menschen hinter den Scheren und Blogs. Mittlerweile kenne ich sooo viele liebe, talentierte, tolle, herzliche, wunderbare Menschen und das nur, weil sie uns quasi zusammen geführt hat. Und weil wir alle finden, dass Birka dafür mal ein Mega-Danke verdient hat und wir sie einfach mal so richtig aus den Socken hauen wollten, haben wir alle Birka eine pinke Geburtstagskarte gewerkelt (sie ist absolut #teampink) und für sie und euch einen Blog-Hop daraus gemacht ;o) Das hier ist die Karte, die von mir für Birka in die Post in die Schürzentasche von Jessi von der Stempelbar gehüpft ist ;o)

Heya my dear crafty friends!
Today is a very special day: It is Birka's birthday. Some of you may know her and her awesome cards from her Blog "Mit Herz und Schere" or her Instagram account "Biiirka". Through her I got to know sooo many lovely, talented and wonderful people and we all thought / think that she deserves a huge Thank You and an spectacular surprise for it. Birka absolutely loves pink which is why we all created a pink card for her and organised this Blog-Hop for her and you of course ;o) This is the card I created for her:


Hier findet ihr die Hopser-Reihenfolge:
Here you find the links to all stops from the hop:

Maike (Maikreations) --> Du bist hier / You are here

Und hier schon mal ein kleines Schmankerl für die Augen / And this is a preview for you of what we have in store for you:


Und das Tollste ist, dass ihr auch Mitmachen könnt! ;o) Wie? Ganz einfach. Hüpft einfach zu unserem Blog und stellt dort eine pinke Geburtstagskarte für Birka ein. Insgesamt gibt es 11 Sponsoren, die allesamt ganz wunderbare Preise zur Verfügung gestellt haben! Vielen Dank dafür! Dann gibt es auch noch ein ganz exklusives Stempelset mit den selbstgezeichneten Stempeln von einigen der zeichenbegabten Happy Crafty Friends zu gewinnen ;o) Aber schaut selbst: klick!

And the best thing about it is, that you can join in with the fun! ;o) How? That's easy: Hop to our blog and link up your pink birthday card for Birka. We have 11 generous sponsors who are giving away awesome prizes and you can also win a very exclusive cling stamp set with hand-drawn images by some of our drawing-talented Happy Crafty Friends ;o) But have a look yourself: click!


Falls ihr euch fragt, wie meine Karte entstanden ist, hier ein ganz kurzes Rezept: Den Hintergrund habe ich mit den genialen Embossing Mousses von Nuvo in Peony Pink und Pink Flame hergestellt. Die Mousse ist vielseitig einsetzbar, trocknet super schnell und gibt einen genialen metallischen Schimmer (wie man hoffentlich in den Fotos erahnen kann...). Nach dem Trocknen habe ich in das Papier ein Fenster hineingestanzt und es mit einem Geburtstagswörter-Embossingfolder geprägt. Die Stempel stammen - bis auf die Herzen -aus dem Set, das ihr gewinnen könntet ;o)

In case you are wondering how I made my card, here is a short recipe: I created the background using the awesome Embossing Mousses by Nuvo in Peony Pink and Pink Flame. The mousse can be used in many ways, dries super fast and has this brilliant metallic sheen when it is dry (which I hope you can guess from the pictures...). After everything was dry I die cut the round window from the paper and also embossed it with some cute birthday-words. The stamps I used are mostly from the set that you could win ;o)


Es wäre klasse, wenn ihr Lust und Zeit hättet unsere Überraschung für Birka noch größer zu machen, in dem ihr auch eine pinke Geburtstagskarte bastelst und auf dem Happy Crafty Friends Blog einstellst. Das ist übrigens auch der Weg zu einem Gewinn unserer elf Sponsoren ;o))) * ich erwähns nur noch mal so am Rand ;o) Also ran an den Basteltisch, nachdem ihr vielleicht noch mal mit einem Sektchen oder ähnlichem auf unser Geburtstags"kind" Birka angestoßen habt!

Habt ein Wahnsinns-Wochenende und happy crafting ;o) Eure Maike

It would be brilliant if you would make the surprise even bigger for Birka by creating a pink birthday and linking it to our Happy Crafty Friends blog. This would also be the way to win one of the prizes of our eleven sponsors ;o))) *just saying ;o) So start creating everyone, maybe after you lifted a glass of Prosecco or something like it to our dear birthday girl Birka!

Have an awesome weekend and happy crafting ;o) Yours Maike


Wenn ihr eure Werke auf Instagram zeigt, dann benutzt doch bitte die Hashtags
When you post your creations to  Instagram please use the hashtags

#happycraftyfriends and #birkasbirthdayohp

Material / supplies:
Stempel / stamps: "Exclusive Handdrawn Images Set" by the Happy Crafty Friends
                             (not available to buy - but you could win it or get the Digis here)
                             "Tons of Hearts" von Simon Says Stamp
Stanzen / dies: "Stitched Rectangle Stax" & "Peek-a-Boo Circle Windows"
                          von My Favorite Things
Embossing Folder: "Birthday Embossing Folder" von Taylored Expressions

Related Posts Plugin for WordPress, Blogger...