Posts mit dem Label Wedding werden angezeigt. Alle Posts anzeigen

Dienstag, 15. Juni 2021

Herzlichen Glückwunsch - Wedding card

Heya everyone ;o)

I hope you are all doing well and that maybe life has returned to a somewhat-normal for you. I am so happy you found your way to my blog and would like to share this simple wedding card with you. It was made for the newest challenge over at Papercraft Challenges, so if you have any weddings coming up we would love it if you could share your creation with us in our gallery:


I chose to go with a square card base, because for some reason that is my preferred format for a wedding card. No idea why, but let's roll with it for now ;o) I die the heart frame and the heart from some pearl cardstock which gives just a tiny bit of shine when you tilt it in the light. I glued both to a die cut banner cut from vellum and added the sentiment with stickers and another die cut. By the way for all the intricate die cut pieces like the frame and the word I always use "Stick it" on the back to make life easier for myself and also so that it is completely adhered and won't lift in odd places. I adhered the banner on the decorated card front and my card was almost done.


Because it was rather plain on the outside, I decorated the inside a little bit as well. It is all stamped, but makes it a proper wedding card as the outside could be a birthday card as well. I would love it if you would join us in this month challenge and am looking forward to seeing you again soon - somewhere in Blogland ;o) Have a fantastic day and happy crafting! Yours Maike


Supplies:
Stamps: "Hochzeit Glückwunsch" by Klartext Stempel
Dies: "Heart Frame" by Avery Elle
         "Traditional Tag STAX" by My Favorite Things

Mittwoch, 20. Juni 2018

Alles Liebe zur Hochzeit - Magic Color Slider

Halli Hallo ihr Lieben!
Für die aktuelle Pinspirational Challenge habe ich diese Magic-Colour-Slider-Karte gewerkelt:

Heya my dear crafty friends!
For the current PINspirational challenge I created this magic colour slider card:


Ich habe mich im Besonderen von den Farben und Strukturen (zum Beispiel von den Streifen vom Holzhaus) inspirieren lassen. Hier könnt ihr unser Inspirationsbild sehen:

I got inspired by the colours and the textures (if that is the correct term...): Here you can see our inspiration picture:


Die Einladung zu der Hochzeit, für die diese Karte ist, war im Vintagestil gehalten, weshalb ich eher abgetönte Farben gewählt habe und auch die Idee von dem schwarz-weißen Bild vorne klasse fand. Der farbige Teil kommt ja zum Vorschein, wenn man an dem Tab zieht.

The invitation I got for the wedding was kept in a more vintagy style so I thought those colours would work perfectly.  And I like both looks: the black and white as well as the coloured "version":


Das Schiebeelement habe ich mit der "Magic Color Slider" Stanze von Lawn Fawn hergestellt, die einem wirklich sehr viel der Arbeit abnimmt. Leider habe ich noch immer nicht ganz raus, wie man vernünftig auf Plastik stempelt, ohne dass die Linien so dick werden... Habt ihr vielleicht einen Tipp für mich?

The slider element is made with the Lawn Fawn "Magic Color Slider" die which really takes all the hard work out of creating such a card. The only thing I always struggle with is the part where I have to stamp the image on the acetate piece. I have tried using the MISTI and that help a little, but I am still not completely happy with how thick the outlines are. Do you have any tipps for me?


Ich hoffe, ihr spielt bei unserer Challenge mit und verlinkt eure Projekte hier. Egal, ob ihr euch auch von den Farben oder den Motiven, Texturen, etc habt inspirieren lassen - sagt uns einfach was es war und mit Glück gewinnt ihr einen Preis unseres freundlichen Sponsors "Fred, She Said". Habt eine tolle Woche und happy crafting, eure Maike

I hope you are going to join us for this challenge with your own projects. Just let us know how the picture inspired you and link your card, scrapbook page,... to our gallery here and with some luck you could be the winner of a prize by our kind sponsor "Fred, She Said". Have a wonderful week and happy crafting, yours Maike

Material / supplies:
Stempel / stamps: "Hochzeit Glückwunsch" von Klartext
Stanzen / dies: "Magic Color Slider" von Lawn Fawn

Montag, 25. September 2017

Jeanins Hochzeitsalbum


Hallo ihr Lieben!
Heute habe ich mal keine Karte für euch, sondern eine Idee für ein kreatives Gruppengeschenk für eine Hochzeit. Eigentlich nicht irgendeine Hochzeit, sondern in diesem speziellen Fall für die Hochzeit von der lieben Jeanin von Some Bits and Pieces, die am Wochenende ihren Alex geheiratet hat. Das hier hat sie von uns allen (uns heißt in diesem Fall viele ihrer Bastelfreundinnen) bekommen:

Heya my dear crafty friends!
Today I'd like to share this idea for a group gift for a wedding with you. Well, actually not any one wedding, because in this case it was the wedding of lovely Jeanin from Some Bits and Pieces who got married to her Alex last weekend. This is what she got from all of us (us meaning many of her crafty friends...):


Jede von uns hat ein 10x10 cm großes Stück Papier auf der Vorder- und Rückseite gestaltet. Hier ist meins - komplett flach gehalten, weil ich ehrlich gesagt nicht mehr wusste, ob es auch in Ebenen gestaltet sein durfte... Naja, sicher ist sicher, oder? ;o))))

We all turned a 10x10 cm piece of paper in something like a card by designing the front and back for Jeanin and her husband. I kept mine completely flat, because to be honest, I wasn't sure anymore if we had established any guidelines for our presents, regarding layers.... Well, better safe than sorry I thought, so this is what I made:

Vorderseite / front

Rückseite / back
Und hier ist noch mal ein Blick auf das auseinandergefächerte Album. Falls ihr Lust habt auch die anderen Seiten anzuschauen, guckt doch mal auf Instagram vorbei und gebt im Suchfeld den Hashtag #jeaninjustmarried ein ;o) Ich hoffe, euch hat unsere Idee gefallen und vielleicht inspiriert sie ja den ein oder anderen ;o) Habt ne tolle und kreative Woche!!!

And here is a different look at the album. In case you'd like to see the other pages as well (which I highly recommend - they are all so different and fun!) just log on to Instagram and search for the hashtag #jeaninjustmarried ;o) I hope you like our idea and maybe we could inspire you with it ;o) Have a fantastic and creative week!!!


PS: Wisst ihr was? Ich liebe unser Hobby, weil es kreativ ist, klar, aber auch, weil der Hauptgrund ist, anderen eine Freude zu machen und das finde ich großartig! Jedes Lächeln, das man mit einer Karte, einem tollen Umschlag, einem Smilespotting-Werk oder einem kleinen handgemachten Geschenk in die Welt bringt ist ein echtes Geschenk. Keine Ahnung, warum das jetzt raus musste, aber es musste! Habt eine tolle Woche und seid großartig!

PS You know what? I truly love our hobby Because it is creative for sure, but especially because one main reason for making cards, beautifying an envelope, leaving smile-spotting cards for random people to see or giving little hand crafted boxes is making people smile. And every little smile that comes to someones face is a real gift. No idea where this all came from, but it had to be typed for some reason... Have a great week and be awesome!

Material / supplies:
Stempel / stamps: "Hochzeit Glückwunsch" von Klartext
Stanzen / dies: "Blueprint 29" von My Favorite Things
                         (but any die that gives you a decent sized opening will work here)
Schablone / stencil: "" will be added


Montag, 24. April 2017

Hochzeitswünsche im Vintage / Modern Mix

Hallo ihr Lieben!
Bei den Crafty Cardmakers startet eine neue Challenge mit dem Thema "Gems und Perls" für euch. Nuuuun, das ist nicht unbedingt meine starke Seite, wenn es ums Kartenbasteln (und auch sonst) geht, aber ich habe mit zwei Perlen einen, wie ich finde, schönen Akzent setzen können. Ohne diese Challenge hätte ich vermutlich nicht mal in meine Perlenkiste (hihi) hineingeschaut. Aber seht selbst:

Heya my dear crafty friends!
The Crafty Cardmakers have a new challenge for you ;o) This time our theme is "Gems and Pearls", which isn't really my strong suit when it comes to cardmaking, but I added a lovely details or so I think withtwo pearls to my card. Without this challenge I would probably not even have thought about having a look in my pearl-box (hehe). Have a look yourself:


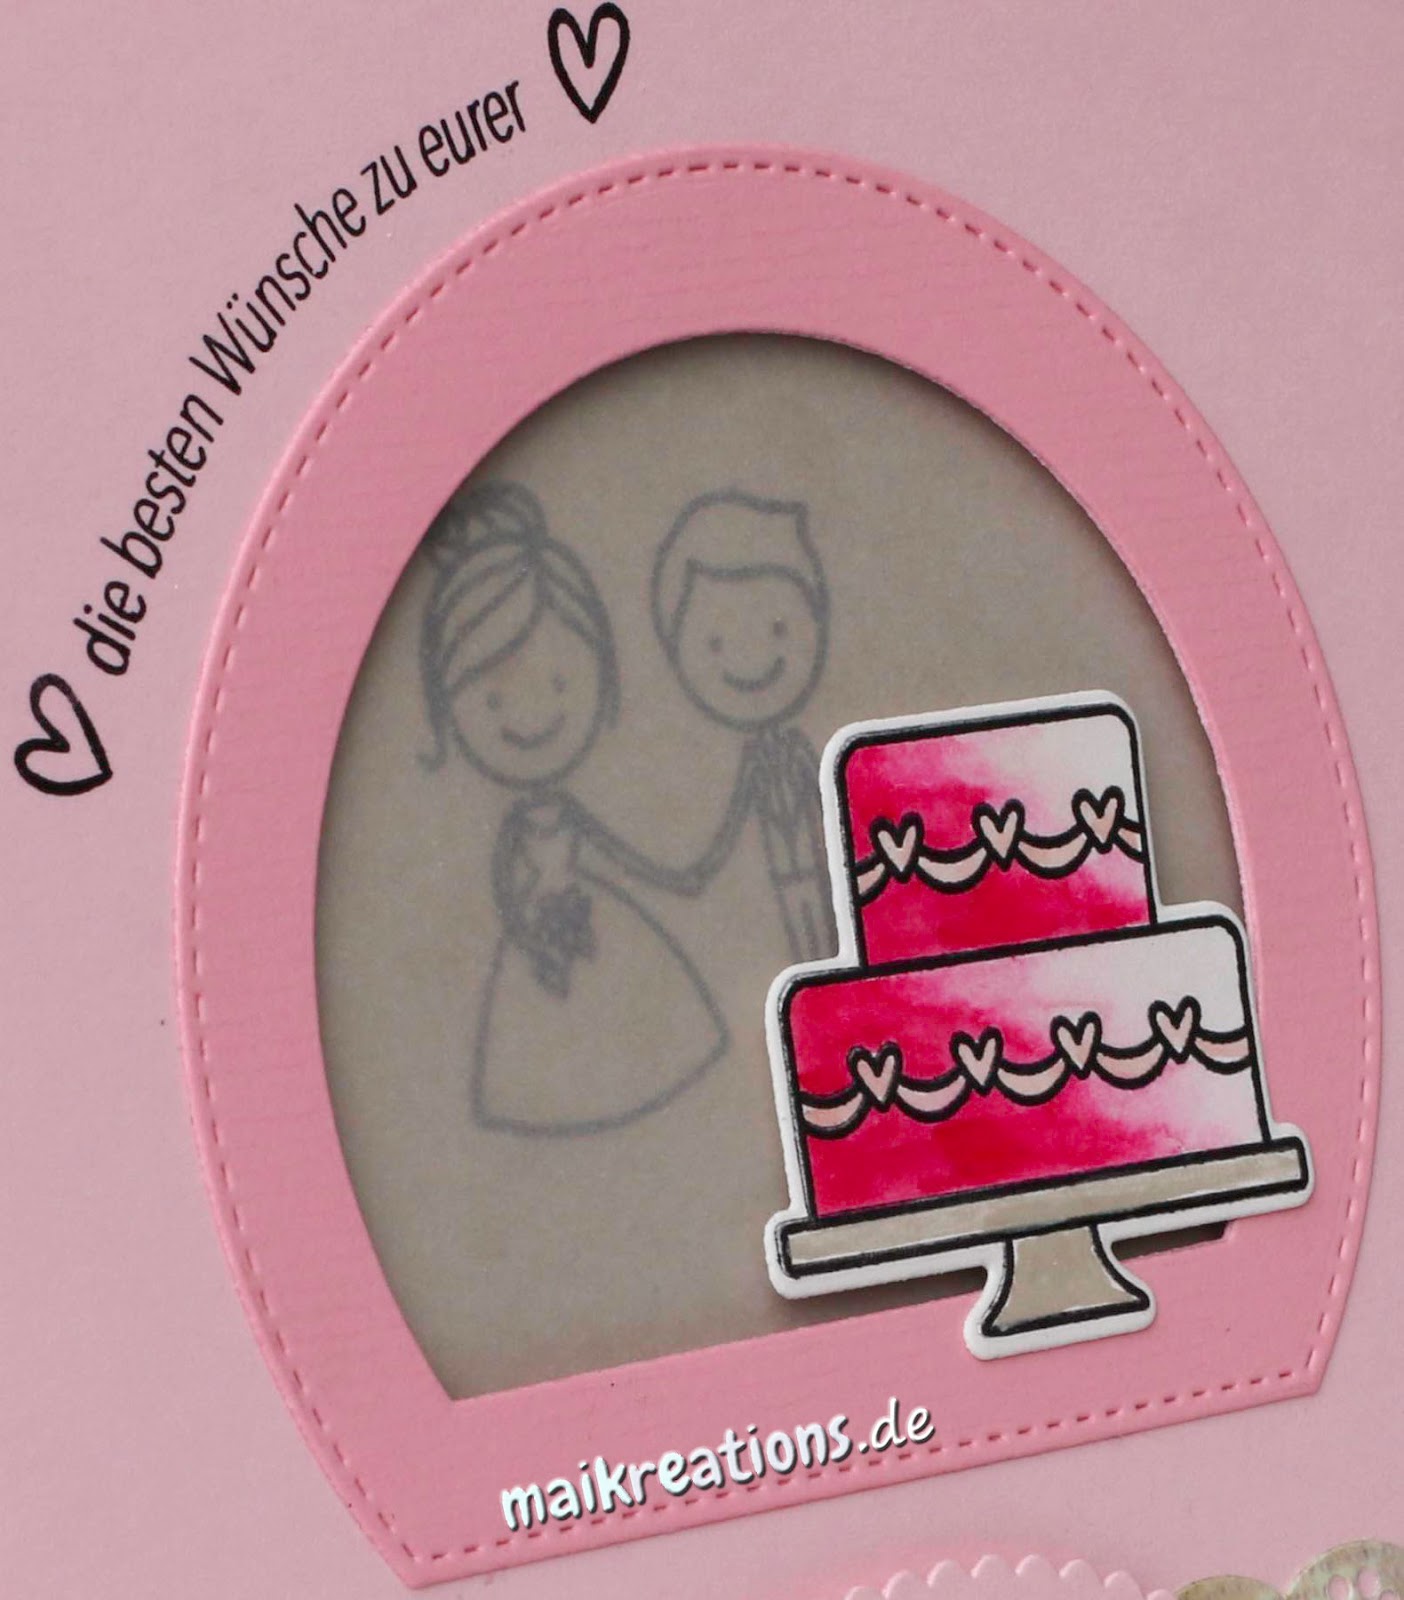
Die Einladungskarte des Paares war überwiegend rosa und daher wollte ich diese Farbe auch in der Glückwunschkarte aufnehmen. Das Hochzeitspaar habe ich direkt auf die Kartenbasis gestempelt und anschließend Transparentpapier darüber geklebt, um sie ein wenig in den Hintergrund treten zu lassen - den Effekt finde ich wirklich ganz klasse, wenn ich das selber so sagen darf ;o)

The invitation we got was mainly pink so I thought I'd stick to that colour for our congratulations card. I stamped the couple directly to the cardbase and added some vellum over the stamped image, so that the people would be a little more in the background. I really like the effect, if I may say so mayself ;o)


Und unten rechts sieht man dann auch noch die beiden Perlherzen, die für mich das Hochzeitspaar symbolisieren. Vielleicht kramt ihr ja auch einmal in eurer Perlen-Kiste und habt Lust etwas damit zu basteln? Dann habt ihr 2 Wochen Zeit euer Projekt bei den Crafty Cardmakers zu verlinken. Ich freu mich schon darauf, durch die Perlen- und Juwelenbesetzten Werke zu stöbern. ;o) Happy crafting, eure Maike

In the right bottom corner you can see the two heart shaped pearls I have used. For me they symbolize the wedding couple.. Maybe you feel inspired to create a project with some pearly or gems, too?! Then I would love for you to link them to our gallery at the Crafty Cardmakers ;o) Happy crafting, yours Maike


Material / supplies:
Stempel / stamps: "Hochzeit Glückwunsch" von Klartext (Dani Peuss)
                              "Happy Wedding" von Lawn Fawn
Stanzen / dies: "Stitched Arch Stax" von My Favorite Things

Challenges:
A Gem of a Challenge "Ribbon or Lace" (hope the sticker lace counts)
As you like it "Favorite Colour and why?"
(I really like pink shades and it is also the bride's favourite colour)
Crafty Addicts "Anything Goes"
Creative Knockouts "Lots of Layers"

Montag, 11. Juli 2016

Bling it on - Stamping with Finetec Watercolours

Hallo zusammen!
Die neue Challenge bei den Crafty Cardmakers lautet "Bling it on" und hat mich anfangs vor eine echte Herausforderung gestellt, da ich ja normalerweise nicht so für "Bling" auf meinen Karten bin. Dann kam mir aber folgende Idee:

Heya everyone!
The new theme for the Crafty Cardmakers challenge is "Bling it on" and that really provided a challenge for me, as I usually do not have a lot of "bling" on my cards. Then I came up with this idea:


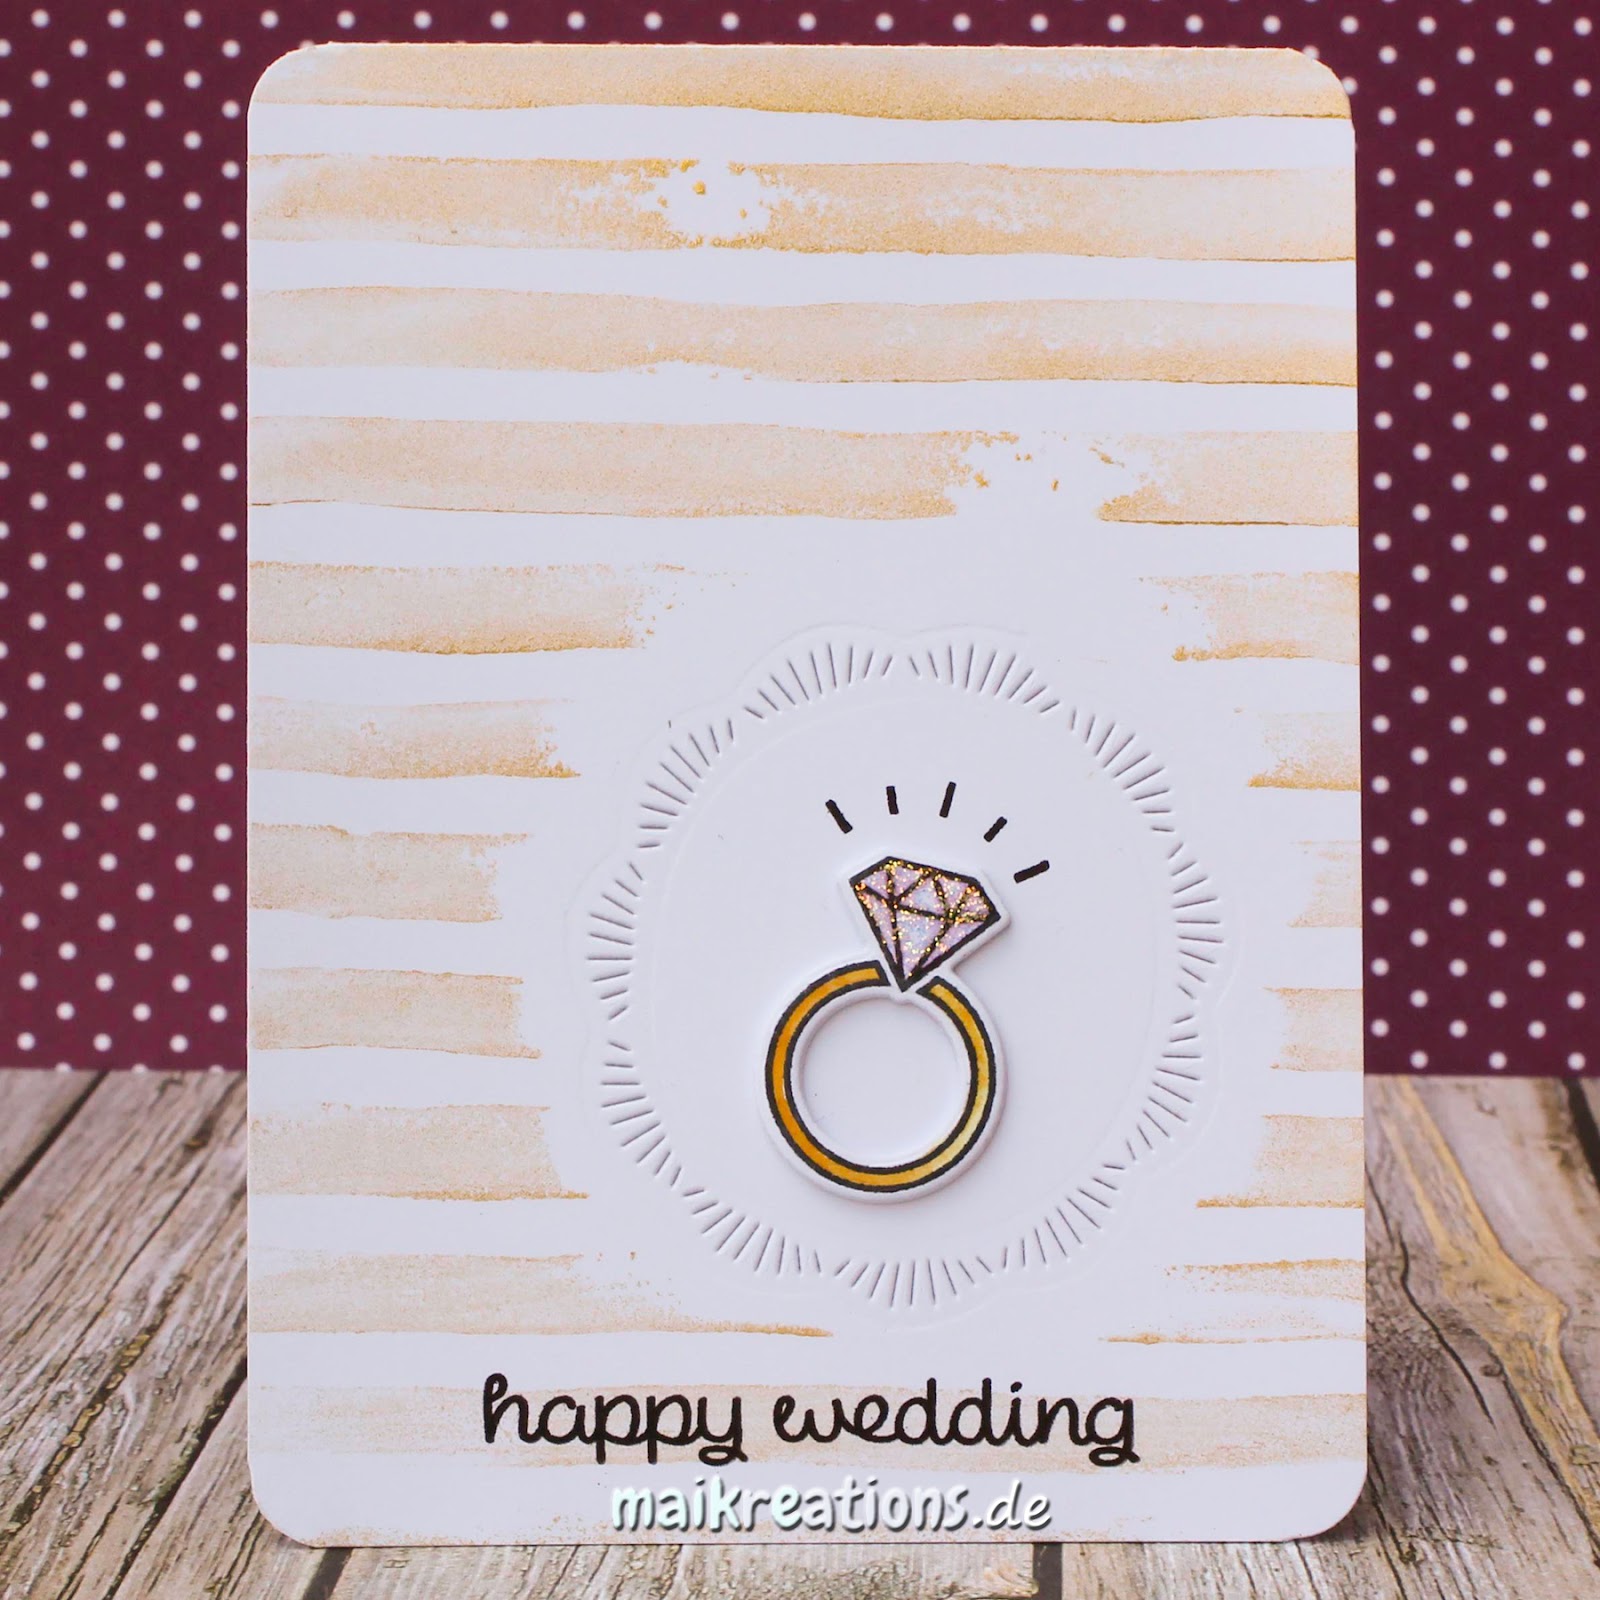
In meiner Sammlung habe ich das Set "Happy Wedding" von Lawn Fawn und sie haben diesen klasse Diamantring darin, der super zu meiner Idee passte. Den habe ich gestempelt und ausgestanzt und anschließend habe ich den Diamantteil großzügig mit Diamond Stickles bedeckt, bevor ich ihn weit weg zum Trocknen in ein Regal gelegt habe. (Sonst passiert es schon mal, dass kurz danach irgendwelche Kleinteile in der Klebe stecken. Also muss ich die Sachen immer weit weg legen.) Da ich den Ring ja gold coloriert habe, wollte ich auch noch einen goldenen Hintergrund, aber das einzig goldene Stempelkissen das ich habe, gibt nicht ganz so viel Schimmer her und außerdem mag ich die Farbe nicht ganz so sehr. Allerdings liebe ich die Goldtöne der "Finetec Perlglanzfarben". Als sie mir einfielen, habe ich mich gefragt, ob man damit wohl auch stempeln kann und ja, es klappt. Allerdings sollte man ein paar Kleinigkeiten dabei beachten: Man muss zügig arbeiten, das Misti ist eine große Hilfe wenn man wirklich flächig stempeln möchte und ein Mini Mister in der Nähe ist auch eine gute Sache, um den Stempel noch einmal kurz vor dem Abdruck leicht einnebeln zu können. Ich weiß, dass mein Hintergrund nicht perfekt gestempelt ist, aber ich fand den Look für diese Karte ganz passend.

I own the set "Happy Wedding" from Lawn Fawn and they included this fun diamond ring in there, which I though would be perfect for my project. I stamped and die cut it and then coated the diamond part generously with Diamond Stickles before setting it aside to dry. And then I wanted to have a sparkling golden background as well, but the only gold ink pad I own doesn't give a lot of shimmer and also I am not the biggest fan of the colour. However I love the "Finetec Pearl Colors". I wondered if I could stamp with it and so I started experimenting. Let me tell you: It works ;o) A few tips should you decide to give it a try as well: You need to work quickly, a Misti is definately a big help, especially when you want to stamp a solid image and also have a Mini Mister ready and give your stamp a light spritz before stamping it. I know my background stamping is far from perfect on this card, but I liked the look of it. 


Insgesamt habe ich den Ring 4x ausgestanzt und übereinander geklebt, damit es so ausschaut, als könnte man ihn tatsächlich von der Karte nehmen und anziehen. Den Kartenspruch habe ich direkt auf einen der Goldstreifen gestempelt und auch hier war das Misti wieder sehr sinnvoll. Der erste Abdruck war nämlich durch den rauen Untergrund nicht besonders geworden. Zum Schluss habe ich noch die "Glitzerstrahlen" um den Ring gestempelt und die Ecken abgerundet. Ich hoffe, ihr zeigt uns eure "Bling it on"-Werke bei den Crafty Cardmakers.


All in all I die cut the ring four times and glued the individual pieces together, so that it now looks like you could pick up the ring from the card and wear it. The sentiment was stamped directly on to one of the golden stripes and the help from the Misti was once again very welcome as the first impression wasn't all that great because of the rough surface. At the end I added the "bling rays" around the diamond and also rounded all four edges of the card with my Corner Chomper. I hope you will link your "bling it on" - creations to the Crafty Cardmakers blog.

Dieses Bild zeigt zumindest ein bisschen den Glanz den die Finetec Farben haben.
This picture shows a little of the shimmer and shine you get from the Finetec watercolors.

Happy crafting,
Maike

Material / supplies:
Stempel / stamps: "Happy Wedding" von Lawn Fawn
                              "Watercolor Stripes" von My Favorite Things
Stanzen / dies: "Happy Wedding - Lawn Cuts" von Lawn Fawn
                         "Scalloped Frames" von Avery Elle (@Simon Says Shop)

Challenges:

Dienstag, 7. Juni 2016

Jessas Hochzeitskarte / Jessa's wedding card

Hallöchen zusammen!
Ich hoffe, ihr hattet einen guten Start in die Woche ;o) Ich weiß nicht, ob ihr es wusstet, aber die liebe Jessa von "Useless Trinkets" hat vor Kurzem geheiratet und die Herstellung ihrer Hochzeitskarte fiel genau in den Zeitraum, in dem ich meine Inspirationskarte für die neue PINspirational Challenge werkeln wollte. Das Bild zeigt Vögel in einem Nest und bei Nest habe ich an ein Zuhause gedacht, bei Zuhause an Geborgenheit, bei Geborgenheit dann an Liebe und von Liebe bin ich zurück zur Hochzeit von Jessa gekommen. Das erklärt dann sicherlich auch, wie es zu dieser Karte kam:

Heya everybody!
I hope you had a good start to your week ;o) I don't know if you knew, but the lovely Jessa from "Useless Trinkets" got married in May and the making of her card happened, when I started thinking about the inspiration card for the new PINspirational Challenge. The inspiration pic shows some birds near their nest and my thought process suddenly went from nest to home to a feeling of security to love and from there right back to Jessa's wedding. This seems to be the reason why I came up with this card:


Erst wollte ich Jessa ja eine Monster-Hochzeitskarte machen ( - wer mit ihren wunderbar humorvollen Werken vertraut ist, weiß sicherlich warum und wer sie nicht kennt, sollte schnell mal bei ihr vorbei hüpfen). Aber da ich keine Monsterchen habe, hoffe ich, dass sie sich auch über die Piepmätze gefreut hat ;o) Bei dem Design habe ich mich an ihren Gäste-Goodies orientiert. (Falls ihr möchtet, schaut sie euch doch mal hier auf Jessas Instagram-Account an.)

First I wanted to make a card using monsters (and if you know Jessa's wonderfully and humorous cards, you will certainly know why and if you aren't familiar with her projects I highly recommend taking a look at them). Unfortunately I don't own any monster stamps, so I hope she likes those little love birds, too ;o) The design of my card loosely follows her design of the gift bags for her guest. (If you are interested in comparing those designs and in getting to know Jessa's work a little better, why not also take a look here at her instagram account?!)


Und nun zum Karten-Rezept: Als erstes habe ich die Schneekugel, die Vögelchen und die Torte gestempelt und mit Zigs coloriert, weil ich einen recht soften Look für die Karte haben wollte. Als nächstes habe ich dann alles ausgeschnitten und mit weißem Embossingpulver noch einen Spruch auf den Sockel der Schneekugel hinzugefügt. Danach habe ich das karierte Muster auf Vanille-farbenes Papier gestempelt, es auf die richtige Größe geschnitten und das Stück Glitzertape oben angebracht - genauso, wie Jessa auf ihren Gastgeschenken. Allerdings habe ich mich für ein goldenes Tape entschieden, statt ein pinkes zu benutzen ;o) Alles, was nun zu tun war, war alles an die richtige Stelle zu kleben. Ein kleiner Trick, der das Leben eines jeden Crafters leichter macht, hat mir dabei geholfen: Die Füße der Vögel habe ich nicht ausgeschnitten, weil mir das zu fisselig ist. Stattdessen habe ich die beiden an die Stelle gestempelt, wo sie stehen sollte und dann die Körper einfach nur noch auf die Beinchen drauf geklebt. Viel einfacher so ;o)

Now to the card-recipe: I stamped the snow globe, the birds and the cake all seperately and coloured them with Zig markers, because I wanted to achieve a rather soft look. Next I fussy cut all of them out and added the sentiment with white embossing powder to the bottom part of the globe. Afterwards I stamped a grid pattern on some vanilla coloured cardstock, cut it to size and added a piece of glitter tape to the top, just as Jessa did on her gift bags. I used a golden colour instead of a bright pink one though ;o) Now all that was left to do was to assemble the card. A little trick to make a crafter's life easier helped me: I didn't cut out the bird's feet but rather stamped them and then placed the coloured birds on top. Much easier ;o)


Das ist das aktuelle Inspirationsbild für die PINspirational Challenge und vergesst nicht, dass unser Sponsor "Robyn's Fetish" einen Preis von 2 Digistamps für den Gewinner gestiftet hat.

This is the current inspiration pic at the PINspirational Challenge and don't forget our kind sponsor "Robyn's Fetish" offers a prize of 2 digi stamps to the winner ;o)


Material / supplies:
Stempel / stamps: "Happy wedding" & "Ready, Set, Snow" von Lawn Fawn
                              "Grid Background" von My Favorite Things

Challenges:

Mittwoch, 29. April 2015

Wedding Card "Lots of Hearts"

Hallo zusammen!
Habt ihr schon Hochzeitseinladungen für dieses Jahr bekommen? Ich schon einige und daher passt das Thema für die neue Stempelküche-Challenge auch so gut. Es heißt "I do" und falls ihr eh Hochzeitskarten machen wolltet, ist das jetzt die perfekte Zeit dafür! 

Hello there ;o)
Did you get some wedding invitations for this year yet? I did and so it fitted well that the Stempelküche Challenge theme for this fortnight's challenge is "I do". If you had planned on making wedding cards anyways this would be the time to make some and show them to the nice community there.


Freunde von mir heiraten im Juni und sie haben eine wirklich schöne Einladungskarte verschickt (schlicht, aber mit dem gewissen Etwas und in Rot und Weiß gehalten) und ich wollte, dass sie ihre Einladung ein bisschen in meiner Gratulationskarte wiederentdecken können. Hier ist sie:

Friends of mine are getting married in June and their invitation was very nice (CAS-style and kept in red and white) and I wanted my card to match theirs. This is what I created for them:


Um die Herzen gleichmäßig aufkleben zu können habe ich mein wunderbares Lineal von Tim Holtz zu Hilfe genommen. (Falls ihr es noch nicht kennt, schaut euch mal ein Video darüber an und guckt, ob es nicht etwas ist, was euch nützlich sein könnte. Ich finde es großartig!) So konnte ich nicht nur vermeiden die Herzen in Schlangenlinien aufzukleben, sondern auch wunderbar den Mittelpunkt der Karte ermitteln und die Abstände der Reihen gleich wählen ohne mit dem Bleistift auf meiner Karte herumzumalen. Ich bin nämlich wirklich nicht gut darin meine Bleistiftmarkierungen wieder komplett auszuradieren und selbst, wenn ich mal nichts übersehen habe, bleiben oft diese leichten Druckspuren, die mich am Ende immer furchtbar ärgern.

In order to glue the hearts down straight I used my wonderful ruler by Tim Holtz. (If you don't know it and you like to have things straight on your cards maybe you'd like to check out a video about this ruler and its special features... I think it is great!) This way the hearts are not only straight on the card, but also are placed in the middle exactly and the space between the rows of hearts are evenly spaced without me having to draw pencil lines on my card base. I am not very good at erasing those and also my grip is appearently too strong so I have slight indentations on my cards whenever I use a pencil - and to be totally honest: that always bugs me horribly!


Am Ende war mir die Karte doch etwas zu schlicht, daher habe ich dem roten Herz noch eine Schönheitskur verpasst: Ich habe noch 4 weitere rote Herzen darüber geklebt, um ihm mehr "Umpf" auf der Karte zu geben, das oberste dann mit Wink of Stelle zum schimmern gebracht und alles mit Glossy Accents zum glänzen gebracht ;o) Vorher war sie auch schön, jetzt finde ich die Karte wirklich super! Manchmal sind es wirklich Kleinigkeiten, die eine Karte zum Scheinen bringen! Welche Tricks habt ihr denn so auf Lager, um einer Karte das gewisse Etwas zu verleihen???

When I was looking at the card a bit later I felt that it needed some finishing touches. So I die cut another four of the red hearts and glued them on top of the one that was already on the card, added some Wink of Stella Clear Glitter Pen and finished it off with some Glossy Accents on top. I like the card before, but now it looks a bit more polished ;o) Sometimes it is really just the finishing touches that let your cards shine! What is your favourite way of touching up a card and transforming it from a nice card to a stunning one???


Ich würde mich wirklich freuen eure Hochzeitskarten auf dem Stempelküche-Challenge Blog zu sehen ;o))
I would love to see your creations at the "Stempelküche-Challenge Blog" ;o)))

Material / supplies:
Stempel: "Simon Says Clear Stamps On Edge" von Simon Says Stamp
Stanzen: "Cardbooking Dies" von Paper Smooches

Tim Holtz Lineal / ruler


Pinterest Pic:


Mittwoch, 21. Januar 2015

Hochzeits - Minialbum / wedding mini album

Im letzten Jahr hat eine Freundin von mir geheiratet und zu diesem Anlass habe ich dem frischvermählten Paar ein Minialbum für ihre Lieblingsfotos gebastelt. (An dieser Stelle noch einmal herzlichen Glückwunsch an Jenny und Levent! Zur goldenen Hochzeit gibt es dann spätestens das nächste Album - versprochen!!!)

Last year a friend of mine got married and I made this mini album for the newlyweds. (Congrats again to Jenny and Levent! For your 50th anniversary at the latest I'll make you another mini-album. Promised!!!)

Aufgeklappt sieht es dann so aus:

Inside it looks like this.

 Man kann an vielen Stellen noch Seiten umklappen und immer wieder Neues entdecken. Die Fotos sollten die beiden selber auswählen können und auch einen Platz um ihre Lieblingsmomente der Hochzeit zu beschreiben ist vorhanden. Hinter die beiden Polaroid-Stanzteile aus dem Set "Precious Polaroids" von Die-Namics können Fotos geschoben werden und darunter ist auch noch einmal viel Platz für Erinnerungen.

There are many flaps to turn and new things to discover. The polaroid frames are from the set "Precious Polaroids" by Die-Namics and there is room for a photo inside. I wanted to give them a chance to choose their own pictures, therefore I left the pages mostly blank. There is also a pocket with three tags for them to write down their favourite moments.


Die Idee stammt leider nicht von mir, sondern aus einem Video-Tutorial von Loretta. Vielleicht habt ihr ja auch Lust euch das Video einmal anzusehen! Mir hat es sehr geholfen, daher: "Ein großes Dankeschön, Loretta!"

Unfortunately I cannot take credit for the idea of the mini-album. I've seen it in a video-tutorial by Loretta. Maybe you'll go and check her video out! Because of her tutorial I made my very first mini-album, so: "Thank you Loretta!"
Related Posts Plugin for WordPress, Blogger...