Mittwoch, 29. April 2015

Wedding Card "Lots of Hearts"

Hallo zusammen!
Habt ihr schon Hochzeitseinladungen für dieses Jahr bekommen? Ich schon einige und daher passt das Thema für die neue Stempelküche-Challenge auch so gut. Es heißt "I do" und falls ihr eh Hochzeitskarten machen wolltet, ist das jetzt die perfekte Zeit dafür! 

Hello there ;o)
Did you get some wedding invitations for this year yet? I did and so it fitted well that the Stempelküche Challenge theme for this fortnight's challenge is "I do". If you had planned on making wedding cards anyways this would be the time to make some and show them to the nice community there.


Freunde von mir heiraten im Juni und sie haben eine wirklich schöne Einladungskarte verschickt (schlicht, aber mit dem gewissen Etwas und in Rot und Weiß gehalten) und ich wollte, dass sie ihre Einladung ein bisschen in meiner Gratulationskarte wiederentdecken können. Hier ist sie:

Friends of mine are getting married in June and their invitation was very nice (CAS-style and kept in red and white) and I wanted my card to match theirs. This is what I created for them:


Um die Herzen gleichmäßig aufkleben zu können habe ich mein wunderbares Lineal von Tim Holtz zu Hilfe genommen. (Falls ihr es noch nicht kennt, schaut euch mal ein Video darüber an und guckt, ob es nicht etwas ist, was euch nützlich sein könnte. Ich finde es großartig!) So konnte ich nicht nur vermeiden die Herzen in Schlangenlinien aufzukleben, sondern auch wunderbar den Mittelpunkt der Karte ermitteln und die Abstände der Reihen gleich wählen ohne mit dem Bleistift auf meiner Karte herumzumalen. Ich bin nämlich wirklich nicht gut darin meine Bleistiftmarkierungen wieder komplett auszuradieren und selbst, wenn ich mal nichts übersehen habe, bleiben oft diese leichten Druckspuren, die mich am Ende immer furchtbar ärgern.

In order to glue the hearts down straight I used my wonderful ruler by Tim Holtz. (If you don't know it and you like to have things straight on your cards maybe you'd like to check out a video about this ruler and its special features... I think it is great!) This way the hearts are not only straight on the card, but also are placed in the middle exactly and the space between the rows of hearts are evenly spaced without me having to draw pencil lines on my card base. I am not very good at erasing those and also my grip is appearently too strong so I have slight indentations on my cards whenever I use a pencil - and to be totally honest: that always bugs me horribly!


Am Ende war mir die Karte doch etwas zu schlicht, daher habe ich dem roten Herz noch eine Schönheitskur verpasst: Ich habe noch 4 weitere rote Herzen darüber geklebt, um ihm mehr "Umpf" auf der Karte zu geben, das oberste dann mit Wink of Stelle zum schimmern gebracht und alles mit Glossy Accents zum glänzen gebracht ;o) Vorher war sie auch schön, jetzt finde ich die Karte wirklich super! Manchmal sind es wirklich Kleinigkeiten, die eine Karte zum Scheinen bringen! Welche Tricks habt ihr denn so auf Lager, um einer Karte das gewisse Etwas zu verleihen???

When I was looking at the card a bit later I felt that it needed some finishing touches. So I die cut another four of the red hearts and glued them on top of the one that was already on the card, added some Wink of Stella Clear Glitter Pen and finished it off with some Glossy Accents on top. I like the card before, but now it looks a bit more polished ;o) Sometimes it is really just the finishing touches that let your cards shine! What is your favourite way of touching up a card and transforming it from a nice card to a stunning one???


Ich würde mich wirklich freuen eure Hochzeitskarten auf dem Stempelküche-Challenge Blog zu sehen ;o))
I would love to see your creations at the "Stempelküche-Challenge Blog" ;o)))

Material / supplies:
Stempel: "Simon Says Clear Stamps On Edge" von Simon Says Stamp
Stanzen: "Cardbooking Dies" von Paper Smooches

Tim Holtz Lineal / ruler


Pinterest Pic:


Dienstag, 28. April 2015

Bookmark Card / Lesezeichen-Karte


Hallo ihr Lieben!
Heute möchte ich euch meine zweite Karte für das {PIN}spirational DT zeigen. Dazu seht ihr hier erst einmal die Fotoinspiration für die kommenden zwei Wochen:

Hello dear crafty friends!
Today I'd like to show you my second card for the {PIN}spirational DT. But first let me show you the inspiration picture for the new challenge:


Und hier ist meine Kreation: / And here is my creation:


Auf den ersten Blick sieht es aus, wie eine ganz normale Karte, aber man kann das grüne Stanzteil mit dem Mädchen abnehmen und hat dann eine Karte und ein Lesezeichen.

When you look at it, it looks like a standard card, but you can take the tag off the card and use it as a bookmark. (The little tag on the card base says "For someone very dear ".)


In den Avery Elle "Bookmark Elle-ments Dies" finden sich drei kleine Lesezeichen, die man einfach ausstanzen und sofort als Lesezeichen benutzen kann. Eines davon habe ich auf die Rückseite von dem großen Lesezeichen geklebt, damit man es einerseits an die Karte, andererseits aber auch später an eine Buchseite klemmen kann.

I glued a little bookmark (from the Avery Elle "Bookmark Elle-ments Dies") on the back of the coloured tag, so that it can be put on the top of the card for now and on a book page later on.


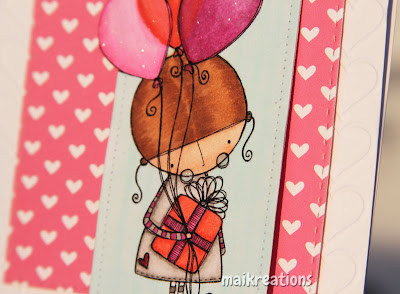
Die längste Zeit habe ich bei dieser Karte für das Kolorieren von Amalia und ihren Ballons benötigt, aber ich finde, es hat sich durchaus gelohnt ;o) Nachdem ich mit dem Ausmalen fertig war, habe ich Glossy Accents auf ihre Brillengläser gegeben und mit dem Wink of Stelle Clear Glitter Pen die Ballons noch einmal übermalt, damit sie diesen wunderbaren Schimmer bekommen, den man im letzten Bild ganz gut erkennen kann. Ich hoffe, euch gefällt meine Karte und ihr habt Lust bekommen auch bei unserer aktuellen Challenge #139 mitzumachen!
Gesponsert werden wir dieses mal von Dilly Beans! Amalia ist zum Beispiel einer der Digi-Stamps aus ihrem Shop - und sieht sie nicht einfach niedlich aus?

The most time consuming part for this card was colouring the sweet Amalia and her balloons, but I think it was time well spent ;o) After I coloured everything in I put some Glossy Accents on her glasses and Wink of Stella Clear Glitter on top of the balloons to give them the nice glimmer you can see in this last picture. Hope you like my card and that you are feeling inspired to play along with us for our challenge #139!
Our kind sponsor this time is Dilly Beans! Cute Amalia is one of their digi stamps - and doesn't she look adorable?!


Material / supplies:
Digi-Stamp: "Amalia's Party #400" von Dilly Beans

Stanzen: "Bookmark Elle-ments" von Avery Elle
              "Stitched Squares Wafer Dies" von Simon Says Stamp


Pinterest-Pic:

Sonntag, 26. April 2015

Hello #2 (Easy to shake up card design)

Hallöchen! ;o)
Heute möchte ich euch eine Karte zeigen, die fix gemacht und vielseitig einsetzbar ist. Durch Austauschen der Farben bekommt man außerdem ganz verschiedene Looks. Stellt euch vor, ihr nehmt statt dem Pink einen Blauton, dann ist die Karte toll für Männer geeignet. Oder ihr kennt jemanden, der bunte Karten liebt? Prima, dann den Grauton zum Beispiel durch Grün ersetzen und ihr habt eine tolle, farbenfrohe Karte!

Hello! ;o)
Today I'd like to show you a quick and very versatile card design. When you swap colours you get very different looks. Imagine you decide to use blue instead of pink, then the card would be great for a man. Or you know someone who loves colourful cards? Great, use some light green instead of the grey and you have a lovely, colourful card.


Den Hintergrund habe ich mit 2 verschiedenen Grautönen ("Fog" von Simon Says Stamp & "Soft Granite" von Hero Arts) in der "Rock 'n Roll - Technik" gestempelt, damit es ausschaut, als hätte die Karte in der Mitte einen Lichtpunkt. Das "hello" habe ich zweimal -farblich passend zu dem Herz und dem Rahmen - ausgestanzt und versetzt aufgeklebt. So entsteht der Eindruck eines Schattens und der Gruß ist außerdem besser lesbar. Herz und Rahmen habe ich mit Abstandshaltern aufgeklebt, um der Karte noch ein wenig Tiefe zu geben.

I stamped the background in two different shades of grey using the "Rock 'n Roll - technique", to make it look like the light would reflect from the center of the card. I die cut the word "hello" two times and glued it slightly offset to the card. This way the piece in the back acts as a shadow which makes the one in front pop off the card even more. I used foam pads to glue the heart and its frame down to give the card some dimension.


Material / supplies:
Stempel: "Weathered" von Stampin Up

Stanzen: "Scripty Hello" von Lawn Fawn
             "Stitched Frames Dies" von Paper Smooches

Challenges:
Simon Wednesday Challenge "Clean and Simple"
Scrapbooker PhD "Focus on a sentiment"
Just Add Ink "Sketch #260"
One Crazy Stamper "Anything goes"


Mittwoch, 22. April 2015

Thanks Butterflies

Hallo ihr Lieben!
Schön, dass ihr vorbeischaut! Heute möchte ich euch eine Karte zeigen, die ich schon lange im Kopf hatte, aber irgendwie nie dazu gekommen bin sie zu machen. Jetzt wurde es langsam mal Zeit... ;o)

Hello everyone!
Thank you for stopping by! Today I'd like to show you a card that I had wanted to create for the longest time! It was well over due... ;o)


Die Stanze habe ich schon vor einer Weile gekauft und nun wurde es endlich Zeit sie auch zu benutzen. Ich habe die Schmetterlinge "ausgestanzt" und dann mit einem Stück Papier hinterlegt, das ich mit drei verschiedenen Copics koloriert habe, so dass ein Farbverlauf entstand. Die gleiche Technik habe ich auch für das Wort "thanks" benutzt, so dass alles gut zusammenpasst. Letztendlich habe ich mich dazu entschieden auch noch einen der kleinen Schmetterlinge in den Rosatönen anzumalen, weil mir ein wenig Farbe auf der Karte fehlte.

I had bought the butterfly die a while ago and now I could finally take it out to play with. I "cut" out the butterflies and put a piece of paper behind which I had coloured with three of my Copic markers. I used the same markers on the word die so that it would match perfectly. In the end I decided I needed a liitle bit more colour and used my markers on one of the butterflies as well. Done ;o) It is a quick, easy card and you could have it any colour you like, so that you would be able to make a card that the recipient like in no time when needed.


Material / supplies: 
Stanzen / dies: "Butterfly Heart" von Memory Box
                      "Scripty Thanks" & "Small Stitched Rectangle Stackables" von Lawn Fawn


Challenges:

Samstag, 18. April 2015

Bunte Kommunionskarte

Halli Hallo!
Endlich hat der Frühling auch hier wieder das Sagen ;o)) Ich hoffe, dass ihr dort wo ihr lebt auch die Sonne, die frischen Knospen und das satte Grün genießen könnt! Der Frühling ist ja auch die Zeit für Kommunionen und Konfirmationen. Daher möchte ich auch heute eine Karte zeigen, die ich für eine ganz bezaubernde kleine Dame gemacht habe, die letztes Wochenende ihre Kommunion gefeiert hat.

Heya there!
Spring is finally here - isn't that wonderful? I hope that the sun and all these lovely blooms have come out by now where you live as well! Spring is also the time for the First Holy Communion of many children and here is a card I made for a lovely young lady who celebrated her first Communion last weekend. 


Sie wollte gerne bunte Farben für ihr Fest haben und daher habe ich mich entschieden das auch mit in die Karte aufzunehmen. Zuerst habe ich das Bild von der Kirche gestempelt, es mit meinem Copic Feinliner erweitert und mit den farbigen Copics koloriert. Bevor ich das Papier auf ein Stück Vellum geklebt und beides dann mit Abstandshaltern auf den gestreiften Kartenhintergrund geklebt habe, habe ich noch den Spruch gestempelt. Das Ganze habe ich noch ein zweites Mal gestempelt und diesmal nur das Dach ausgemalt. Das habe ich ausgeschnitten und mit Foampads auf die Kirche geklebt. Ganz zum Schluss habe ich noch Glossy Accents auf alle Fensterflächen aufgetragen, damit es wie Glas ausschaut.

She had chosen a very colourful scheme for her celebration and so I decided to go with it. I stamped, extended and coloured the image with my Copics and added the sentiment. Then I glued the panel with the image on it on a piece of vellum and put of of those pieces on a lovely colourful striped patterned paper with some foam pads. After that was adhered I stamped the image again, but this time I only coloured the roof, fussy cut both pieces out and put them on top of the first image with some glue dots to give it some dimension. As a last finishing touch I put Glossy Accents on top of all the window panes to give them some shine. 


Material / supplies:
Stempel / stamps: "Kommunion / Konfirmation" von Efco
                            "alles zum Geburtstag" von Mias Stempelküche
Stanzen / dies: "Stitched RoundedRectangle Stackables" von Die-namics

Mittwoch, 15. April 2015

Monochrome Card - Inspiration für die Stempelküche Challenge

Hallöchen zusammen!!!
Heute habe ich meine zweite Karte für die Stempelküche Challenge für euch. Das Thema dieses Mal lautet:

Hello everyone!!!
Today I'd like to show you my second card as guest-designer on the Stempelküche Challenge Blog. This coming fortnight's theme is "monochrome".


Aus irgendeinem Grund hat es ziemlich lange gedauert, bis ich mich entschieden hatte, in welche Richtung mein Beitrag gehen sollte. Am Ende habe ich mich für eine sanfte Farbe ("Fresh Peach" von Hero Arts) auf weißem Hintergrund entschieden.

For some reason it took me quite some time to figure out where I wanted to go with my entry. In the end I decided on a soft colour ("Fresh Peach" by Hero Arts) on a white background.


Ich habe verschiedene Muster in Fresh Peach auf weißes Papier gestempelt und diese mit einer 6-Eck-Stanze von Sizzix ausgeschnitten. Danach habe ich die Teile so auf der Kartenbasis arrangiert, dass möglichst keine gleichen Muster nebeneinander lagen. Den ausgestanzten Schmetterling habe ich mit der gleichen Farbe "abgeschwämmt" und nur den Körper auf die Karte geklebt, damit man die Flügel aufstellen kann. Anschließend habe ich drei Mal den Geburtstaggruß ausgestanzt und aufeinandergeklebt, damit es sich noch mehr vom Hintergrund anheben kann. Zum Schluss bin ich über das "happy birthday" mit meinem Wink of Stella Glitterpen drüber gegangen - jetzt schimmert es richtig schön, wenn man die Karte in der Hand dreht.

I stamped a couple of different patterns in "Fresh Peach" on some white cardstock and cut them out using a hexagon die by Sizzix. I then arranged the pieces on my card base, so that no identical pattern lay next to each other and glued the body of the butterfly down. This way you can still lift up its wings to give the card more dimension. I cut out the "happy birthday" word die three times and glued them on top of each other to give the sentiment a little something more and also added my Wink of Stella Clear Glitterpen over it. Now it has this really nice shimmer when you move the card.


Ich hoffe, ihr habt auch Lust bekommen bei der Challenge mitzumachen und meine Karte konnte euch ein wenig inspirieren. Bin gespannt auf eure Werke ;o)

Hope you are going to play along with us for the "monochrome" Challenge and that my card inspired you a bit. I am looking forward to your creations ;o)


Material / supplies:
Stempel / stamps: "Fine Chevron", "Wood Plank" & "Romantic Script" von My Favorite Things
                            "Tiny Stars Background" von Hero Arts
                            "Handcarved" von Stampin Up

Stanzen / dies: "1 1/2" Hexagons for Paper" von Sizzix
                      "Princess Butterfly" von Poppystamps
                      "Happy Birthday Border" von Lawn Fawn


Dienstag, 14. April 2015

Happy Birthday Pop Up Card & großartige Neuigkeiten / & great news ;o))


Hallo ihr Lieben!
Vielleicht haben es einige von euch ja bereits mitbekommen, dass ich das Team von {PIN}spirational Challenges unterstützen werde. Juhuu ;o))) - ich freue mich schon sehr darauf euch mit meinen Karten inspirieren zu dürfen! Die Challenges dort haben als Inspiration immer ein Bild von Pinterest, das dem Betrachter aber meistens viel Raum für eigene Inspirationen lässt. Die Inspiration für die aktuelle Challenge #138 seht ihr hier:

Hello my dear friends!
Maybe you have already visited the {PIN}spirational Challenge Blog and seen that I will be part of the design team for 2015. Whoohoo ;o))) - I am looking forward to being able to inspire you with my cards! Their challenges always have a picture from Pinterest as a source for your inspiration which you can then use as a starting point for your project: colour, theme, maybe a shape...?! This is the photo for the current challenge #138:


Ich hoffe, ihr habt Lust bei der aktuellen Challenge mitzumachen! Ihr könnt einen 15 Dollar Gutschein für DeeDee's Digi Shop gewinnen ;o) Für mein Projekt habe ich das Thema "Meer" gewählt und für eine liebe, tauchbegeisterte Freundin eine Geburtstagkarte gestaltet:

I hope you are joining us for the current challenge! Our prize is a $15 Gift Code for DeeDee's Digi Shop ;o)  I chose the theme "Sea" for my project and created a birthday card for a dear friend who loves scooba diving:


Passenderweise habe ich auf Pinterest ein Kartenlayout von Kelly Griglione für eine Pop Up - Karte gefunden und es so abgeändert, dass es zu meiner Karte passt. Falls ihr die Karte so oder so ähnlich nachbasteln möchtet, schaut euch doch einfach mal ihren Blogpost an!

I found a layout for a pop-up card on Pinterest from Kelly Griglione which I adapted so that it would fit my needs. In case you'd like to create a card like this I highly recommend having a look at her blog post!


Für die Wellen habe ich mit Hilfe des "Scallop Sentiment Border Punch" von Fiskars eine Art Maske gestaltet, diese auf den Kopf gedreht und dann mit dem Ink-Blending Tool die verschiedenen Blautöne aufgetragen. 

To create the background I used the "Scallop Sentiment Border Punch" by Fiskars, turned it upside down, so that I had the shape of waves. I then started at the top with my lightest blue colour and used the ink blending tool to add my first layer of ink. Afterwards I moved the scallop piece down a bit and added more ink. After three rows of light blue I used a darker blue and repeated the same steps. Lastly I added a third shade of blue to finish my panel. 


Die Motive habe ich mit Memento Tuxedo Black gestempelt und mit Copics angemalt. Anschließend habe ich alle Meeresbewohner ausgeschnitten und aufgeklebt. Zuletzt habe ich die Geburtstagswünsche gestempelt und den Wal nebst Kartenspruch auf den Teil der Karte geklebt, den man auch dann sieht, wenn die Karte zusammengefaltet ist.

I stamped the images in Memento Tuxedo Black and coloured them with my Copics. When they were done I fussy cut them out and glued them to the panel. Lastly I stamped the birthday sentiments and then added the whale and the banner to the part of the card that you can still see when the card is folded flat.


Material / supplies:
Stempel / stamps: "Critters in the Sea" von Lawn Fawn
                           "Surf & Turf" von Paper Smooches
                            "Birthday Messages 3x4" von Simon Says Stamp

Stanze / corner punch: "Scallop Sentiment Border Punch" von Fiskars


Samstag, 11. April 2015

Danke vielmals / Thanks a lot

Hallöchen!!!
Heute wollte ich eine bunte Karte machen und habe deshalb einen meiner neusten Stampin Up Stempel herausgesucht. Es ist ein Stempel mit fünf kleinen unregelmäßigen Punkten und ich bin gefragt worden, wofür man so einen Stempel braucht und was man damit machen kann. In diesem Beispiel habe ich ihn dazu benutzt, um den Hintergrund zu gestalten.

Heya guys!
I felt like creating a very colourful card and so I reached for one of my newest stamps from Stampin Up. It is a stamp with "just" five irregular dots on it and some friends asked me why anyone would need such a stamp and what you could do with it. In this example I used it as a backgroung-building stamp.


Damit der Kartenspruch nicht untergeht habe ich unter das weiße Tag noch ein schwarzes geklebt. Um die Farben der Karte auf dem Tag noch einmal aufzunehmen und die Karte so abzurunden, habe ich das untere "Danke" in den Hintergrundfarben ausgemalt.

I stamped the sentiment three times on a white tag without reinking it, so that the image became gradually lighter and matted it on a black tag, so that it wouldn't get lost on the white card panel. Before I glued it down I coloured the lower sentiment in the five different colours I used for the background.


Material / supplies:
Stempel / stamp: "Wie Du bist" von Stampin Up
Stanze / punch: "Ornate Tag Topper Punch" von Stampin Up
Stanzen / dies: "Mini Hearts Set Craft Die" von Simon Says Stamp

Challenges:

I was inspired by the many colours in this picture.


Montag, 6. April 2015

Gottes Segen

Hallo zusammen!
Heute möchte ich euch ein Karten - Set zur Kommunion oder Konfirmation zeigen. Für die Mauer habe ich "Wet Cement" von Hero Arts benutzt, damit das Stempelbild herausstechen kann.

Hello everybody!
Today I'd like to show you a set of cards designed for giving to children for their Holy Communion or their Confirmation. I used "Wet Cement" by Hero Arts for the colour of the wall to make the main image pop.


Für die erste Karte habe ich das Stempelbild mit einer Maske abgedeckt und anschließend koloriert. Mir gefallen die leuchtenden Farben auf dem schlichten Hintergrund wirklich sehr. 

For the first card I masked off the image for the stencilling and coloured it afterwards. I really like the bright colours against the soft background. 


Bei der zweiten Karte bin ich einen Schritt weitergegangen und habe das Kirchenfenster weggeschnitten und mit Transparentpapier hinterlegt. Darauf hatte ich ebenfalls das Motiv mit Staz On Jet Black Ink gestempelt und dann von hinten (!) mit den Copics angemalt. Andernfalls hätten die alkoholbasierten Copics das Staz On angelöst und das will man ja nicht haben, oder? Hier im Foto kann man es nur erahnen, aber wenn man die Karte in der Hand hält, glänzt das Transparentpapier und der Eindruck, dass die Taube vor dem Fenster herfliegt, verstärkt sich noch.

With the second card I went one step further. I cut away the window pane and glued some vellum with the same image stamped on behind it. Because of the slick surface of vellum I used Staz On Jet Black Ink and coloured the image from the backside. If I had coloured it on the front the Copics, which are alcohol based markers, would have etched away the ink and no one wants that to happen, right? The picture doesn't do the actual card any justice in my opinion. In real life the vellum shines and thus gives the impression of there really being a window pane. 


Ich wünsche euch allen fröhliche Ostern und hoffe, ihr habt eine tolle Zeit mit euren Freunden und eurer Familie!

I wish you all very happy Easter and may you all have a wonderful time with your friends and family!!!


Material / supplies:
Stempel / stamp: "Kirchenfenster mit Taube" von Heindesign
Stanze / die: "Small Stitches Rectangle Stackable" von Lawn Fawn
Schablone / stencil: "Brickwall" MIX-ables Stencils von My Favorite Things


Challenges:


Donnerstag, 2. April 2015

Happy Birthday to you (Window Die Cutting)

Hallo zusammen!
Schön dass ihr hier vorbeischaut! Dieses Mal möchte ich euch gerne die Karte zeigen, die ich für einen meiner allerbesten Freunde gemacht habe, der vor Kurzem der Besitzer einer super süßen, "kleinen" Labradorhündin geworden ist. Natürlich musste ich diesen niedlichen Stempel von Avery Elle benutzen und ihn so wie den Hund meines Freundes anmalen.

Heya everybody!!!
Thanks for stopping by today! This time I'd like to show you the card I made for one of my bestestest friends who recently became the owner of a sweet "little" Labrador. Naturally I had to use this cute stamp from Avery Elle and colour it the same colour as my friend's dog.


Als erstes habe ich die gemusterten Papiere auf die Kartenfront geklebt und den Hund mit der passenden Stanze aus der unteren rechten Ecke ausgestanzt. Anschließend habe ich das Bild durch das Loch durchgestempelt, damit der Hund auch wirklich an der richtigen Stelle war. Das hier sieht man, wenn man die Karte öffnet:

In order to make the card, I started with the front of the card and glued all the pieces - except the panel with the sentiment - down. Then I ran it through my Big Shot with the coordinating die for the dog in the lower right corner. Afterwards I stamped the image through the hole in my card front to have the dog in exactly the right spot. So this is what you see when you open the card:


Jetzt werdet ihr sicher alle denken ich sei verrückt geworden... Könnt ihr das Muster hinter dem Geburtstaggruß sehen? Das habe ich gestempelt. Dazu habe ich diesen winzig kleinen Hundeknochen aus dem Stempelset etliche Male mit einem ganz hellen Grauton gestempelt und anschließend habe ich mit den Copics die Zwischenräume ausgemalt. Glücklicherweise hatte ich haargenau den Farbton den ich brauchte. Es hat eine ganze Weile gedauert, aber ich mag das Ergebnis total gern. Das Muster ist nicht zu grell, als dass es von dem Gruß ablenken würde und rundet die Thematik der Karte super ab, finde ich. 

Now you will all think I got crazy... Can you see the pattern behind the sentiment? Good ;o) I stamped it and coloured around all these itty bitty bones using my copic marker which had exactly the colour I needed. It took me quite some time, but I really like the outcome. The pattern isn't too distracting yet makes the card come together.


Material / supplies:
Stempel / stamps: "Furry Friends" & "Cake & Candles" von Avery Elle
Stanzen / dies: "Furry Friends Die" von Avery Elle
                       "Four Point Frame" von Die-namics


Mittwoch, 1. April 2015

"I love you so mush"

Huhu liebe Bastelfreunde ;o)
Heute darf ich euch endlich meine erste Karte als Gastdesignerin für die Stempelküche-Challenge zeigen.

Heya dear crafty friends ;o)
Today I can finally show you my first card as a guest designer over at the Stempelküche-Challenge.


Das Thema lautet: "DIY-Hintergründe".
The theme of this challenge is "DIY - backgrounds".


Ich war hin- und hergerissen: Sollte ich Wasserfarben nehmen, eine Schablone benutzen, die Distress-Inks rauskramen... Dann hielt ich aber eins meiner momentanen Lieblings-Stempelsets (Gleeful Gardens von Lawn Fawn) in der Hand und dachte: "Warum nicht einen eigenen Hintergrund stempeln, maskieren und kolorieren?!" Das scheint im ersten Moment viel Arbeit zu sein, aber mit Hilfe der passenden Stanzen zu dem Set, war es wirklich halb so wild. (Aber auch, wenn man nur die Stempel hat, kann man den Look hinbekommen. Dafür müsstet ihr euch vielleicht 5 oder 6 Masken selber ausschneiden und euch dann langsam & vorsichtig über den gestempelten Bereich vorarbeiten.)

I had so many different ideas in my mind: watercolouring, stencelling, masking, stamping, using my Distress inks... But then I picked up one of my favourite stamp sets at the moment (Gleeful Gardens by Lawn Fawn) and thought: "Why not create a background by combining stamping, masking and colouring?!" At first it might seem like a lot of work but when you have the coordinating dies with the stamp set, it isn't half as bad to create. (However, even if you do not have the coordinating dies you can achieve the same look. You would have to cut out 5 or 6 masks by hand and then work your way across the stamped panel slowly and carefully.)


Das linke Bild zeigt, wie ich gerade ein paar Pilze ausstanze. Damit es nicht zu lange dauert, habe ich durch 5 Post-its gleichzeitig gestanzt und das funktionierte ohne Probleme. Als nächstes habe ich den kleinen Fliegenpilz viele, viele Male auf ein weißes Blatt gestempelt und die Abdrücke mit den Post-its abgedeckt. Das ging sogar erstaunlich schnell, weil das Papier so dünn ist, dass man die schwarze Tinte darunter prima sehen konnte. Nachdem alles abgedeckt war, habe ich mir das Ink-Blending-Tool sowie mein „Mowed Lawn“ Distress Inkpad geschnappt und mit einer tupfenden statt einer wie sonst üblichen kreisenden Bewegung die Farbe aufgetragen. Dabei hätten sich die Post-it-Pilze sonst anheben und ich mir den ganzen schönen Hintergrund ruinieren können. Nachdem ich überall „Mowed Lawn“ aufgetragen und alle Platzhalterpilze entfernt hatte, habe ich die gestempelten Pilze mit meinen Copics angemalt. Einige von euch wissen ja vielleicht, dass ich noch nicht lange stolze Besitzerin von ein paar Copics bin. Daher versuche ich jede sich mir bietende Gelegenheit zu nutzen mit ihnen zu malen.

In the picture on the left you see me cutting out the little mushroom a couple of times. I used 5 layers of post it paper and the Big Shot cut through it without a problem. Afterwards I stamped the coordinating mushroom lots and lots of times on a white piece of cardstock and covered the images with my little yellow post-it masks. It went fairly quickly. Now it was time to get out the „Mowed Lawn“ Distress Ink and my ink blending tool. I pounced the ink blending tool over the masks rather than swiping it because I was afraid I would lift them up otherwise. After I had applied all the ink I wanted. I took off the masks and coloured in all the little mushrooms. I had so much fun colouring them. Some of you might know that I am rather new to the Copic world and therefore I take every chance I get to use them.


Material / supplies:
Stempel / stamps: "Gleeful Gardens" von Lawn Fawn
Stanzen / dies: "Gleeful Gardens coordinating dies" & "Stitched Rectangles Stackables" von Lawn Fawn
                       "Four Point Frame Dies" von Die-namics
Embossing Folder: "Floral" von Darice


Happy Wednesday everyone and keep crafting ;o)))
Related Posts Plugin for WordPress, Blogger...