Freitag, 16. Dezember 2022

Merry Christmas Penguin (Slim line card)

Hello everyone,
I am a little late in sharing this card for the newest Papercraft Challenge, but I hope you'll forgive me. Right before Christmas it seems to me at least like there are never enough hours in a day - how about you,  do you feel the same? Anyways, here is the card:


The theme of our newest challenge is "Decking the Halls" and this cute critter by Gerda Steiner Designs is doing just that - just not very successfully at the moment. However I bet his little igloo will look very festive once he has finished decorating it. For the card I cut a piece of white cardstock to the right size and used a stencil to create the dot background. Once the ink was completely dry (I let it sit over night) I heat embossed the sentiment right over the dots with Ranger Platinum Embossing Powder. I love that colour. In the picture above it looks silvers, but when you tilt it in the light...


you get a golden look from it. I love it. I coloured the cute digi stamp with Copic markers and cut it out with a tiny white border. I placed it to the side and really like the look of the card! I hope you do, too. Have you ever made a slim line card? 


I hope to see your festive project in our gallery over at Papercraft challenges ;o) Have a great day and happy crafting, everyone!!! Yours Maike


Stamps: "Decorating Penguin" by Gerda Steiner Designs 
              "Merry Christmas" by My Favorite Things (discontinued)
Stencil: tba

Donnerstag, 1. Dezember 2022

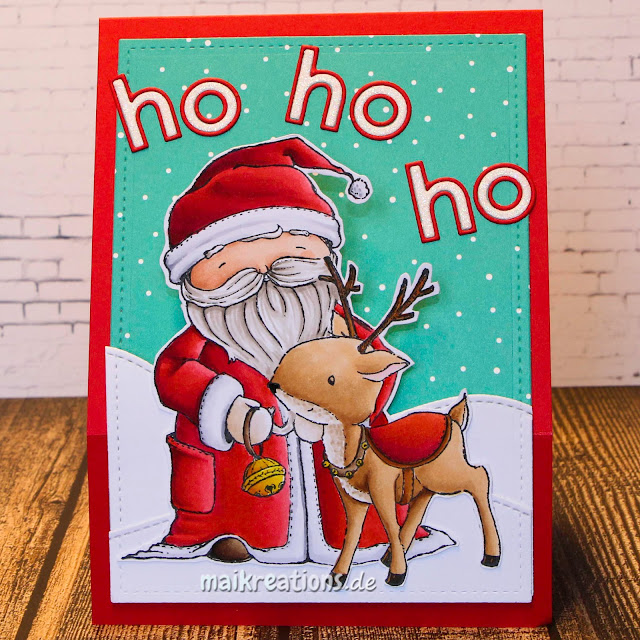
Hohoho Easel Card

Hello my dear crafty friends,
today I'd like to share my DT card for the current challenge at Challenge Up Your Life with you.


This time it is a  color combo:


For this card I stamped the cute reindeer, masked it and then stamped Santa over it. After colouring everything I cut the image out. I die cut the rectangle die from this fun snowy paper by Lawn Fawn and also from white paper which I then die cut two snowy hills from. That way I could have the stitching go around completely. 


Next I glued the snowy background to the cardbase and scored both pieced at once. I also adhered Santa to the snowy hills, making sure no adhesive went higher than the edge of the hill in the back and glued that piece to the bottom part of the snowy background. 


Depending on how you place the card you can either see the background but have Santa be lifted off it visually oder you can just have the hills with Santa on it visible. Really fun to play around with! 
To add a sentiment I die cut the "ho ho ho" from red and glitter cardstock and placed them over Santa`s head. The "real" sentiment was playced inside the card heat embossed on a small die cut which I backed with the same paper that I made the card base from. That way, when you use the sentiment to placethe card behind it, the bottom  part doesn't go all the way to the white paper (if you know what I mean). 
That was my card for today. I hope you are going to join us with a sentiment of your choice, only keeping in mind the beautiful color combo ;o) Have a fabulous day and happy crafting, Maike


Supplies:
Stamps: "Santa" & "Laurel - reindeer" by Purple OnionDesigns
               "Sweet Holiday Penguins" by My Favorite Things 
Dies: "Cool Cuts Cherry Lower Case" by Create A Smile 
          "Small Stitched Rectangle Stackables" & "Stitched Hillside Boarders" by Lawn Fawn

Related Posts Plugin for WordPress, Blogger...